The Airgarden is an Australian-made and Australian-designed aeroponic vertical garden. The sleek design and seamless functionality of the Airgarden is a testament to the meticulous care and dedication put into its development.
With it’s array of features and user-friendly design, it’s one of the most advanced and accessible aeroponic systems on the market, offering effortless cultivation and optimal plant growth.
Designed for outdoor use, it eliminates the need for complex cable covers or additional indoor lighting, making gardening hassle-free.
The primary objective of the Airgarden is to simplify gardening and optimise space utilisation.
In this article, we invite you to join us on our Airgarden journey, as we share the valuable lessons we've learned, the diverse crops we've nurtured, and the challenges we've faced along the way. Our Airgarden test spanned over a 4 month period, and we will update you with our ongoing experiences as time goes by.
More...
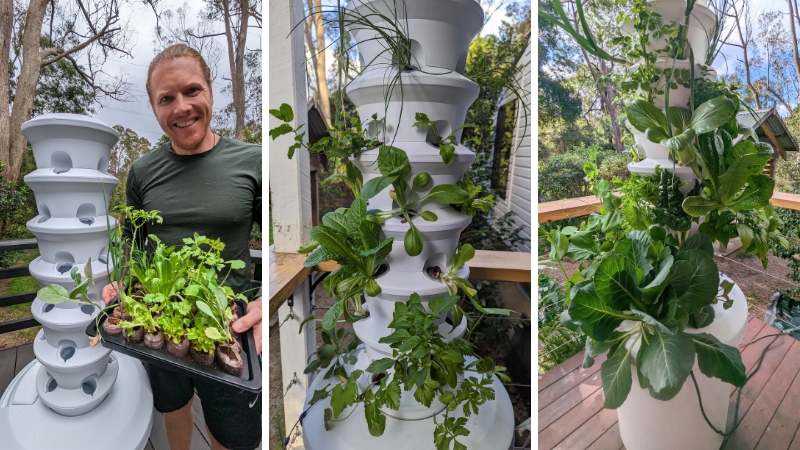
Airgarden plant growth progress over 9 weeks
You can watch our video review of the Airgarden from Nathan Schwartz, or continue reading our written review, which we will periodically update as we keep using the Airgarden.
What is The Airgarden?
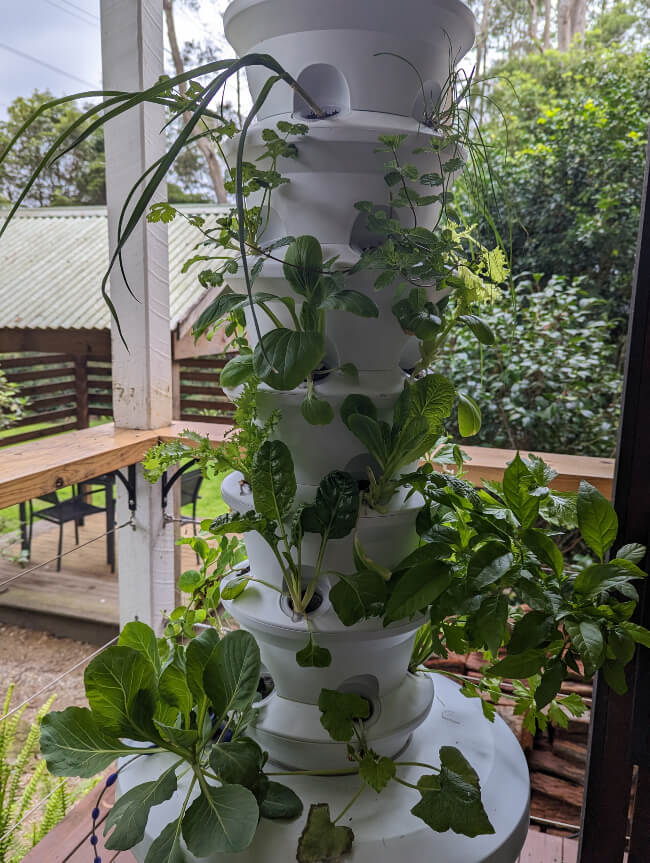
The Airgarden is a straightforward, but perfectly produced vertical aeroponic planter, with a tiered set of planting pockets, designed to grow plants entirely in water.
Starting with a small amount of coconut coir for seedlings to root into, the system is adjustable for different growing stages, and comes with all the advice you need to grow your own veggies at home without any experience required.
On Airgarden's test, it produced over $1000 worth of produce in just six months, which means you’re making back your money on the installation, running costs, and product price in under six months, and will have years worth of fresh produce for free, from then on.
For more info on aeroponics, read our full interview: Airgarden – Nathan with Prue & Tom
How does The Airgarden work?
The Airgarden works by circulating water and nutrients from a base tank, up through the top of the tower and back down. The water and nutrients have a simple indicator gauge so you know when to top it up, and once you’ve set up your seedlings, you just need to check your pH levels in the water and top up the water, which takes 5-10 mins each week or so.
By choosing simple leafy greens, there’s almost no maintenance, and for other crops like tomatoes or peppers, you’ll just need to prune them when they’re at the correct growth stage.
Even the usual risks of damping off, or fungal problems with seedlings are incredibly rare thanks to the simple filters and circulation which help to maintain well-aerated roots that can stay moist without ever being waterlogged.


Get Your Free Guide:
Master Growing Australian Natives eBook
A Must Have Complete Guide for Every Australian Garden
Get Your Free Guide:
Master Growing Australian Natives eBook
A Must Have Complete Guide for Every Australian Garden
All you need is natural sunlight, a well-ventilated open space with good air circulation, and manageable rainfall, and that’s it. It really is that simple.
Difference Between Hydroponics and Aeroponics
Hydroponics traditionally use a reservoir system, or growing medium to retain moisture around the roots. The water and nutrients are pumped around and circulated, but the moisture is typically retained at the roots. This system is useful for growing fruiting plants as well as leafy greens but could be more efficient.
Aeroponics is more complex, keeping a more constant supply of moisture, as well as allowing the roots to hang free and have direct exposure to oxygen and carbon in the air, making for healthier roots and massively reducing the chances of infection, or overwatering-related problems.
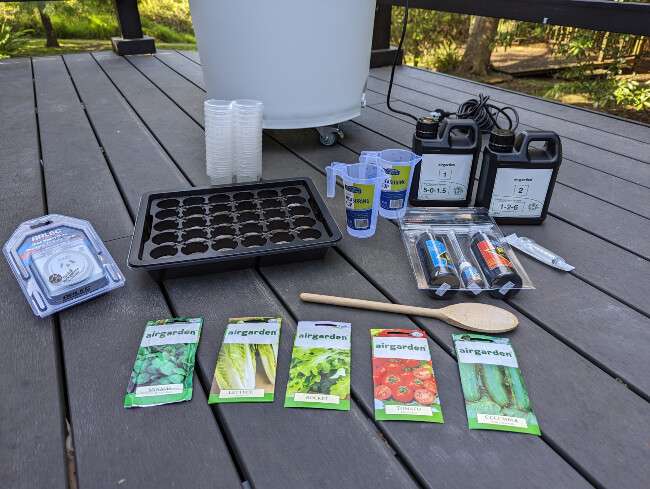
What You Get with Your Airgarden Kit
The Airgarden comes fully supplied with everything you need for your first growing season. For future seasons you’ll need to buy additional nutrients and pH testers, which you can find online from the Airgarden website , or from other suppliers.
At the time that we purchased our Airgarden, we received everything listed below, which meant we could start growing on day one.
How to Setup and Use The Airgarden
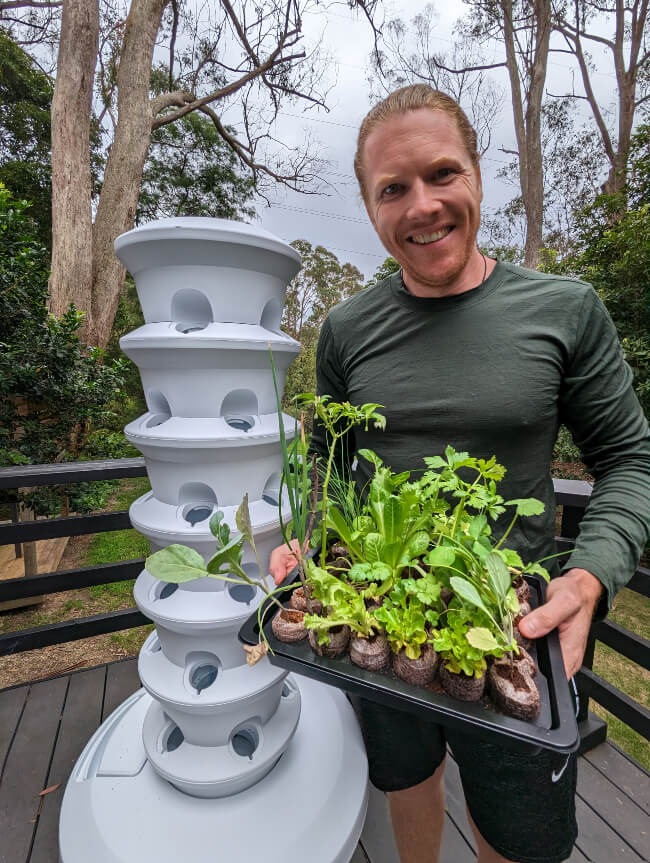
Nathan Schwartz of Aussie Green Thumb setting up an Airgarden Aeroponic Garden Kit
There are two stages to getting to know your Airgarden kit. First, you’ll need to get it set up and installed in the right spot, and then you have to maintain it, top it up, and care for your plants. After a few goes, the whole process will be second nature and only take 5-10 minutes of maintenance per week.
Setting Up The Airgarden
When you unbox your Airgarden kit, start by constructing the basics. Follow the instructions to install the pump and tubing within the reservoir, and set the piping up through the tower planters.
- Before filling the tank, make sure it’s on level ground and the castors are properly secured.
- Find a sunny spot, with a minimum of 4 hours of direct light per day, but 6-8 is better.
- Make sure there is a 1m wide ring around the tower for proper air circulation.
- Get your seeds or seedlings ready for the Airgarden (this can take a few days up to a couple of weeks depending on your climate). Place the seedling or seed into an activated coir disk, and wait until the roots break through the coir. During this time, the seedlings will need occasional water as well as a couple of hours of sunlight per day.
- Fill the tank, and make sure the pump is working when submerged.
- Turn off the pump, add the required nutrients, and leave to settle. Once settled, stir the tank and test pH, adjusting if necessary.
- Then fill each grow cup with a seedling and place into the tower.
- When the plants or seeds are placed in the tower, turn it on and set up the timer.
For full detailed instructions, you can watch our Airgarden video review above, or visit the Airgarden website.
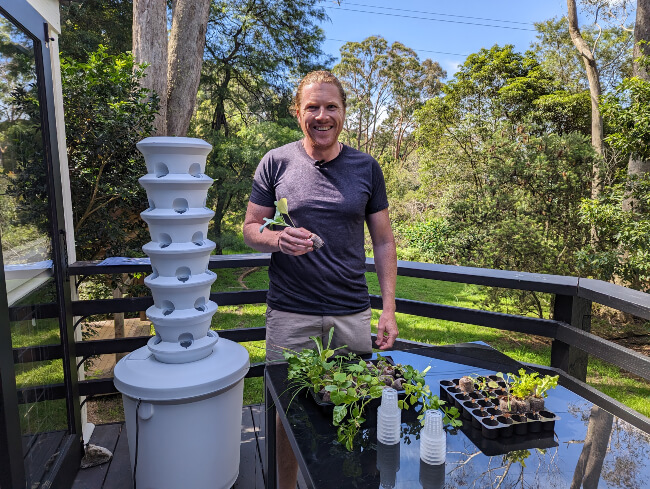
Nathan Schwartz of Aussie Green Thumb ready to set up an Airgarden Aeroponic Garden Kit
Airgarden Maintenance Requirements
Maintenance for the Airgarden is a simple and quick process. Once your plants are in the growing tower, all it takes is a simple 5-10 minutes each week to perform the following tasks:
- Top up the water reservoir as needed, which is usually once every couple of weeks during summer and once a month during winter.
- Top up nutrients approximately every second time that you top up the water.
- Check the pH levels and adjust by using the provided pH testing kit, once per week.
- Check the roots every couple of weeks and trim as needed to prevent root root and to promote new root growth.
- Update your gardening journal.
The Airgarden Setup: Our Experience
The assembly process was straightforward and took us no more than 25 minutes. We loved that it was designed with simplicity in mind, making it easy even for a beginner gardener to set up. Plus, Tom from Airgarden has put together a range of easy to follow video instructions which made the setup even easier.
Don't forget to plan your placement strategically. Access to a power point is crucial as the Airgarden isn't solar-powered.
Our Airgarden comfortably found its home on our front deck, conveniently near a power point. Had the system been on a solar panel, we would have placed the tower on our back deck which receives more sunlight.
There are pros and cons of both solar and mains power, and with the Airgarden operating on power, the placement constraints are a minor trade-off when considering the significant benefits of the system.
Starting with Seeds and Seedlings
We dabbled with both seeds and seedlings for our Airgarden, providing us an all-rounded experience. Despite needing more patience with seeds, they give a hands-on experience of the entire life cycle of a plant, a valuable lesson in patience and care.
When starting with seedlings, you must remove the soil from the roots and ensure you are only placing one seedling in each coco coir pod.
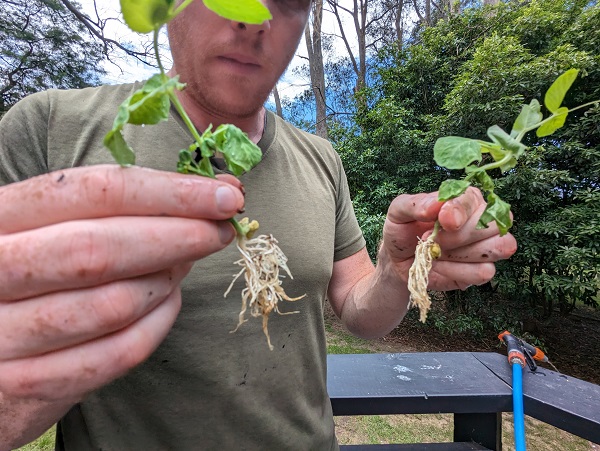
Getting the seedlings ready to go into their coir pods for the Airgarden.
Over a few days, water the seedling periodically, allowing the coir to dry out in between waterings, and ensure they get a couple of hours of sunlight per day. When you can see roots coming out of the coir pods, they are ready to go into the Aurgarden.
Our recommendation is to start with seedlings so that you can start growing in the tower as soon as possible. As the plants develop, before they are at the end of their life cycle, start to plant some seeds into the propagation kit, allowing them a few weeks to develop before they are ready for the Airgarden. By doing this, you will never have empty space in your tower.
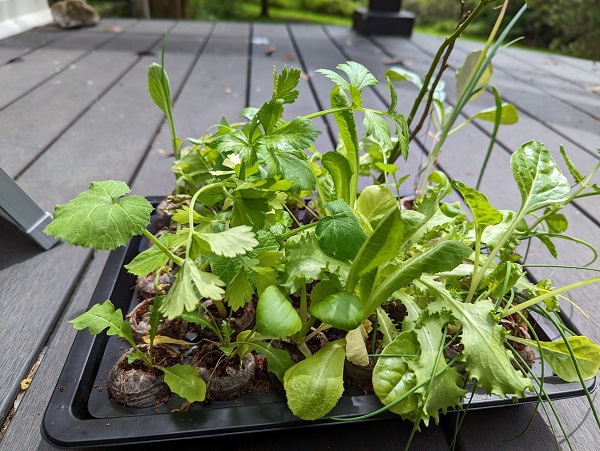
Seedlings in the propagation kit, getting ready to go into the Airgarden.
In our initial enthusiasm, we transplanted some seedlings into the Airgarden pods a bit too early. As their root system wasn't well established, this affected their growth. However, the slight setback taught us the value of patience in gardening. We plan to allow more time for the roots to develop in the future before transplanting.
The seedlings that we did allow the time to develop their roots properly thrived in the Airgarden, which we were thrilled with.
Our Airgarden Plant Selection
Our Airgarden now boasts a beautiful array of winter vegetables, leafy greens and herbs. We're currently growing rocket, spinach, Brussels sprouts, bok choy, snow peas, shallots, leeks, coriander, parsley, and basil among others.
We love the flexibility the Airgarden provides in experimenting with different plant varieties.
We also attempted to grow cucumbers, zucchinis and cabbages. Although you can absolutely grow these plants in the Airgarden, we wouldn't do it again due to their long maturation period and space requirements. For our use, we would rather grow leafy greens that we can continually harvest.
We also grew chillies, and although it was the wrong season we would do it again in summer.
It's essential to select plants that thrive in the Airgarden conditions and that are suited to your eating and lifestyle. Quick-growing and frequently used greens like spinach and lettuce are perfect choices, offering a steady supply of fresh produce.
Although we've learned it's best to prioritise plants with quicker yields, we remain committed to our plant experimentation. Gardening is as much about the process as it is about the harvest.
Airgarden provides a handy list of all the plants they recommend for the growing tower, so take your time to go through their suggestions and match them up with your preferences and the season.
The Importance of a Garden Journal
Keeping a garden journal has proven invaluable, for general gardening as well as for the Airgarden.
This journal helps us keep track of things like nutrient top-ups, pH levels, and planting dates. Spending around 5 minutes each week updating this journal can significantly improve your gardening experience.
Over time, your journal becomes a rich resource filled with your gardening patterns, trends, and insights. This historical record can guide your future gardening decisions, helping you optimise your plants' growth and health.
Garden Pests and Root Care
Our journey hasn't been without its challenges. We've dealt with aphids and caterpillars, both common garden pests, as well as powdery mildew on our zucchini. Thankfully, the white frame of the Airgarden allows easy detection of pests, facilitating quick and effective pest control.
Additionally, we've learned that regular root maintenance is vital. Trimming the roots of your plants approximately once every two weeks can encourage new growth and prevent root rot. Regular maintenance becomes even more critical during warmer weather when plants are in their peak growth phase.
Thankfully, the maintenance for pests and root care with the Airgarden is a quick and easy process.
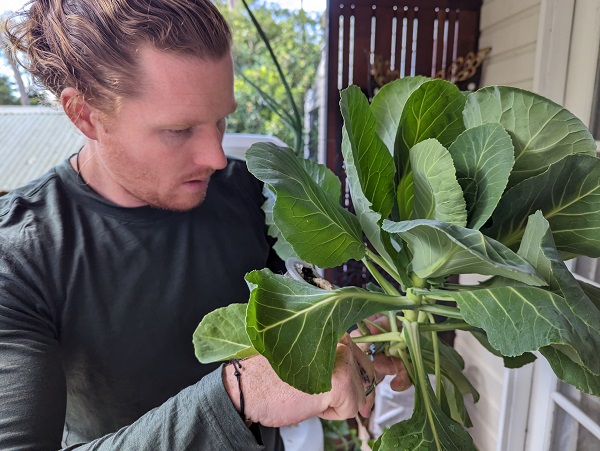
Nathan Schwartz from Aussie Green Thumb inspecting and trimming the cabbage roots as part of the Airgarden maintenance.
Harvesting from the Airgarden
One of the most satisfying experiences of having an Airgarden is the continual harvest it provides.
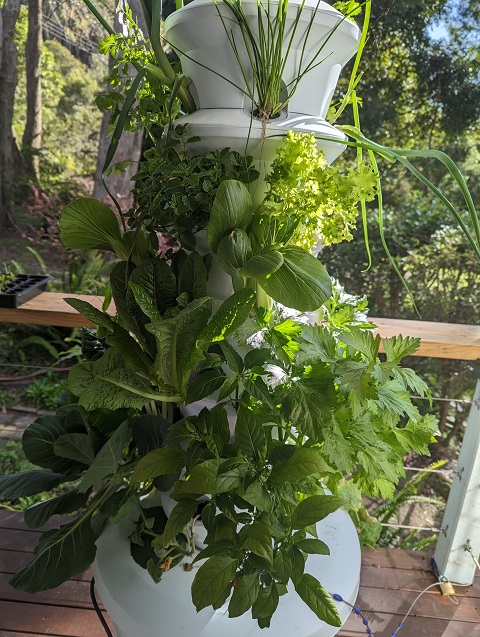
Airgarden plant growth progress after 3 months.
From whipping up a quick salad with freshly picked rocket, spinach, kale, and other leafy greens to incorporating aromatic herbs like basil, mint, and coriander into your culinary creations, the Airgarden offers a bountiful supply of homegrown goodness.
As your plants mature and reach their harvest stage, you can start plucking the ripe leaves or trimming the outer foliage, allowing the inner leaves to continue growing. This method, known as "cut and come again," ensures a steady supply of fresh greens throughout the growing season. Simply snip off what you need, and the plants will continue to regenerate, providing you with a continuous harvest.
When it comes to harvesting, timing is key. Each plant has its own growth cycle and ideal harvest time. Leafy greens are typically ready for harvest within a few weeks of planting, while herbs may take a bit longer to mature.
Keeping track of the growth progress and consulting plant care instructions will help you determine when it's time to harvest.
Harvesting from the Airgarden not only guarantees the freshest, most flavourful produce for your meals but also allows you to fully enjoy the rewards of your gardening efforts.
Airgarden Frequently Asked Questions
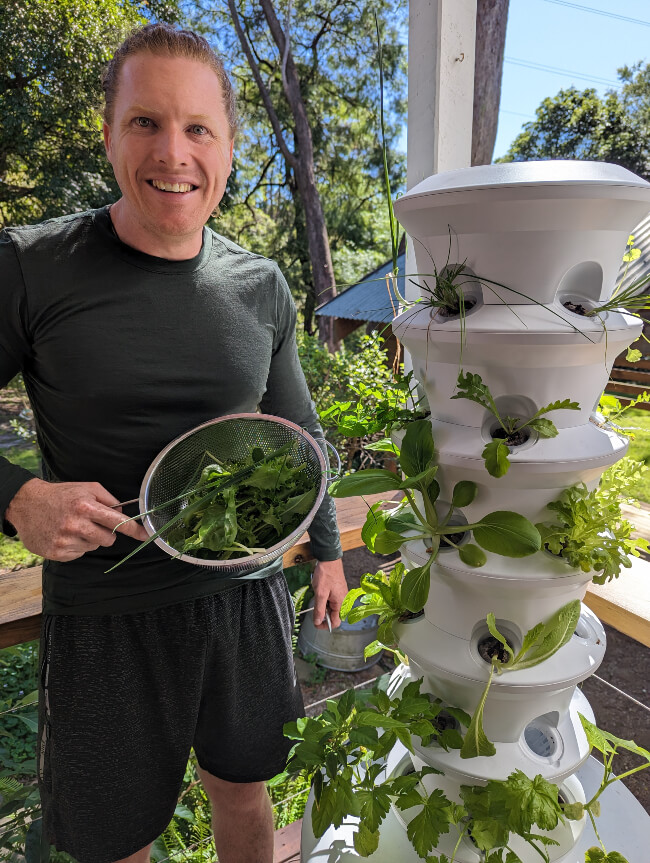
Nathan with some fresh harvest from his Airgarden
What is The Airgarden good for?
The Airgarden is an incredible tool for growing as much as possible in as little space as possible, by using aeroponic watering and nutrient circulation it grows fruit and vegetables three times faster than traditional methods, and uses less water in the process. Plus, once your plants are in the Airgarden, it takes very little time to maintain, which is great for those who love to garden but don't have the time.
What are the disadvantages of aeroponics?
Aeroponics has two significant disadvantages over traditional gardening; purchase cost and running cost. While the running cost is generally offset by the water savings costs, the initial cost of setting up or buying a ready-made aeroponic system is higher than traditional raised bed gardening.
How much does an aeroponic system cost?
While you can build a basic aeroponic garden for about $100-$150, a standard spend of about $1000-$2000 should be expected for ready-made kits, but the Airgarden is more affordable at around $800, are better quality than many higher-priced kits, and work much better than homemade systems.
Enjoy the Benefits of The Airgarden Today
Our trial run of The Airgarden has been pretty outstanding, with great results, especially on leafy veggies, with coriander being the biggest success so far in our opinion. But, perhaps what I love most about it is the amount of space it saves.
I’m growing 30 plants in a 1m2 unit. OK, so it needs 1m of air circulation around it, but you’re saving about 5m2 of raised bed or garden rowing space, meaning more space for you to enjoy.
As you can probably tell, I’m pretty enamoured with this clever aeroponic grow kit, and I’m excited to expand our collection. Hopefully you are too, because you’ll be seriously impressed with what you can grow with the Airgarden vertical tower kit.
Published on July 27, 2025 by Nathan Schwartz
Last Updated on July 30, 2025


