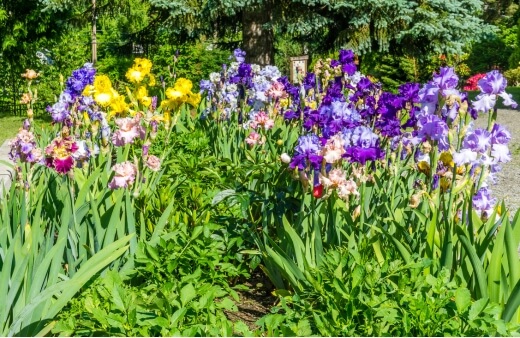
There are few better indications of early summer than the fleeting beauty of irises. Whether you’re growing highly ornamental bearded irises or damp-loving flag irises, there are irises to suit all settings and most are incredibly easy to grow once you’ve got the initial conditions just right.
Our guide shares decades of experience growing these gorgeous perennials and boils it down into simple-to-follow instructions for sowing, growing, and caring for irises in your Australian garden.
More...
Family: | Iridaceae |
|---|---|
Genus: | Iris |
Species: | Various |
Origin: | Over 300 species with origins all over the Northern hemisphere |
Common Names: | Iris |
Location: | Outdoor |
Type: | Perennial |
Growth: | 0.5-1.5m tall, clump-forming |
Sun requirements: | Full sun |
Foliage Colour: | Green |
Flower Colour: | Various |
Flowering: | Summer |
Fruit: | None |
Maintenance level: | Low |
Poisonous for pets: |
Getting to Know Irises
Iris is a wide-ranging genus of flowering plants, containing over 300 species, which can (mostly) be grouped into about twenty sections. There are, however, just two groups that truly matter; bulbous irises and rhizomatous irises.
Bulbous irises grow from large bulbs that grow below ground and divide just like tulips and daffodils, as well as heavy natural seed production.
Rhizomatous irises produce huge soft-shelled seeds, which self-seed easily on loose, moist soil, and also grow from rhizomes. Rhizomes are thick underground roots, which store energy in a similar way to bulbs, but divide along their length by sprouting from nodes.
In cooler climates, rhizomatous irises like to be planted close to the surface where they can be baked by summer sun, but in most parts of Australia, they benefit from being planted about 5cm deep where they get the heat of the summer sun, without direct and dehydrating heat during flowering.
Natural Habitat of Irises
Irises are widespread in nature, but almost all species have their origins in warmer parts of the Northern Hemisphere – particularly southern Europe, North America, and Asia.
However, there are situation-specific Irises which thrive in cooler climates, on lake-sides, and chilly mountainous regions, while others will only grow in dry meadows.
Popular Irises Varieties
There are about twenty easily recognisable groups of Irises, which can help to categorise the 310 species, but of those we grow in gardens and are useful in terms of horticulture, the ten below are both the most common and most useful for our gardens here in Australia.
1. Bearded IrisBearded iris, as you might have guessed, are named to represent their three drooping beards, which droop down alternately with three upright petals. The colouring of bearded irises varies wildly, and the texture of petals and height of each plant is each different. They are useful for any heavily enriched bed or border and which will appreciate having the rhizomes planted just below the surface, where summer temperatures trigger bold flowering for several weeks. | 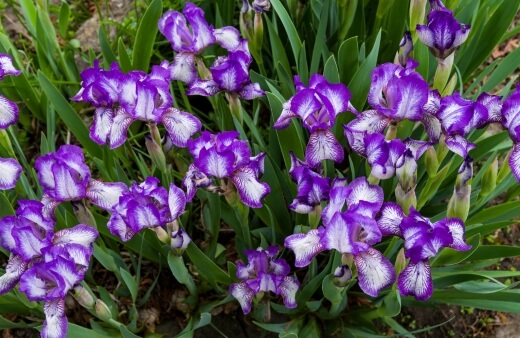 |
2. Siberian IrisIris sibirica, or Siberian iris, is another rhizomatous iris with dramatic flowers at the tip of each stem, with clear patterning to attract pollinators into the flower’s centre from every angle. They share the same drooping petals as bearded irises, but are distinctly tighter in form. The root systems of Siberian irises are more fibrous, and while they do technically grow from rhizomes, can be harder to divide due to the less obvious nature of the roots. | 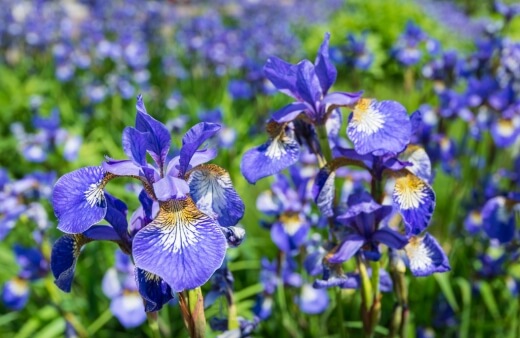 |
3. Iris reticulataIris reticulata is a bulbous iris, with distinct garlic clove-shaped bulbs, which are eventually surrounded by a dense mat of fibrous roots. Each stem has three even flowers at the top, producing a similar look to the bearded iris, but on much shorter stems, and with finer petals. Iris reticulata is ideal for pots or border fronts, where it helps to mark the start of summer. | 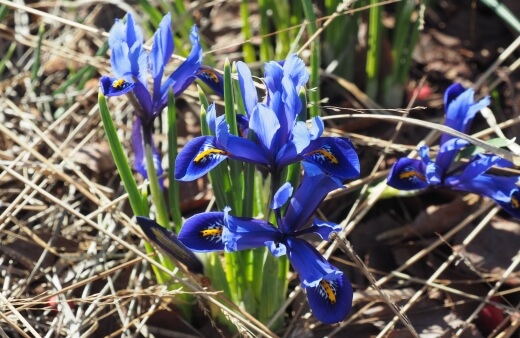 |
4. Dutch IrisDutch Irises are manmade iris hybrids, with striking colouring often in quite matte colours. Their dramatic fleur-de-lis form makes for very, very simple style in any garden, and their bulbs are simple to plant without needing to worry too much about overly warm summers. | 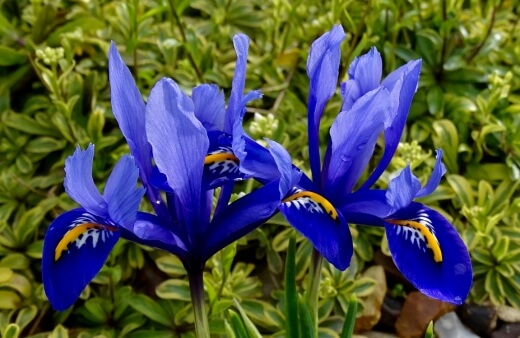 |
5. Flag IrisAlso called the yellow flag iris, or water flag iris, these irises are ideal for lining the edges of ponds. They are widely spread in nature to any damp setting in the northern hemisphere, where they can cope with frosts as well as drought. The downside to yellow flag irises is that they will spread and take over ponds after a few years, but they are simple to pull out, and their rhizomes can be cut through with kitchen knives or snapped off for replanting elsewhere. | 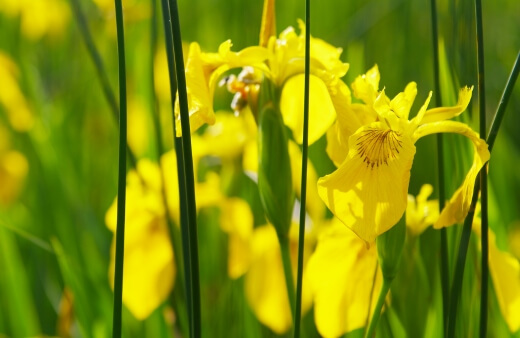 |
6. Japanese IrisThe smooth iris, or Iris laevigata, is a beautiful cottage garden plant, more recognisable in swathes than as single plants, so perfect for borders. It is perhaps the most recognisable of Japanese Irises, with multiple flowers on each stem, creating successions of flowers, and thus creating a longer flowering season. | 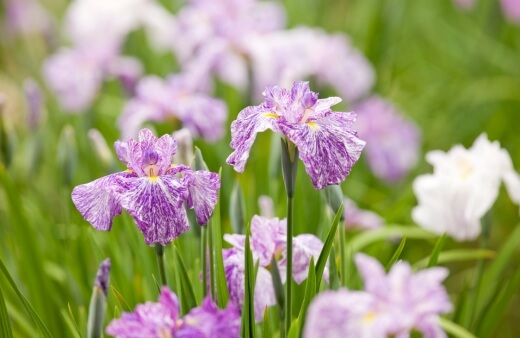 |
7. Sweet IrisSweet iris is a softly coloured iris that grows reliably from rhizomes in Australian gardens but is native to the Dalmatian coast (hence its other name, the Dalmatian iris). Its variegated leaves last well past the flowering period each year, offering structural forms at the back of borders to help set off seeded annuals. | 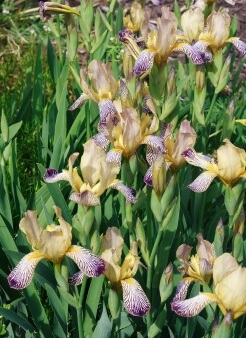 |
8. Crested IrisCrested irises are perhaps the most underrated or unrecognisable of all irises. Their delicate petals nearly all face outwards, with ornate patterns across each beard. Like most irises, they grow from rhizomes, but are more commonly dwarf forms, making them ideal for ornamental pots where they can be appreciated up close. | 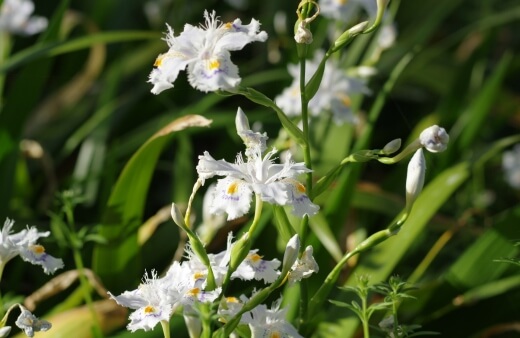 |
9. Himalayan IrisHimalayan irises are great for dry gardens, where drainage is fast, but plenty of water is an option. Their flowers are similar to flag irises, but they grow from largely fleshy root systems, which function like rhizomes but with slightly less structure. | 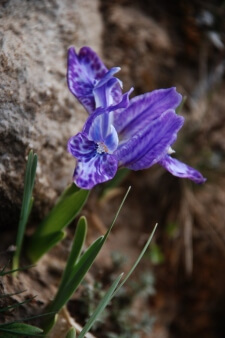 |
10. Wall IrisThere are a few different colours of wall iris, but it is the gentle lavender tones of Iris tectorum that are most recognisable. Its roots are in China and Burma, where it grows in a wide range of conditions, from forest edges to damp meadows, lakesides, or even dry banks. | 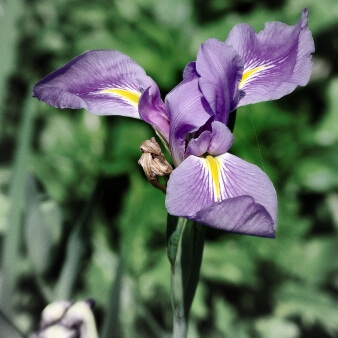 |
1. Bearded Iris

Bearded iris, as you might have guessed, are named to represent their three drooping beards, which droop down alternately with three upright petals. The colouring of bearded irises varies wildly, and the texture of petals and height of each plant is each different.
They are useful for any heavily enriched bed or border and which will appreciate having the rhizomes planted just below the surface, where summer temperatures trigger bold flowering for several weeks.
2. Siberian Iris

Iris sibirica, or Siberian iris, is another rhizomatous iris with dramatic flowers at the tip of each stem, with clear patterning to attract pollinators into the flower’s centre from every angle. They share the same drooping petals as bearded irises, but are distinctly tighter in form.
The root systems of Siberian irises are more fibrous, and while they do technically grow from rhizomes, can be harder to divide due to the less obvious nature of the roots.
3. Iris reticulata

Iris reticulata is a bulbous iris, with distinct garlic clove-shaped bulbs, which are eventually surrounded by a dense mat of fibrous roots. Each stem has three even flowers at the top, producing a similar look to the bearded iris, but on much shorter stems, and with finer petals.


Get Your Free Guide:
Master Growing Australian Natives eBook
A Must Have Complete Guide for Every Australian Garden
Get Your Free Guide:
Master Growing Australian Natives eBook
A Must Have Complete Guide for Every Australian Garden
Iris reticulata is ideal for pots or border fronts, where it helps to mark the start of summer.
4. Dutch Iris

Dutch Irises are manmade iris hybrids, with striking colouring often in quite matte colours. Their dramatic fleur-de-lis form makes for very, very simple style in any garden, and their bulbs are simple to plant without needing to worry too much about overly warm summers.
5. Flag Iris

Also called the yellow flag iris, or water flag iris, these irises are ideal for lining the edges of ponds. They are widely spread in nature to any damp setting in the northern hemisphere, where they can cope with frosts as well as drought.
The downside to yellow flag irises is that they will spread and take over ponds after a few years, but they are simple to pull out, and their rhizomes can be cut through with kitchen knives or snapped off for replanting elsewhere.
6. Japanese Iris

The smooth iris, or Iris laevigata, is a beautiful cottage garden plant, more recognisable in swathes than as single plants, so perfect for borders. It is perhaps the most recognisable of Japanese Irises, with multiple flowers on each stem, creating successions of flowers, and thus creating a longer flowering season.
7. Sweet Iris

Sweet iris is a softly coloured iris that grows reliably from rhizomes in Australian gardens but is native to the Dalmatian coast (hence its other name, the Dalmatian iris). Its variegated leaves last well past the flowering period each year, offering structural forms at the back of borders to help set off seeded annuals.
8. Crested Iris

Crested irises are perhaps the most underrated or unrecognisable of all irises. Their delicate petals nearly all face outwards, with ornate patterns across each beard. Like most irises, they grow from rhizomes, but are more commonly dwarf forms, making them ideal for ornamental pots where they can be appreciated up close.
9. Himalayan Iris

Himalayan irises are great for dry gardens, where drainage is fast, but plenty of water is an option. Their flowers are similar to flag irises, but they grow from largely fleshy root systems, which function like rhizomes but with slightly less structure.
10. Wall Iris

There are a few different colours of wall iris, but it is the gentle lavender tones of Iris tectorum that are most recognisable. Its roots are in China and Burma, where it grows in a wide range of conditions, from forest edges to damp meadows, lakesides, or even dry banks.
Growing Irises in Australia
Best Condition for Planting Irises
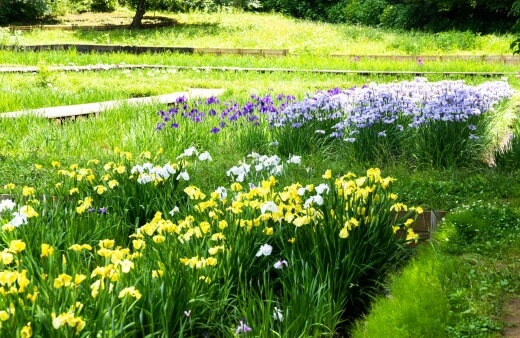
The three basic rules for growing irises well in Australia are; full sun, good drainage, and plenty of organic matter.
If you can provide your irises with that from day one, they will thrive for years to come, and only need your help through very bad droughts, and when they start to outgrow their space as, like any rhizomatous or bulbous perennial they do eventually form into rings, with hollow centres as the old rhizomes stop producing and are replaced by new roots on their outskirts.
Soil & drainage
Other than flag irises (which can be planted partially submerged) the general rule for planting irises is to find somewhere with good drainage and to add plenty of organic matter to the soil before planting.
Make sure the bulbs or rhizomes are near the surface of the soil, or at the same level they are in the pot for potted irises. The closer to the surface your rhizomes are, the warmer they will get in summer.
This will support good growth, but in very warm parts of Australia, they will benefit from a light mulch to protect roots from direct summer sun.
Light
Irises should always be planted in full sun. They will not cope with shade unless it is very partial shade from deciduous trees or shrubs. As a bare minimum, irises need 6 hours of sun per day, and 8 hours per day in summer.
How to Propagate Irises
Bulbous irises will reproduce at their bulb, but growing your own from seed is relatively straightforward, and if you only grow one type of iris, cross-pollination is fairly unlikely so you will still get seeds that are true to the parent plant.
For rhizomatous irises, growing from cuttings is the best way to propagate perfect replicas of parent plants as they are common garden plants and neighbours’ plants can cross-pollinate, making seeds slightly different from their parents.

Propagating Irises from Seeds
To propagate irises from seed, you need to leave the flowers in place when they fade, and you will be rewarded by seed heads packed full of seeds, which if left unchecked, will burst out on a warm summer day to spread around your border.
On moist soil, you don’t need to do any work as they will grow naturally where they land. On dry soil, it’s worth placing a bag over the seed head when it starts to swell and securing it with twine or elastic.
When the seed head bursts, the bag will fill with seeds that can be sown onto moist compost either immediately or the following spring. Germination is rapid when they make contact with moist soil, so sow just what you need, and pot them on as they get large enough to handle.
When roots poke out of the base of a small pot, each plant is ready to plant into the garden, but this is best left until spring when they are actively growing.
Propagating Irises from Root Cuttings and Division
By far the easiest way to propagate any iris is by division. Simply drive your spade into the ground between the bases of plants and dig up as large a section as you can handle. Cut back all the top growth to reduce stress on the divided clump and plant as quickly as possible into enriched soil elsewhere in the garden.
For a gentler method, you can literally just snap off a few inches of rhizome from most types of iris and replant that into a pot of moist organic compost in early spring. It will root quickly and flower reliably that summer.
Caring for Irises
Irises are simple plants to care for, but you do need to know how and when to do it. Follow the guide below to understand what to do with mature or established irises, particularly if they’ve stopped looking their best.
Mulching & Feeding
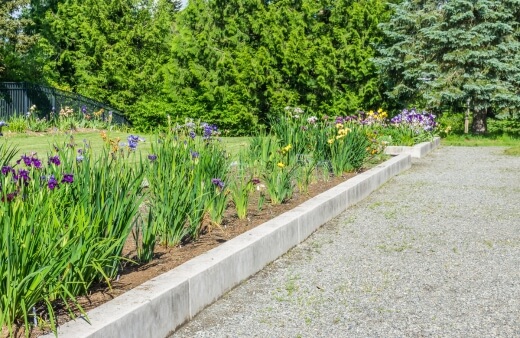
Irises don’t really need much food. They feed themselves from sunlight and heave chlorophyll production that feeds back into their rhizomes when the leaves die back. Mulching with organic matter (2-3cm of mulch is sufficient) every two years will boost the base nutrients in their soil.
Watering Irises
Irises shouldn’t be watered unless they are wilting. The most common problem for irises is overwatering, which can cause all sorts of fungal problems, so aim to let their rhizomes bake, and water only in a prolonged drought.
When to Cut Back and Divide Irises
Irises should be cut back in autumn when all flowering has finished. If you don’t want them to spread by seed, remove spent flower heads too. Some varieties have very ornate foliage, which can add autumn and winter interest to your borders, but it's still worth cutting these back to a few inches above ground level ahead of winter.
Either after flowering in autumn, or before flowering in spring, you should divide irises to encourage new roots and new plants as a result. While irises will continue to flower without dividing, they will develop hollow patches in the middle of clumps, which can be avoided by dividing.
Iris Pests and Diseases
Irises have many common pests and several fungal diseases that affect them. Pests include beetles, caterpillars, and slugs, which cause some problems, but rarely damage overall plant health.
Aphids and spider mites carry fungal infections that can cause lasting damage to irises. If you notice any fungal problem (rust, leaf spot or bulb/rhizome rot are most common) remove the affected area.
For bulb or rhizome rot, dig up the area around that clump and dispose of it entirely. For leaf infections, typically signified by black spots, yellow spots, or rusty coatings, cut away any affected leaf, and any leaves in direct contact with it to prevent the spread of disease.
Irises Frequently Asked Questions
What month is best to plant irises?
Plant Irises in January or February, or as late as March in warmer regions. They are best planted where they are to grow so they can establish through winter and flower in spring or summer depending on your climate.
What to do with irises after they bloom?
After flowering, it's best to split each clump of irises to prevent hollow sections in the centres of clumps, and to reinvigorate clusters for better flowering the following year.
Do irises come back every year?
Irises are hardy perennial plants that come back every year in almost all parts of Australia. Other than flag irises, most varieties like to be kept dry over winter.
Do irises spread quickly?
Irises can spread rapidly in good conditions, but they are easy to manage, and their spreading habit is generally considered useful for most gardens, where they quickly fill out empty spaces and can be moved into other spots to create generous rhythms of planting through borders.
How do I get my irises to bloom more than once?
If you can keep iris rhizomes and bulbs warm through autumn they will flower more prolifically in spring and summer. Mulching over winter can also help to boost flowering, but most varieties are limited to a single flush of flower each year even when deadheaded.
Do Iris bulbs multiply every year?
Bulbous iris multiply similarly to rhizomatous irises, and will multiply each year. Dividing clumps of iris is essential to retain the form of your iris patch and to encourage reliable blooms.
How do I protect my iris in the winter?
If your area is susceptible to cold wet winters, choose a well-drained spot to protect your irises from winter damp. Cut back any top growth before winter to prevent frost damage.
What happens if you don’t cut back irises?
Irises can suffer from various blights and fungal infections, though flag irises are particularly resilient against these problems. Cutting irises back hard at the end of summer or in autumn will help to prevent the spread of these fungal problems.
Wrapping Up Our Irises Growing Guide
Whatever type of iris you choose to grow, it’s important to get your preparation just right. While irises can be picky about where they grow, once they are happy there is very little ongoing work to do.
Simply divide clumps when they get carried away, and cut them back ahead of any cold wet winter weather. If you get that right, you can easily grow glorious and colourful irises of any variety in your garden at home in Australia.
Published on April 7, 2023 by Maisie Blevins
Last Updated on February 23, 2025


