Low maintenance, and a boon for butterflies? Sounds too good to be true right? Well, Sedum ‘Autumn Joy’ is exactly that, offering nectar at a time when it’s scarce, and packing a serious punch of wonderfully structural flowers too.
If you want to attract butterflies to the garden without big, brash buddleias, or scruffy hibernation sites, follow our guide to growing this spectacular sedum, which will keep your garden bright into autumn, and looking joyful in summer.
More...
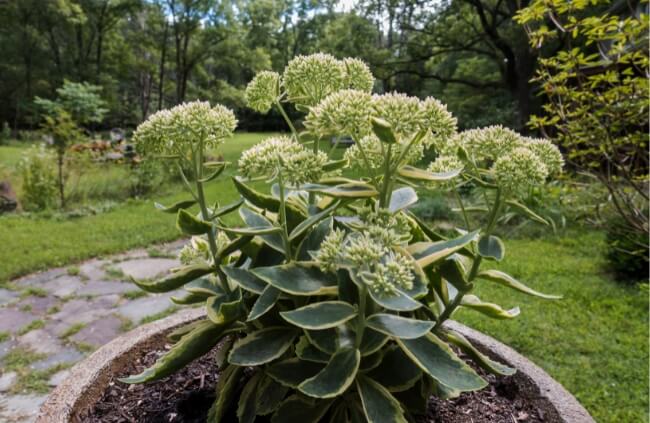
Family: | Crassulaceae |
|---|---|
Genus: | Hylotelephium (formerly Sedum spectabile) |
Species: | H. spectabile |
Common Names: | Sedum ‘Autumn Joy’, Iceplant, Butterfly Stonecrop |
Origin: | China and Korea |
Location: | Outdoor |
Type: | Herbaceous perennial |
Growth: | 50 cm tall, spreads to 1 m |
Sun requirements: | Full sun to light shade |
Foliage Colour: | Green |
Flower Colour: | Pink |
Flowering: | Autumn and early winter |
Edible Parts: | None |
Maintenance level: | Low |
Poisonous for pets: | Non-toxic to cats and dogs |
What is Sedum ‘Autumn Joy’?
Sedum ‘Autumn Joy’ is one of the most popular garden sedums. While many sedums are planted for their trailing habits, this succulent herbaceous perennial is a little different.
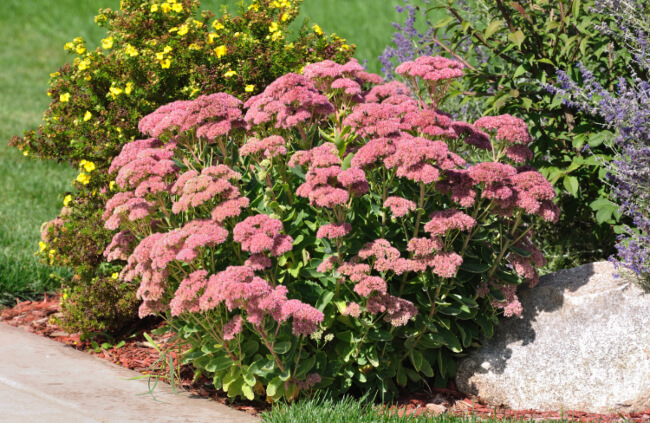
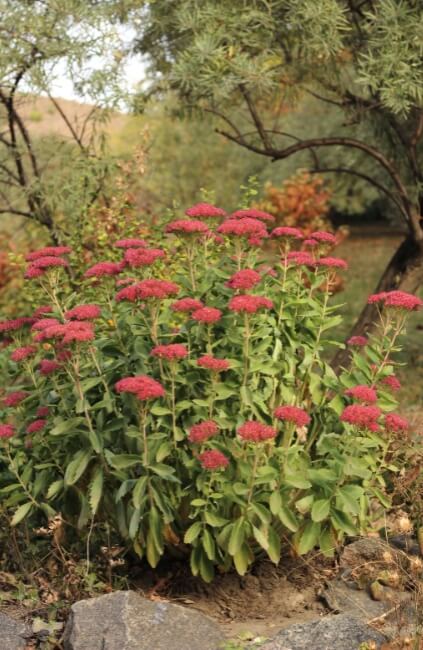
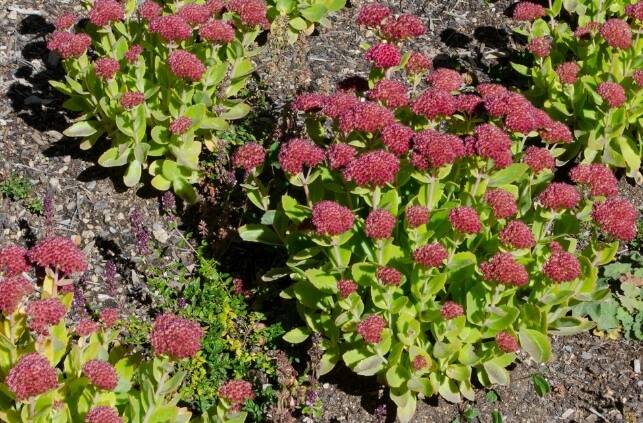
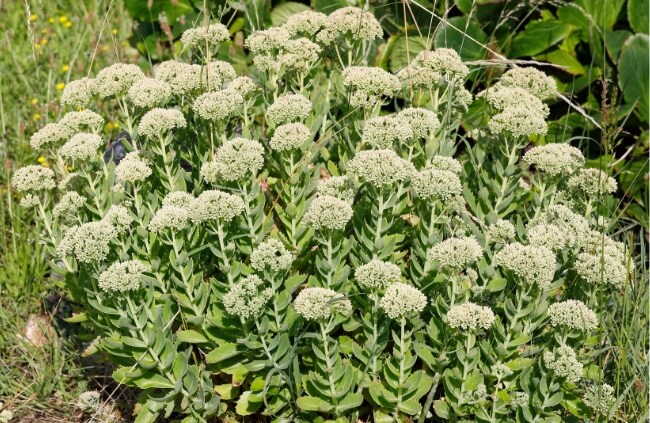
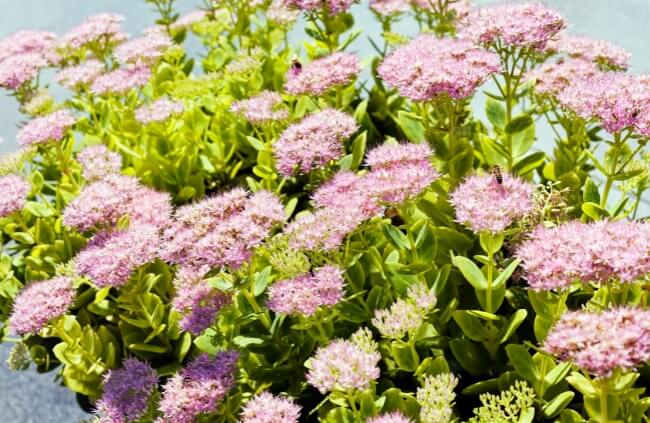
Sedum ‘Autumn Joy’ is an upright sedum, growing to about 50 cm tall in most conditions, with a spread of 60 cm-1 m. Its flowers create dense plates of burnt pink petals. When it’s in full bloom, each plant can have dozens of flower clusters out at once, creating gorgeous, rhythmic, hillocks of colour.
Technically, Sedum spectabile isn’t a sedum at all. It was reclassified as Hylotelephium spectabile a few years ago – though that is still within the sedum family. However, as with renaming anything, its popular name is hard to shake, so you’re much more likely to see Sedum ‘Autumn Joy’ on plant labels.
Hylotelephium ‘Autumn Joy’ Natural Habitat
Sedum ‘Autumn Joy’ is a cultivar of Sedum spectabile, which is native to China and parts of Korea. The species grows most prolifically on rocky cliffs (making them perfect for rockeries) and valley slopes, either out in the open or at woodland edges, where it can cope with surprisingly damp conditions.
In gardens, we can translate that habitat into a simple mix of direct sun, good drainage, and even irrigation. Thankfully, Sedum ‘Autumn Joy’ is fairly resilient. Provided it doesn’t ever sit in soggy soil with standing water, it will generally do well, but there are a few simple ways to make sure you get the most out of it.
How to Grow Sedum ‘Autumn Joy’
Growing Sedum ‘Autumn Joy’ is pretty simple. Don’t over water, give it plenty of light, and leave it be. Every few years you’ll need to divide or reduce the size of the plant to get the most out of it, but generally speaking, they are very low-maintenance plants.
Ideal Conditions for Planting Sedum ‘Autumn Joy’
Soil & Drainage
Sedums want as much drainage as you can give them, but with good nutrition compost too. They don’t like being overfed, but require some general feeding once a year to maintain vigour. We typically dig in a few big handfuls of grit and mix it through the topsoil with equal parts of compost.
What we plant is basically equal parts grit, topsoil and compost. If you’re gardening on sand, use less grit and more compost as a soil improver, but in most garden conditions, try to create a planting space that feels loose but with organic compost or leaf mould ready to soak up whatever water it can.
Light requirements for Sedum ‘Autumn Joy’
Today, I use Sedum ‘Autumn Joy’ in nearly every planting scheme. It’s easy to propagate and adds rhythms to fading borders at just the right time. But the first time I planted Sedum ‘Autumn Joy’ was a complete disaster.
Part-shade in nearly every part of the garden meant it was always going to be challenging, but we planted it somewhere with good reflected light and excellent drainage. What we ended up with was a version of ‘Autumn Joy’ that flopped over constantly, with rapidly developing hollows in the centre of the plant.
It flowered fine, but at ground level. The lesson? Full sun is always going to produce better flowers, healthier plants, and green foliage when it comes to Sedums.
Growing Sedum ‘Autumn Joy’ in pots
It’s pretty simple to grow Sedum ‘Autumn Joy’ in pots, but definitely, definitely, make sure it’s growing in full sun to encourage healthy upright growth.


Get Your Free Guide:
Master Growing Australian Natives eBook
A Must Have Complete Guide for Every Australian Garden
Get Your Free Guide:
Master Growing Australian Natives eBook
A Must Have Complete Guide for Every Australian Garden
Remember too, that Sedum ‘Autumn Joy’ will spread, so choose a pot that it can grow into. In a good year, the root ball of a young sedum can easily fill its pot, and 90% of young plants you buy will be quite tightly rooted into their containers.
Fill your container with a layer of crocks at the base, and a good gritty compost mix. Tease the roots away from their soil before planting, and leave an inch or two at the top of the pot for watering. Don’t firm it in, just water it generously and let the root ball settle into the soil, then place it somewhere sunny to do its thing.
How to Propagate Sedum ‘Autumn Joy’
Sedums are really simple to propagate, but they are popular garden plants, and there are various cultivars of Sedum spectabile, so cross-pollination is likely if you try to save seeds, meaning it’s unlikely you’ll get a true-to-form plant that way.
However, it’s relatively easy to propagate from shop-bought seeds, and really simple to propagate from division and cuttings. Here’s how:
Propagating Sedum ‘Autumn Joy’ from Seeds
Sedum ‘Autumn Joy’ can be sown at any time of year, but will germinate when temperatures reach a constant above 10°C, so it’s best to sow in spring for faster germination and more reliable results.
The seeds require light to germinate, and should not be left sitting in water. The easiest way to do this is by sowing on a surface of grit, over compost.
- Fill pots or a seed tray with gritty or sandy seed compost.
- Cover that with a fine layer of grit.
- Sow seeds thinly over the surface of the grit.
- Stand the pot or tray in water for ten minutes, or until the grit on top has soaked water up from the base.
- Place the tray somewhere sheltered from rain and with at least 6 hours of sunlight.
- Water from the base with tap water when the compost dries out.
- Germination takes about two weeks.
Sedum ‘Autumn Joy’ Propagation from Cuttings
There’s one step to taking sedum cuttings that always sounds odd, but it’s the same with cacti and most succulents; callousing. Plus, it makes the whole process more reliable, and generally easier than most hardwood or semi-hard cuttings because you’re not having to work as quickly.
The end of the cut stem needs to callous over because it’s quite susceptible to rot and fungal infections. To protect the cut site, remove it from the plant and then leave it for 24 hours before planting.
- Start by cutting a 15 cm stem from your Sedum spectabile in late spring, before flower buds are forming.
- Strip the bottom two-thirds of the leaves from the stem, and then leave it to callous over for 24 hours.
- Use a gritty potting mix, similar to what you would use to plant sedums in containers, to fill small plastic pots.
- Make a hole in the compost with a pencil, up against the wall of the pot, and then drop the cut end of your sedum stem into the mix.
- Water thoroughly with tap water until it runs out of the base of the pot, and the compost is evenly wet.
- Place your cutting in a bright, sheltered spot, out of direct afternoon sun.
- They should root within a couple of days, and new growth will be apparent after just a couple of weeks.
- Once they start to develop new shoots, check the roots. If they’re wrapping around the container, either plant it in the garden, or pot it on to a bigger container.
Propagating Sedum ‘Autumn Joy’ from Division
Division is the easiest form of propagation for these clump-forming perennials, and it’s a bonus of their care, rather than an extra task. Every few years, your Sedum ‘Autumn Joy’ will require division, because it will grow out from the centre of the plant, creating hollow sections.
One option is to dig it up, split it in half, and plant both halves back to front to fill in the gap. But, one half will quickly fill that space back out, and the other can be planted anywhere in the garden.
The best way to divide sedums is to dig the entire clump out of the ground and push a spade through the centre of the clump. For large clumps, you can create four divisions easily, for younger clumps, stick to one division, and plant the original clump back in its hole.
Caring for Sedum ‘Autumn Joy’
Mature sedums are really simple to care for, and if planted in the right conditions on fertile soil barely need any looking after. But, gardening isn’t about letting plants just live, it’s about helping them to thrive.
Given that sedums can end up looking leggy, hollow, and weirdly wiry, it’s worth feeding and dividing biennially, and there are some general fertilisers that help out too.
How to Mulch Sedum ‘Autumn Joy’
Sedums don’t like being sat on wet soil, and in wet climates or on damp soil, they will need some sort of practical mulch to keep their foliage off the wet earth. An easy way to do this is with a mulch of gravel for pots, or woodchip and shredded bark for garden borders.
I prefer shredded bark for this as it stays reasonably dry on top through wetter autumn months, but helps to retain moisture, as well as eventually rotting down, making it a good mulch to use once every two or three years, rather than annually.
Fertilising Sedum ‘Autumn Joy’
You can feed Sedum ‘Autumn Joy’ with compost or leaf mould, but that will depend on your current soil. Sandy or free-draining soils can be mulched in this way to feed sedums, but on damp loamy soils, use liquid feeds monthly during the growing season, or slow-release pelletized feeds once every two years just to top up any spent nutrients.
Pruning Needs
Sedums really don’t need pruning, and in most parts of Australia, our winters are dry enough that their flowers won’t rot either. That means their structure can be enjoyed even once the colour has faded.
Leave sedum flowers on the plant after they’re finished to provide hiding places for bugs over winter, and retain that rhythmic flow of repeating plate patterns through your border.
Repotting Sedum ‘Autumn Joy’
Sedums do need repotting, similarly to dividing, every two or three years. This is because they need to spread, and that spread creates hollows in the centre of the plant.
Lift plants out of pots, or the ground, and split them in half, then plant them back into their containers with gritty compost around the edge. The other half can be used in a new pot, or planted into the garden.
Common Sedum ‘Autumn Joy’ Pest and Diseases
Diseases are more problematic than pests for sedums, but as we’ve learned from years of trial and error, many troubling growing problems are weather-related, and will largely treat themselves with the next years’ growth emerging trouble-free.
However, there are some things to look out for, and a couple of things you can do to minimise risk.
As succulent garden plants with quite tough foliage, there aren’t many common pests that will actually damage sedums. However, slugs and snails adore the young growth, and winter foliage of sedums, and aphids can colonise new shoots in spring.
Generally, planting deterrent plants like chives around sedums will be enough to reduce any significant damage, but you could try a garlic spray to keep slugs and snails at bay too.
For aphids, simply wash them off with a hose when you see them, or wipe them away with tissue and dispose of them.
Refer to our guide on how to get rid of aphids for more details.
The emphasis of this grow guide is on gritty compost and bright conditions. That gives a clue to what the most common problems are going to be for any sedum, but especially Sedum ‘Autumn Joy’.
Fungal problems, particularly those caused by over-watering or poor drainage, will cause browning, yellowing, and dropping leaves at any time of year. If you notice symmetrical yellow fades to each leaf, later developing brown tips, it’s almost certainly due to over-watering or overfeeding these grit-loving plants.
They can be affected by anything from root rot, mould and stem rot, to mildew and rust. The trick is prevention rather than cure. And if you ever notice signs of fungal problems, dig the plant up, cut out any damaged sections, and plant it into a much more free-draining mix.
Other than root rot, Sedum ‘Autumn Joy’ will recover from most fungal problems with heavy prune, and drainage improvements.
Sedum ‘Autumn Joy’ Frequently Asked Questions
Does Sedum ‘Autumn Joy’ spread?
Sedum ‘Autumn Joy’ doesn’t spread around the garden. It will form neat clumps of about 60 cm-1 m wide, and remain generally tidy, without any invasive roots or self-seeding to speak of.
Does Sedum ‘Autumn Joy’ grow in shade?
Sedum ‘Autumn Joy’ will grow in part shade, but not well. For best results, plant Sedum ‘Autumn Joy’ in a bright, sunny spot, with at least 6 hours of direct sunlight per day.
How do you keep Sedum ‘Autumn Joy’ from getting leggy?
The best way to stop Sedum ‘Autumn Joy’ from getting leggy is to give it enough light. Sedums planted in shade go looking for light and will grow horizontally across the ground to spread out their foliage and maximise sunlight.
Should I cut back my Sedum ‘Autumn Joy’?
You don’t have to cut back Sedum ‘Autumn Joy’. Its dried flower heads will remain intact and provide gorgeous form and structure right through winter.
When is the best time to prune Sedum ‘Autumn Joy’?
The best time to prune Sedum ‘Autumn Joy’ is either straight after flowering, so it can heal itself before very damp winters, or in spring, cutting back last year’s flowers and stems to the ground once temperatures reach a reliable 10°C.
What should I plant next to my Sedum ‘Autumn Joy’?
Sedums benefit from any plants that deter slugs and snails, and make a great addition to winter gardens with other dried flower heads, meaning they look good with and benefit from alliums, particularly once both have faded back from winter.
Does Sedum ‘Autumn Joy’ grow well in pots?
Sedum ‘Autumn Joy’ does exceptionally well in pots, with the added drainage they provide, and the option to move them around the garden to sunnier positions at the right time of year.
Can you overwater Sedum ‘Autumn Joy’?
It’s very easy to over-water Sedum ‘Autumn Joy’, but by planting on the right soil in the first place, it’s easy to manage and simple to avoid. Basically, don’t water them if the soil is still wet, and unless there’s a real drought, mature sedums shouldn’t need watering at all.
Wrapping Up Our Guide to Growing and Caring for Sedum ‘Autumn Joy’
Sedum ‘Autumn Joy’ is one of my favourite garden plants. Its resilience makes it reliable, and its flowers add soft structure in a way that nothing else does.
If you’re looking for ways to brighten up your garden that don’t take much maintenance, then growing your own Sedum ‘Autumn Joy’ is a clear choice.
Published on November 8, 2023 by Gary Clarke
Last Updated on September 20, 2025

