Considering the Worx Landroid for a hassle-free lawn maintenance experience? In this guide, we explore the features and benefits of the Worx Landroid robotic lawn mower to help you make an informed decision.
We’ve personally tested this product ensuring that you receive reliable information to enhance your lawn care routine with the Worx Landroid.
More...
What is the Worx Landroid Robotic Lawn Mower?
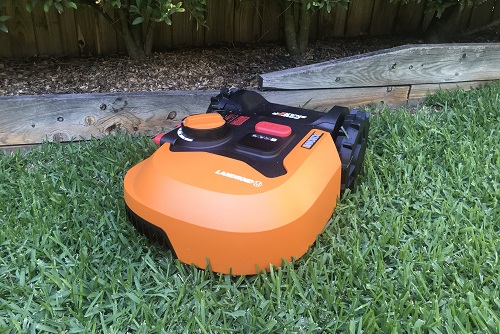
Worx Landroid Robotic Lawn Mower
The Worx 20V Landroid robotic lawn mower comes in three sizes, and we’ve tried out the smallest for a 500m2 lawn, which has proved to be an amazing addition to our lawn care.
With more intuitive controls and a sturdier chassis than the old Worx Landroid M (discontinued in 2019) it’s one of the best mowers on the market when compared to similar mowers from other brands (and in my humble opinion, it’s a better-looking mower too).
Obviously, whether or not a mower looks good is irrelevant if it doesn’t work well, but the Landroid Worx robotic lawn mower is a brilliant lawn mower that is surprisingly simple to set up compared to most robotic lawn mowers.
With an adjustable cutting height, automatic charging, user managed cutting programmes, and an intuitive app and good security system, this robotic lawn mower really is one of the best on test.
Why do I need a Worx robot mower?
This award-winning lawn mower gets to know your lawn, adapting to the growth rates of your grass, the weather conditions in your area and (a feature I find quite endearing) it learns from other Worx mowers around Australia by communicating via the app to understand the weather conditions as winds and rains move around from state to state.
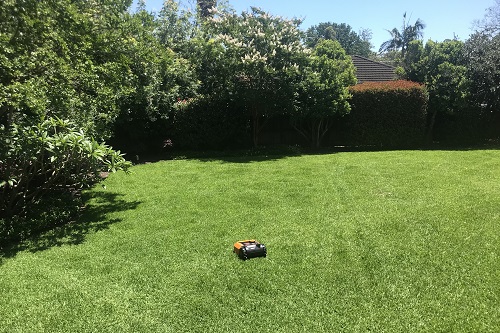
Worx Landroid robot lawnmower mowing the lawn
The Worx Landroid robot mower we tested can handle up to 500m² (the other models handle up to 1000m2 and 1500m2) and pretty much takes all the work out of upkeeping your grass, and because it cuts twice a week by default the cut blades are small enough to directly mulch back on to the lawn to help feed your grass and improve the soil.
Worx Landroid 20V comparison to other robot lawn mowers
An important point for most robotic lawn mowers is that they really do work best on flat ground. A few divots in your lawn won't matter, but hills, mounds and trenches will be a challenge for most robotic lawn mowers.
The Worx V20 Landroid though easily manages hills and gradual inclines with its high grip wheels that make ups and downs in the garden super easy to manage.
It’s automatic charging and app control make it incredibly up-to-date too, as most robotic mowers on the market are still manual starts, or remote controlled.
While there are advantages to remote control, it still requires you to be present. The new Worx Landroids do all that work for you.


Get Your Free Guide:
Master Growing Australian Natives eBook
A Must Have Complete Guide for Every Australian Garden
Get Your Free Guide:
Master Growing Australian Natives eBook
A Must Have Complete Guide for Every Australian Garden
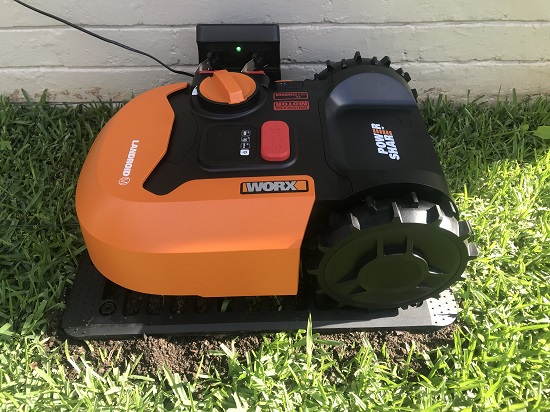
Worx Landroid robot lawnmower charging
Installing Worx Landroid Robotic Lawn Mower
To install the new Worx V20 Landroid you will need a mallet, wire-cutters, and a spirit level. The installation guide suggests that the spirit level is optional, but we found it pretty important when ensuring the charging base was set up properly.
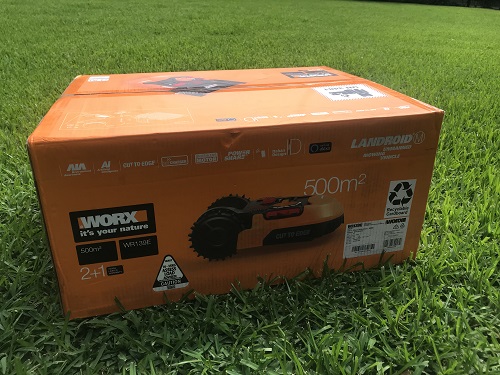
There is also a handy Landroid straight ruler and a template for corners included in the box to make sure you get the boundary wire measurements spot on.
Set up time for Worx 20V Landroid Lawn Mower
We installed the Worx 20V Landroid in a 370m² plot in under 2hrs. The main work was properly installing the boundary wires, with a little trial and error.
The base plate needs installing (more on that later) and there are some easy adjustments to the cutting height that are optional.
Once the lawn mower is physically set up, you need to set a pin code, and install the app so the mower is tracked and only usable by you. This also allows you to change the cutting frequency.
The instructions included in the box were a little basic and hard to follow. We ended up following the below video from YouTube which was extremely easy to understand and follow.
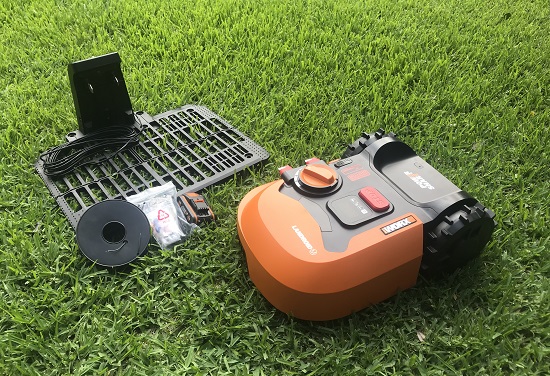
Worx Landroid robot lawnmower parts
Watch the Worx 20V Landroid installation video:
Online Written Landroid Installation Manual
Worx has a basic manual that comes with the mower, but it's online if you ever lose it, and while the manual doesn’t give all the information in detail there is a great user installation film from Worx on YouTube which will guide through everything you need to know.
Installation Manual: here
Installing the base plate for Worx 20V Landroid
The base plate is the charging point of your new lawn mower, and needs to be installed on level ground. Using the spirit level and ground screws supplied, secure the Landroid’s base plate to the ground, within 5m of your mains power (ideally this should be a watertight outdoor socket).
Make sure to place the charging plate somewhere with 80cm of free space to the right and 30cm to the left. The mower needs this to return and exit the charging point neatly, then connect the power cord, and plug into the mains.
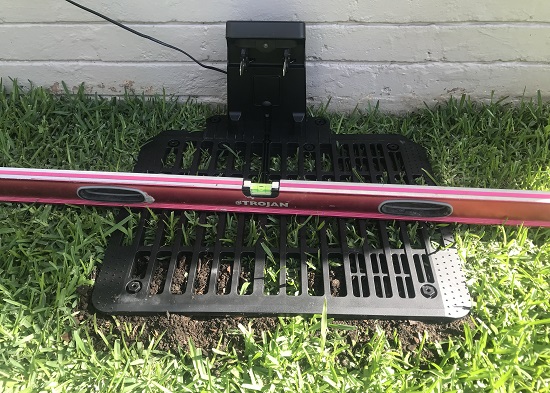
Installing the charging station of a Worx Landroid robot lawnmower on the lawn
Setting up the boundary cable for Worx 20V Landroid Lawn Mower
Leave 50cm of boundary wire at the base place to connect once completing the boundary.
Unwind the boundary cable and add a peg every 60-80cm and closer on edging turns. We originally only did it at 80cm but had to add some pegs in-between these a few days later to make sure the boundary cable stayed tight and fixed to the lawn.
Tip: Leave a loop of 20cm of boundary cable every 10-15m and neatly peg this down outside of the boundary. We found the boundary may need to be adjusted in places and it was better to have extra boundary wire than having to cut the boundary wire and join more wire on to get the length you need.
There is a great YouTube video by Worx with all the information you need for wire installation, but to sum up, make sure the wire is parallel to the base plate for the first 80cm on either side, and leave 10cm for flat boundaries, or 26cm for steps. If you get that right, you'll have a perfect cut right to your boundaries.
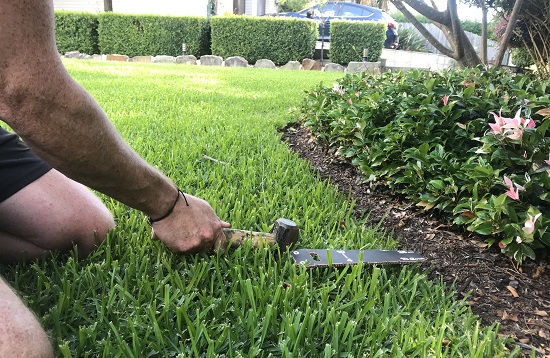
Installing the boundary line for the Landroid robot mower
How to change cutting length on your Worx Landroid
The installation manual doesn’t give much information on how to change cutting length, so get to know your new Landroid. There is an orange dial on the top of the lawn mower which easily adjusts the cutting height, but has a few safety measures to stop accidental changes.
Pull the dial up to release, then turn to adjust the cutting length. We began on "5" but it was to high and we changed it to "4". Our grass was about 7cm tall after some summer rain.
The robot lawn mower took it's self out everyday for the first week to cut the entire lawn, during this time it was quite patchy in places where the mower had not cut yet.
Tip: Give your lawn a nice mow like you usually would and then install the Landroid robot mower to maintain the lawn, so you don't have a messy looking lawn while the mower gets to know the lawn.
Note: When installing the cutting blades, make sure to use pliers rather than turning the nuts by hand, as loose connections can cause blades to slip – not only giving an uneven cut, but potentially damaging the mower. Make sure all connections are secure before first use.
Worx Landroid Anti Collision System
Sold separately to the Landroid, the Anti-Collision System stops your mower cutting too close to shrubs or garden islands, and more importantly, it stops it hitting you if you’re out and about in the garden.
I allowed the mower to run into my leg in the middle of the lawn, it was a slight bump then it stopped and turned away. If it does run into you it should not cause any harm.
It’s an extra expense and does use up more power, but each mower automatically charges to include enough power to run the sensor.
Worx Landroid Review - Pros & Cons
Pros
Cons
Worx Landroid Frequently Asked Questions
What is Worx Landroid party mode?
Sadly, Worx Landroid’s party mode isn’t to roam around the garden playing music, but it is a useful feature. Landroid party mode allows you to pause the cutting schedule when you’re expecting guests so it won’t be a trip hazard while it rolls around the garden.
How do Worx Landroid mowers work?
Worx Landroid uses a boundary wire to trace its way around the garden, and automatic sensors send it straight back to the charging hub. The latest model, the Worx 20V Landroid has an app to manage the cutting frequency and general settings.
How long do Worx Landroid Lawn Mowers last?
Worx Lanroid lawn mowers will last forever if properly maintained, and they are triggered to stop cutting and return to safety in the rain to prevent any damage to lawns, or themselves.
Blades should be replaced every 3-4 years, but that can be extended by sharpening them gently once a year.
How do you use the Worx Landroid App?
Just follow the instructions in the app to install. Once installed the app has loads of great features, like party mode, frequency and setting specific to weather.
Do Worx Landroid collect clippings?
No, because of the frequency of cuts, Worx Landroid don’t collect grass clippings, they create a fine mulch which won’t be noticeable on your lawn and helps to improve overall lawn and soil health.
Can you unlock a Worx Landroid?
A great feature of the Worx Landroid is its security. Unlocking a Worx Landroid requires a recognized Wi-Fi network, and the users’ pin code.
If you forget your pin, it can be reconnected via the app following security and ensuring you are on a recognized network.

Now You Know More About Worx Landroid
The Worx Landroid is a wonderful robotic lawn mower which is why it is the top choice in our robot lawn mower reviews. And, while it’s a luxury for the garden, sometimes we need to treat ourselves.
The intuitive setup of the Worx Landroid 20V makes it our favourite Landroid to date, and thanks to its neat charging point can pretty much be left to its own devices for the entire year once initial setup is complete.
Published on December 18, 2021 by Gary Clarke
Last Updated on December 27, 2025


Great overview of the Worx Landroid! It's impressive how robot lawn mowers in Australia are becoming more accessible and efficient. The features highlighted here make lawn maintenance seem effortless.