If you had to Google African violet, the first thing that would come up is a whole lot of beautifully presented gifting options using this popular houseplant. They are a symbol of devotion and the gift that keeps on growing.
Whatever the occasion, gift givers the world over gravitate to this little purple delight. Thinking of adding a new houseplant to your home? We’ve outlined advice on how to grow and care for your African violet. So let’s start at the beginning.
More...
Genus: | Saintpaulia |
|---|---|
Common Names: | African Violet |
Family: | Gesneriaceae |
Location: | Indoor |
Type: | Houseplant |
Growth: | Width 7 – 40 cm, Height 15 – 30cm |
Sun requirements: | Part sun |
Foliage Colour: | Dark green |
Flower Colour: | Blue, pink, purple, red, white |
Flowering: | Most of the year |
Maintenance level: | Low |
Poisonous for pets: | No |
Introducing the African violet
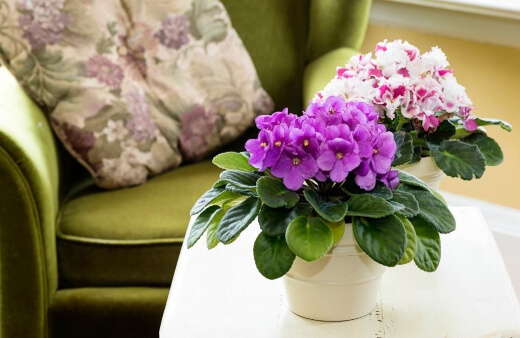
The African violet flowers several times a year, showing off various leaf forms and colours. They’ve earned a bit of a reputation for being difficult but we’re here to reassure you that they are in fact low maintenance.
If you follow a few simple rules, African violets should thrive in your home. Over time you can learn to keep them in flower nearly all year round.
The name African violet might be a giveaway in terms of where they are from. This popular houseplant is native to East Africa, particularly the tropical rainforests of Tanzania and Kenya.
In 1892, a German colonial officer named Walter Von Saint Paul-Illaire, identified these plants and sent seeds back to Germany. That’s why the genus came to be known as Saintpaulia.
This plant has recently been categorised into a different genus, namely Streptocarpus. The name African violet can be a bit confusing – these plants are not a type of violet. They do however produce gorgeous, violet-colour flowers.
History of the African Violet
The African violet wasn’t very popular in Europe until after the end of the Second World War. At this point, Britain became fascinated with this plant throughout the 1960s and 1970s, a trend that was called African violet fever. It became a tradition to give the African violet as a Mother’s Day gift.
Flowers and Foliage of the African Violet
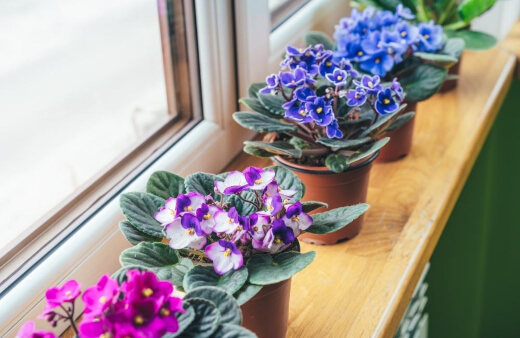
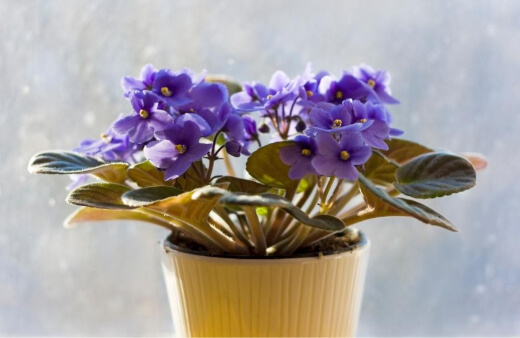
The flowers of the African violet could be called dainty and fragile. They are in fact pretty tough plants and will happily grow on a warm sunny windowsill.
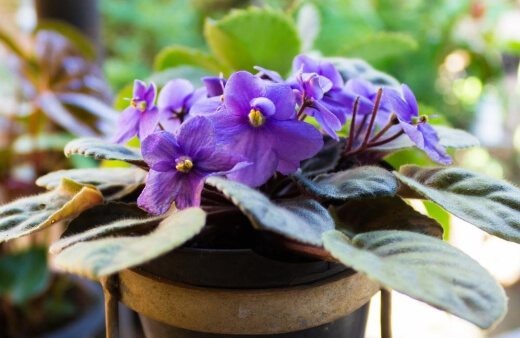
The flowers come in a wide range of colours - all shades of purple, blue, pink, red, and white. The foliage is furry and some of the leaves have ruffled edges or streaks of white and green.
How to Grow African Violets
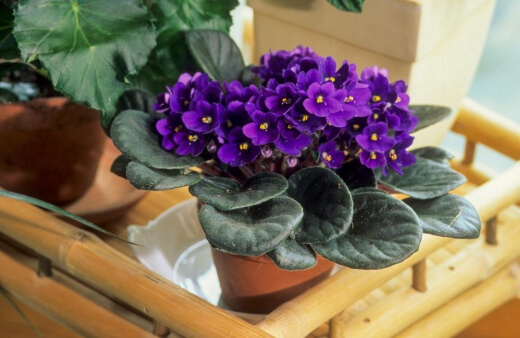
If you’re just starting out with this houseplant, you might have some trouble getting your African violet to flower. It’s really fussy about growing conditions so there are a couple of things to keep in mind before you can enjoy its gorgeous blooms.
For the ultimate in blooms, African violets need 10 to 14 hours of bright but indirect light per day followed by an eight-hour rest in darkness. West or south-facing windows have the best light in winter, and windows that are north or east-facing are better in summer.
African violets thrive best with daytime temperatures between 21 and 27°C and nighttime temperatures close to 18°C.
African Violets Propagation Process
African violets can easily be propagated from a leaf.


Get Your Free Guide:
Master Growing Australian Natives eBook
A Must Have Complete Guide for Every Australian Garden
Get Your Free Guide:
Master Growing Australian Natives eBook
A Must Have Complete Guide for Every Australian Garden
The first step is to remove and trim the leaf. Remove a fresh leaf from the plant that you want to propagate. We suggest using a mature leaf, but it shouldn’t be old and tough.
Use a sharp knife or razor to trim away the top of the leaf blade. This isn’t a must but it will support faster production of roots and plantlets from the leaf when it’s rooted. It will also stop the leaf itself from growing.
Next you’re going to cut the leaf stem at a 45° angle with the cut-side facing up, to about 1.3 cm in length. When you cut at an angle, it encourages more root and plantlet growth.
You’re now going to root the leaf cutting. Fill a small pot with your rooting mix. You want a mix that is light and porous. Some people use only vermiculite or they mix with perlite. It should be moist but not too soggy otherwise the leaf will rot.
Make a narrow hole in the mixture and push the leaf stem into this hole, up to the bottom of the leaf blade. You can then firmly put the rooting mix around it. You can put more than one leaf cutting into a single pot if there’s enough space.
You need to put your pot in a clear, covered container or plastic bag. Place it in a bright place with moderate temperature. Avoid direct sun or a very warm spot – this can cause the leaf cutting to rot or burn.
At about 12 weeks, one or more plantlets will start developing from the cut end of the rooted leaf stem, and start peeping out above the soil. Although they could be separated and planted from 12 weeks, we recommend waiting 4-5 months.
The longer wait means more plantlets will grow from the cutting, but they’ll also be bigger, easier to handle, and more likely to survive when they’re transplanted. When the plantlets are big enough and you can handle them, you can separate them from the original leaf.
Remove the cutting from its pot, get a firm grip on a plantlet, and gently pull it away from the leaf cutting. It’s absolutely fine if your plantlet doesn’t have many (or even any) roots. If the plantlet is healthy it will produce roots when it is potted.
Next up, you’re going to fill a small pot with regular soil mix. Make a small hole deep enough to hold the plantlet that you’re potting. Gently push the plantlet into the hole and firm up soil around it.
Place it deep enough so that you can’t see the bare central stem but make sure not to bury the tiny growing point in the centre of the plant. You can now lightly water the plantlet.
If the plantlet is very small and only has a few roots, you can place it in a clear, covered container or plastic bag. This will offer protection while the plantlet becomes established. You can remove it from this container after a few weeks.
Caring for African Violets
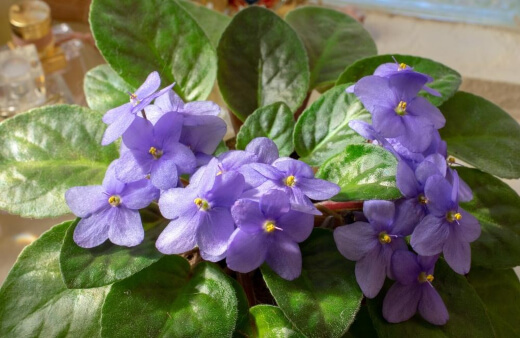
Light/Temperature Needs
The African violet appreciates a warm house. Keep them away from draughty windows in winter. Bright indirect light is perfect. During the shorter days of winter they can handle full sun.
Keep them away from bright south or west-facing windows. An east or north-facing window offers the best lighting without burning the sensitive foliage. Artificial lighting can work too. You can use fluorescent or LED bulbs in addition to natural lighting.
If you notice thin, dark green leaves and stringy stems, you’ll know the plant isn’t getting enough light. If you see light green or bleached leaves then your African violet is getting too much light.
Planting African Violets
The African violet will flower the best when it’s slightly pot-bound. You should wait until your plant has outgrown its pot, has stopped flowering, or is developing multiple crowns before repotting. African violets are shallow rooted plants so aim for a pot that isn't too deep.
Soil
You can make your own soil by combining equal parts potting soil, coconut coir, and perlite or vermiculite. You can also use an actual African violet potting mix or an all-purpose potting soil. It just needs to be well-draining.
The soil should be loose, and high organic matter content is an added plus. Our best soil for pots guide might be helpful in finding the ideal growing medium for your African violet.
Watering African Violets
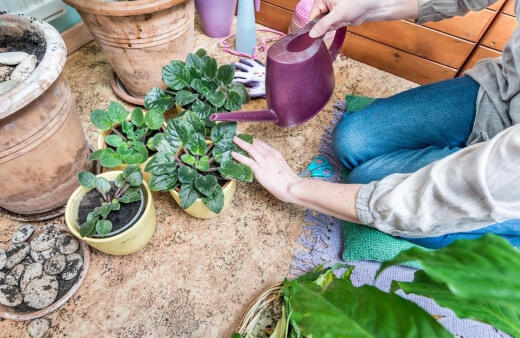
If you water your plant carefully, you will ensure good African violet health. You can water the plant from the bottom by filling a saucer under the pot with water and letting it absorb through the soil. After 30 minutes you can drain off the excess.
You can water the plant from the top – just ensure that you don’t get the leaves or center of the plant wet. Don’t overwater your African violet. Overwatering an African violet is deadly, so let the soil dry out a bit before watering.
You want to water so that the soil is moist but not saturated. Use room temperature water as cold water can damage the root system. It will also cause spotting if you spill it on the leaves.
What Fertiliser to Use
This is a delicate balance - too little or too much fertiliser can mean a lack of flowers. Use an African violet food to ensure your plant is getting the right quantity of nutrients.
During spring and summer, fertilise your African violet every 2 weeks with a high phosphorus plant food. You only need to start fertilising when the plant shows signs like slow, thin growth and pale or yellowing leaves.
If you need some help selecting a fertiliser that is right for you, check out our Yates Fertiliser Buying Guide and Product Reviews for 2024.
Repotting
African violets need to be repotted about once a year, but they don’t particularly enjoy this process and can be a bit finicky. Use a new pot that is only slightly bigger than the old one.
Remove about a third of the old soil and replace it with an African violet potting mix. The crown of the plant should be just above the soil line. Water thoroughly when you are done.
General Care
The fuzzy leaves of the African violet tend to collect dust and dirt. You can brush them off gently with a small, soft-bristled paintbrush.
Possible African Violet Pests and Diseases
If only life was pest free for our treasured plants and gardens, but with each new addition, there are always some pests and diseases to keep in mind.
- Cyclamen mites can affect African violets. They are virtually impossible to remove completely, so you’ll need to dispose of the infected plant and isolate nearby plants.
- Spider mites can also be an issue. You can hose the plant down in the sink or shower to uproot the bugs. You’ll need to follow this with an insecticide like neem oil.
- Powdery Mildew looks like fuzzy white blotches on the stems and leaves. You can use sulphur-containing organic fungicides to prevent and treat infections. You’ll also need to remove the affected leaves, stems and buds from the plant.
- Various forms of rot and blight are also common. To treat root rot, remove the plant from the soil and wash the roots under running water.
Wash away as much soil and affected roots as possible but be gentle with the plant. You can then use a sharp, clean pair of shears or scissors to cut away any remaining affected roots. - If you’ve identified blight on your plant, you need to act quickly to stop it from spreading. Remove all affected leaves and dispose of them. Then you need to mulch around the base of the plant.
You can use straw, wood chips or any other natural mulch. This prevents fungal spores in the soil from splashing onto the plant. See our complete guide on the types of mulches and learn when and how to use each.
African Violets FAQs
Do African violets purify the air?
This plant absorbs benzene. It is often named the top plant for cleaning the air from the most common indoor pollutant which is formaldehyde.
Are African violets edible?
The plant is nontoxic to pets and African violets appear on every list of edible flowers. They make any plate look more inviting, whether topping a dessert or tossed in a salad.
What's the difference between a violet and an African violet?
African violets have fleshy furry leaves and produce flowers throughout the summer. True violets have large to small heart shaped leaves. Sometimes the leaves are smooth, and sometimes they have different levels of hairiness.
Do African violets smell good?
African violets have no scent at all.
How many years do African violets live?
African violets can live up to 50 years. If you’re aiming to get yours to the big 50, you’ll need to give it expert care which includes repotting. It’s important to know when to repot an African violet and what soil and container size to use.
Do African violets do well in bathrooms?
The best temperature for the African violet is 21°C. The plant doesn’t like drafts. You can create some humidity for the plant by placing it on wet pebbles. African violets like humid rooms, so a sunny bathroom or kitchen window is ideal.
Are coffee grounds good for African violets?
Who would have thought your daily caffeine fix could have benefits for your plants as well. Coffee grounds are a great homemade fertiliser for African violets.
You can make a mixture of dried coffee grounds and dried egg shells and work the mixture into the top of the soil. You can replenish the soil with this mixture every couple of months.
Is Epsom salt good for African violets?
If applied once per month, Epsom salts can help set the flowering process in motion and will compliment your African violet fertiliser perfectly. Dissolve two tablespoons of Epsom salts in 3,8 litres of tepid water in a watering can. Stir the salts in the water to dissolve them and then combine with your fertiliser.
Is vinegar good for African violets?
Soil that is too acidic can prevent African violets from getting the nutrients that they need. Vinegar's pH is around 2.5. You can dilute vinegar (one or two teaspoons of vinegar per 4 litres of water) and use that to water your African violets. This will slowly lower the pH level of the potting mix.
Are you a big fan of violet coloured plants? Check out our growing guide for the Australian Native Violets.
Wrapping Up Our African Violet Guide
The colour of an African violet in bloom is an instant mood booster. The brilliant purple hue comes to mind first, but any shade of this plant’s blooms are good for the soul (and the home). A pop of colour on your windowsill in the kitchen or bathroom goes a long way.
Whether you like the old-world tradition of the African violet, or are won over by a plant that has travelled the world from the tropical rainforests of Africa, you won’t be disappointed once you commit to growing this beauty (or a few).
Published on March 10, 2022 by Maisie Blevins
Last Updated on February 21, 2025

