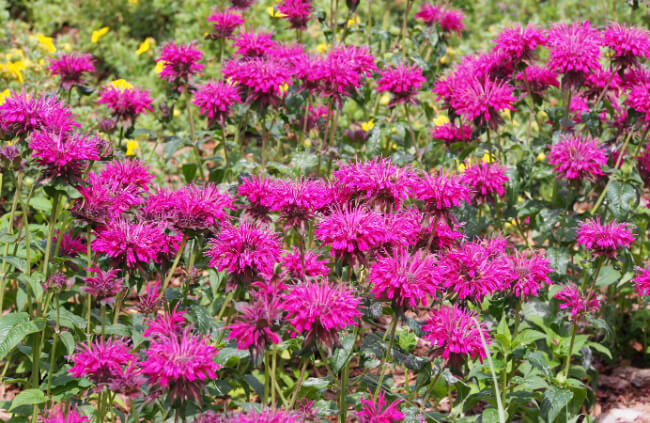
Bee balm isn’t just beautiful, it’s useful, offering a brilliant and simple way to turn your garden into a herbal paradise, with its vibrant flowers and aromatic foliage. If you want to learn how to grow your own bee balm, you’re in the right place.
While it might not be native, bee balm is easy to grow in Australia, particularly in more temperate parts of the South, where a mix of warm summers and moderate winters allow it to thrive, quickly springing into spring bloom.
In this guide, we’ll share our top tips on growing bee balm at home, and cover the numerous ways to propagate bee balm yourself.
More...
Family: | Lamiaceae |
|---|---|
Genus: | Monarda |
Species: | Various |
Origin: | North America |
Common Names: | Bee balm, bergamot, horsemint, Oswego tea |
Location: | Outdoor |
Type: | Herbaceous perennial (some annual species) |
Growth: | 90 cm (H) x 50 cm (W) |
Sun requirements: | Full sun or light shade |
Foliage Colour: | Green |
Flower Colour: | Pink, red, purple, white |
Flowering: | Summer |
Edible Parts: | All parts other than roots are edible |
Maintenance level: | Medium |
Poisonous for pets: | Not toxic to cats and dogs (some digestive discomfort or vomit if over consumed) |
What is Bee Balm?
Thanks to its anti-inflammatory properties, bee balm has been used as a remedy for bee stings (hence its common name). Also known as bergamot for its sweet, rich, citrusy scent, bee balm is the common name for Monarda, a wide genus of mostly perennial herbaceous plants.
The thick rhizomatous roots of the perennial species are quick to establish and can spread easily in the garden, but with a little bit of care and some clever planting you can avoid an invasion and maintain happy, healthy bee balm to enjoy all summer long.
What is Bee Balm’s Natural Habitat?
Bee balm is native to North America, spreading all over the continent. Its genetic diversity means that there is a bee balm for most situations whether it’s slightly damper winters, or extremely warm winters, and most will cope quite well with drought.
In natural conditions, bee balm does best on moist but not waterlogged soil, and its flowers actively show off when it’s well watered through summer, provided it isn’t too humid, and water is allowed to drain. That makes it ideal for container gardens, where you can manage and maintain bee balm’s water.
20 Best Bee Balm Varieties to Grow at Home
1. Monarda citriodora
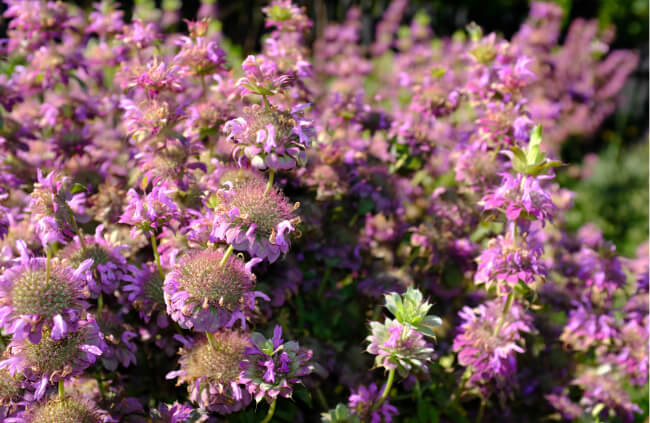
Lemon Bee Balm has an unmistakable citrus aroma and flavour, not dissimilar to lemon verbena, but with a minty undertone. Its spectacular towers of flowers are hugely varied in colour, with bold drooping tiers of petals.
2. Monarda ‘Balmy Pink’
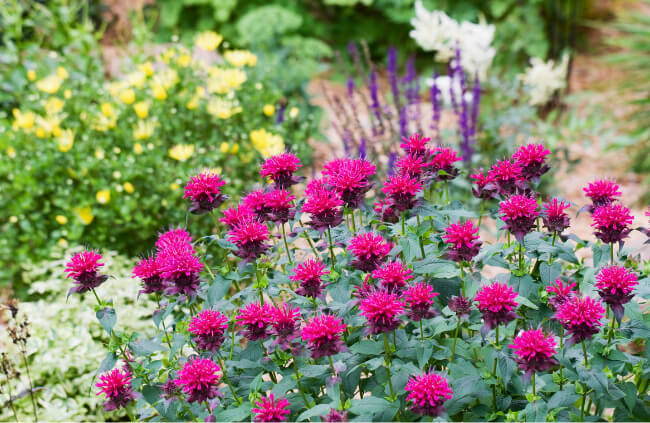
The huge flowers of Monarda ‘Balmy Pink’ are dramatic additions to any border, offering bright and brash colour that would work beautifully with any more traditional fuchsias or even magenta salvias.
Like all bee balm though, it offers a great option as a mid-layer plant behind annual colour.
3. Monarda bartlettii
Bartlett’s bee balm is pastel lavender in slightly shadier conditions, but vibrant pink in brighter borders, often producing flowers that stand way above its foliage.
Water M. bartlettii well through summer to help it get through any prolonged drought, and it will reward you with months and months of flowers.
4. Monarda ‘Beauty of Cobham’
Monarda 'Beauty of Cobham’ is an exceptional cottage garden perennial, with gentle candy-pink petals above warm purple petioles. Its foliage is simple, but forms a neat and dense cluster beneath the flowers, responding well to cutting back in spring.
5. Monarda bradburiana
M. bradburiana isn’t easy to get hold of but has one of the most delicately gorgeous petals in the natural world, presenting with sweet spotted petals, similar to the landing strip on foxglove cups.

Get Your Free Guide:
Master Growing Australian Natives eBook
A Must Have Complete Guide for Every Australian Garden
Get Your Free Guide:
Master Growing Australian Natives eBook
A Must Have Complete Guide for Every Australian Garden
The neat concentric structure creates a tidy crown of white petals, each holding a shockingly lovely flavour when brewed into a simple tea.
6. Monarda didyma
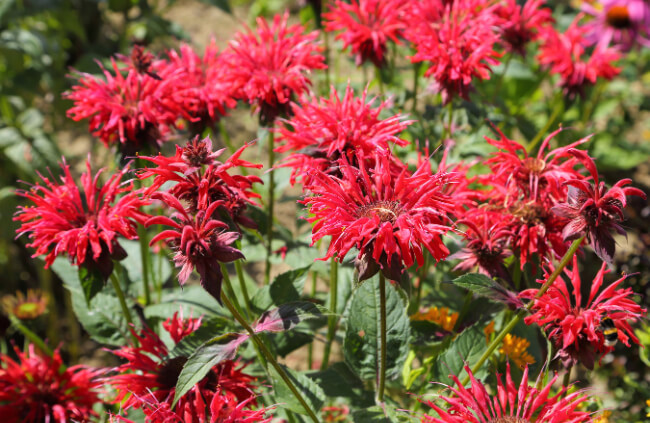
Scarlet bee balm has intensely vibrant crimson flowers, standing nearly a foot above the rest of the plant, creating a gorgeous airy effect in any planting scheme. It’s also the base for several other cultivars, with adapted flower colour, that makes use of the dense foliage and towering blooms.
7. Monarda ‘Dark Ponticum’
A loosely structured cultivar of M. didyma, with dusty purple flowers is ‘Dark Ponticum’. Its soft leaves die back faster in cold winters than others, but dry easily if you plan on using it in the kitchen or storing it for long times.
8. Monarda ‘Fishes’
Flowers that are similar in tone and structure to honeysuckle help Monarda ‘fishes’ stand out from other bee balms, but so does the basic fact that it is one of only a handful of cultivars that are nearly pure white, but for a striking streak of pink on the underside of the petal, which fades into a pastel, salmon pink when it’s fully opened out.
9. Monarda ‘Claire Grace’
One of the taller bee balms to grow at home is Monarda ‘Claire Grace’, a cultivar of M. fistulosa that can reach up to 90 cm tall most years, and grows in well-developed groups of stems, offering wonderful winter structure when the foliage dies back.
10. Monarda ‘Gardenview Scarlet’
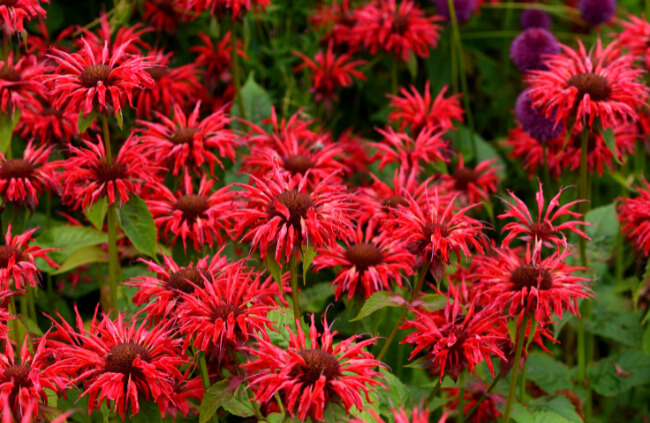
Monarda ‘Gardenview Scarlet’ has a neon-red flower that responds incredibly well to deadheading, providing searingly bright colour in the garden right through from spring to early winter.
Grown in pots or containers, there are few more dazzle herbaceous plants you can grow at home.
11. Monarda ‘Marshall’s Delight’
Monarda ‘Marshall’s Delight’ opens out like a thistle, with a structural base to the flower that develops in rings from the top until just a few petals remain, providing a long harvest window for use in infusions.
It’s also a low growing bee balm, making it ideal for smaller gardens, or planting in generous swathes along the front of borders.
12. Monarda ‘Mohawk’
Mohawk bee balm is a fascinating plant that looks different from one garden to the next responding with brighter or paler blooms depending on the soil and light conditions it’s grown in. In its ideal situation, its fuchsia pink neon blooms stay open for almost a week until they need deadheading and replaced with a new swathe of colour flowers.
13. Monarda ‘Pawnee’
In its first year from seed, Monarda ‘Pawnee’ can develop a beautiful flowering stem, but is limited. From cuttings or division though it establishes quickly into dramatic swathes.
The clustered flowers open well, producing cushions of pink at the end of each stem.
14. Monarda ‘Petite Delight’
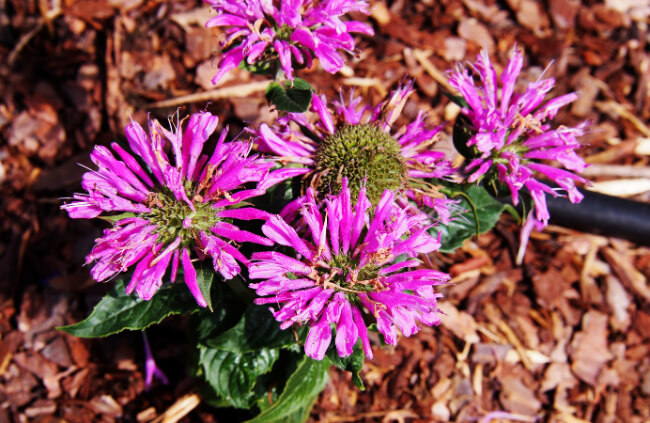
Monarda ‘Petite Delight’, also sold as ‘Acpetdel’ is ideal for small spaces, container gardens and balconies, growing to just 30 cm high at the absolute most, but more typically less than 25 cm, meaning it’s easy to contain in pots, as well as slower to spread in borders.
15. Monarda russeliana
While virtually impossible to find in Australia, the Wild Monarda, M. russeliana, is a unique addition to any wildflower meadow, or forest edge planting scheme. It’s not impossible to find though, so if you’re looking for something truly unique this is well worth a search.
16. Monarda ‘Snow White’ / ‘Schneewittchen’
Snow white Bee Balm would work perfectly with a dark magenta cultivar like Purple rooster, with each setting the other’s colour off perfectly.
It grows to about 60 cm tall, so it’s uncontrollably large, but does benefit from some support in windy gardens.
17. Monarda ‘Purple Rooster’
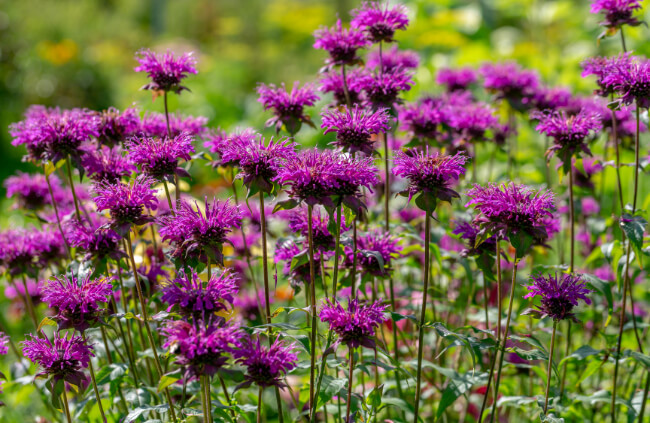
A mid-height bee balm, Purple Rooster puts all its effort into its rich magenta flowers, but you’ll not miss the height as the flower colours burst out across the garden, forgiving any issues you might have around this size.
18. Monarda ‘Talud’
Talud is a wonderful sprain plant thanks to its vibrant and verdant foliage which presents crisply in spring before any sign of flowers, making beds and borders jump into life early in the year.
19. Monarda ‘Violet Queen’
Subtly spotted petals and highlights on their tips mean that there’s something truly unusual, and really quite special about Monarda ‘Violet Queen’. It works better than nearly any other cultivar when planted in swathes in larger gardeners or generous planting best, either boldly at the front of a border, or firmly in the centre.
20. Monarda ‘Squaw’
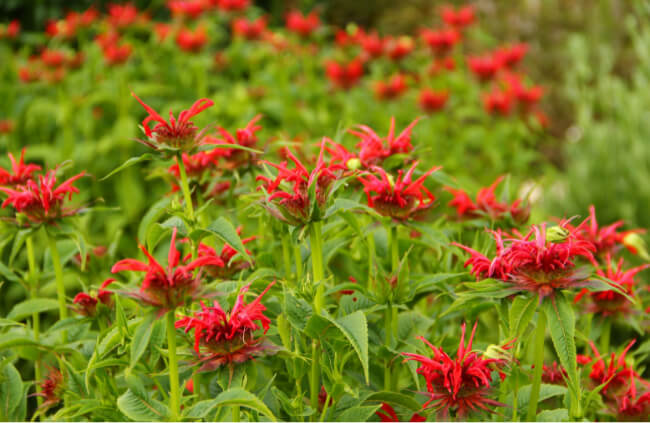
Monarda ‘Squaw’ is one of the easiest bee balms to grow in any climate, and was awarded the RHS ‘Award of Garden Merit’ for just that reason. Regardless of climate or conditions, it will grow in nearly all conditions and is able to cope well with drought and cold winters in equal measure, though will still need some consideration ahead of wet winters.
How to Grow Bee Balm in Australia
If you can find a bright, sunny spot in the garden, where your bee balm can benefit from a gentle breeze, and won’t drain too quickly, you should have plants that look good right through summer, often flowering from late spring to the middle of winter with regular deadheading.
The only common problem reported by most gardeners when growing bee balm is winter damp, caused by damp soil and the common mistake of pruning back in winter, rather than spring.
How to Plant Bee Balm
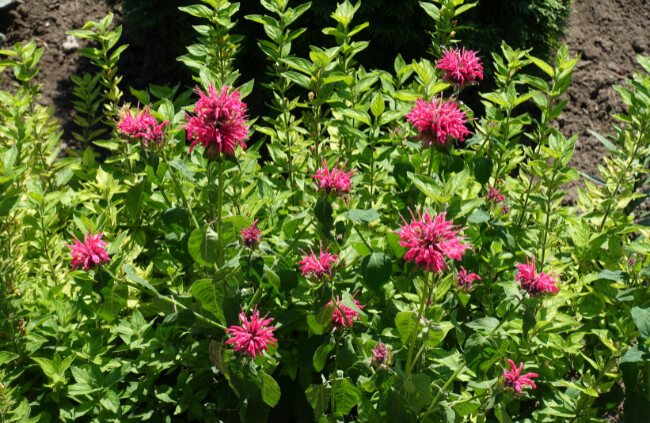
When you’ve got the right spot, and prepared your soil (see below) there’s only one thing to know about planting bee balm; keep the crown dry. Bee balm suffers, for me at least, perpetually with rot around the base of its stems whenever we get heavy rain, unless it’s planted proudly.
Dig a hole, just slightly larger than the pot it’s in, and plant your bee balm so the top of its root ball is just proud of the soil surface. On very dry soil, firm it in so there’s a hollow trench around the plant for watering while it establishes, but on most soils, just leave it lightly mounded.
Best Soil & Drainage for bee balm
Despite its tendency to suffer from fungal problems as a result of sodden soil or overly humid air, bee balm actually quite likes moisture. It's drought tolerant, but the flowers and foliage of dry plants tend to be paler and lack lustre.
On very sandy soil, sift through organic compost before planting, or add it by mulching in spring. On clay soils, mix through plenty of soil improver to open up the structure and allow drainage.
Light Requirements
Though it can cope in light shade, bee balm prefers full sun. It’s a plant that’s as much about scent as it is about colour, so planting it somewhere bright, with direct afternoon sun goes a long way to boosting those essential oils, which always seem so much more potent when they’re warmed by the sun.
Growing Bee Balm in Containers
If your garden is very poorly drained, or you just like the idea of bee balm growing in structural and striking pots and containers, that’s a great way to make sure you have full control of its conditions, as well as raising it up to nearer nose level.
Fill your pots with a mix of compost and soil, making sure there’s a layer of crocks or drainage at the base. After that, just water it a little more regularly than normal and that’s all there is to it. Other than initial planting, and more regular division, caring for bee balm in pots is the same as caring for them in the ground.
How to Propagate Bee Balm
Most keen gardeners get quite excited by bee balm in spring, not because of its fragrance (though that does help) but because of how adaptable it is when it comes to propagation.
Propagating any plants means making more of them, literally. By dividing existing established clumps, sowing new seeds, or taking cuttings, you can add to your plant collection quickly and cheaply.
Bee balm isn’t just possible to propagate, it’s positively simple. Follow our step-by-step propagation guides for four ways to propagate bee balm below.
Propagating Bee Balm from Seeds
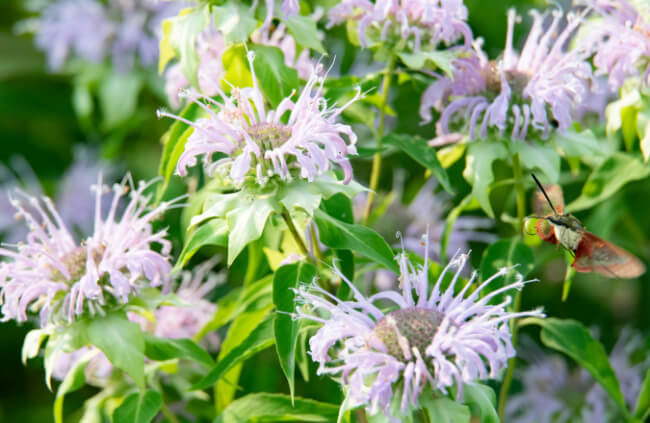
Bee balm is super simple to propagate from seed. All it needs is light, moisture and heat. You can sow bee balm at any time of year in Australia, but you’ll get the best results by sowing in early autumn or late summer, which gives young plants a short season to set roots and grow some top growth.
Grow them on a warm windowsill, or a warm spot in the garden, and by this time next year, you’ll have strong plants that should already be in flower and planted in the garden.
- Fill a seed tray or module tray with seed compost.
- Water the soil lightly.
- Thinly sow bee balm seeds over the compost (or one seed per module).
- Do not cover them with compost, they need light to germinate.
- Keep them warm, and in good sun.
- Keep the soil moist.
- Germination will take 2-6 weeks, and will be sporadic.
- After 6 weeks or when they’ve all germinated (whichever is sooner) move them out of direct midday sun, and keep them moist.
- When they’re large enough to handle, plant them into individual pots (about 8 weeks after sowing).
- Keep them warm and protected from frost over winter and they should burst into life in spring.
- In late spring or early summer, plant them into the garden, or larger pots.
Propagating Bee Balm from Stem Cuttings
Stem cuttings take reliably well from bee balm, either from basal cuttings or shoot cuttings. The methods for both types of cuttings are identical once you have the cutting ready.
Take basal cuttings by cutting right at the base of a new stem in early spring, trying to take a small nick of the rhizome with it.
Take shoot cuttings by pruning 10-15cm of non-flowering shoots in mid-late spring.
After that, follow this basic step-by-step bee balm cutting guide:
- Having taken your cuttings, trim the leads from the bottom half.
- For shoot cuttings, make sure the lowest point is right below a node.
- Dip the base of the cutting in rooting hormone if you have any (it helps but isn’t essential).
- Place your cuttings in a glass of clean water.
- They can root in as little as two days, but usually take about ten days.
- If, after 14 days, they haven’t rooted, compost them and try again.
- Once roots are about 5 cm long, carefully transplant each cutting into its own pot, filled with loose, free draining compost (add perlite, vermiculite, or grit to improve drainage).
- Grow the cuttings on a bright spot, away from direct sunlight.
- In about 2 weeks, they should have rooted really well, and new shoots should be vigorous.
- Pinch out the tips down to a pair of leaves to encourage bushing out.
- Plant them out in the garden when they’re big enough and roots have filled the container.
Bee Balm Propagation from Root Cuttings
The most reliable way to propagate young bee balm plants is from root division. Their thick, underground rhizomes make great cutting material, and in early spring you literally can’t go wrong.
If you take root cuttings from bee balm in spring, you should have flowering plants by mid-summer.
- Dig away the surface soil around the base of your bee balm until you find a thick rhizome.
- Cut 5 cm sections of root in spring, if you’re lucky they’ll already have shoots on.
- Place them horizontally into a pot, half filled with moist compost, and cover with 1-2 cm of compost.
- Keep them moist, and in a bright spot for two weeks.
- Shoots should reliably form very quickly, and the pot should have rooted fully after one month.
- Your root cuttings are ready to plant out whenever they develop new shoots from the base.
- Pinch out each new shoot to a pair of leaves when it gets to 10 cm tall.
How to Propagate Bee Balm from Division
Established clumps of bee balm not only offer great material for new plants, but benefit from division. Bee balm in the right conditions grows vigorously and can spread quickly around borders, so dividing it should be a regular occurrence.
To divide bee balm in the ground, just dig a spade down into the roots and pull up clumps. Once they’re out of the ground, cut them back to about 10 cm from the ground and replant them.
That’s literally it, no need to fuss, just a ton of new, hardy bee balm, ready to plant straight into the garden. Done in early spring, this should produce reasonably mature plants by the end of summer.
Caring for Bee Balm
Bee balm is a low-maintenance plant, known for its ability to cope with nearly all situations, so you're more likely to kill it with kindness than with neglect. However, there are some great tricks to get the most out of its flowering season, and make sure it looks its best through dry summers.
Mulching Tips
Mulching bee balm is only a good idea if it’s done in spring. Winter mulches can lock moisture into the ground, and even in dry winters, if it gets cold, that can kill the roots.
Mulch in spring with organic compost or soil improver to support soil structure and nutrients as well as locking in moisture for warmer summer months. Avoid mulching over any cut stems to avoid direct infection.
Fertiliser
It’s not necessary to fertilise or feed bee balm, but I’ve found that it helps to produce stronger flowering stems and often brighter blooms. Any balanced liquid feed in spring in a high concentration will be more than enough to boost soil nutrients. I find that three capfuls of liquid seaweed in a watering can is enough.
Pruning Bee Balm
The only real part of bee balm care that can get complicated is pruning. Most gardeners have an instinctive drive to cut everything back in winter when its leaves die back, but bee balm like many herbaceous plants much prefers to be left alone through winter.
Leave bee balm stems intact for winter structure, and then cut them back to 10 cm in spring. In a mild winter, the lowest leaves can stay green for the whole season. These, or the nodes left behind, will sprout quickly after an early-spring prune, and lead to vigorous growth, without risking winter rot.
Deadheading
As well as pruning in spring, deadheading throughout summer is important with any monarda cultivar. The more you deadhead, the more it will flower, producing blooms that can last right through into early winter.
When you deadhead monarda, cut back to a pair of leaves or a bud, which will produce new shoots and blooms.
Repotting Bee Balm
Bee balm grown in pots benefits hugely from being repotted at least once every three years. Be brave and bold here too, don’t try to take a little bit off at a time.
Pull your bee balm out of its container, split it into four parts, and replant each into a new pot the same size as the one it came out of.
Each division will grow into a vigorous new plant and fill its pot within three or four years.
How to Harvest, Store and Use Bee Balm
Why grow medicinal or herbal plants if you’re not going to use them? Bee balm might not be the best known edible plant in most gardens, but its flowers are gorgeous in salads, and its leaves and stems can also be used to brew a delicious cup of tea, with a flavour similar to earl grey (which gets it flavour from true bergamot oranges)
When is Bee Balm Ready to Harvest?
As soon as the first leaves appear in spring, they can be harvested for infusions, but it’s best to wait until mid-summer and use deadheading as an excuse to harvest some richly scented flowers, and even bolder blooms.
The best time to harvest bee balm is while it is in full bloom, and before the flowers fade, as the flowers have the best flavour, and add a sweeter note to teas.
How to Dry Bee Balm
You can just harvest flowers and dry them on dry towels on a windowsill before storing them in an airtight jar, but I find the best way to harvest and process bee balm is to cut back whole stems to a lower node.
This both helps to aerate your plants and promotes new growth that will hold flowers for months to come.
After that, set up a washing line indoors, in a dry room, and peg up each stem with about an inch between them. After a week, you’ll have dry bee balm that’s ready to harvest as soon as the stems snap (if you’ve got a humidity reader it should be below 65% for a moderate drying speed that holds in flavour).
Best Edible Uses for Bee Balm
Bee balm leaves and stems are best dried and used in teas or infusions. Drying takes away the bitter flavour of fresh leaves, and makes for a much smoother drink.
Bergamot flowers can be used immediately after picking, but once dried can be stored indefinitely in air-tight containers. Use bergamot flowers (fresh or dry) to decorate salads, infuse water for drinks, cocktails, or baking, to just make plain, warm cups of winter tea when you need it most.
Common Bee Balm Pests and Diseases
There are no common pests for bee balm in Australia, but aphids, thrips, and mealybug can all cause a problem with new growth in spring. Slug, caterpillars, and other larger leaf-eaters tend to stay away because of the pungent fragrance.
To get rid of pest infestations just spray them with a powerful hose or wipe them off with a cloth. If that fails, spray the infestation with a solution of water and dish soap which will suffocate them. You’ll need to rinse them off a few days later.
Check out our detailed guide on getting rid of aphids if you’re experiencing an infestation.
Fungal problems are common on bergamot, which is generally sold as a plant that both likes moisture and can cope with drought – a confusing set of likes and dislikes for any gardener to deal with.
Overwatered, or over-humidified bee balm commonly suffers from mildew and rust, but they can be avoided by pruning out excessive foliage, removing disease stems, and avoiding the leaves when you water your plants.
While bee balm is drought tolerant, it’s not naturally able to cope with severe Australian summers, so will need irrigation, or watering generously once a week through summer in hot weather. Bee balm in pots needs watering as soon as the soil starts to dry out to avoid leaf drop from drought.
Bee Balm Frequently Asked Questions
Do you need to cut back bee balm?
Bee balm needs cutting back, but only in spring. Avoid cutting bee balm back in winter as this can open up dormant stems to moisture, which can lead to problems at the root.
Why is it called bee balm?
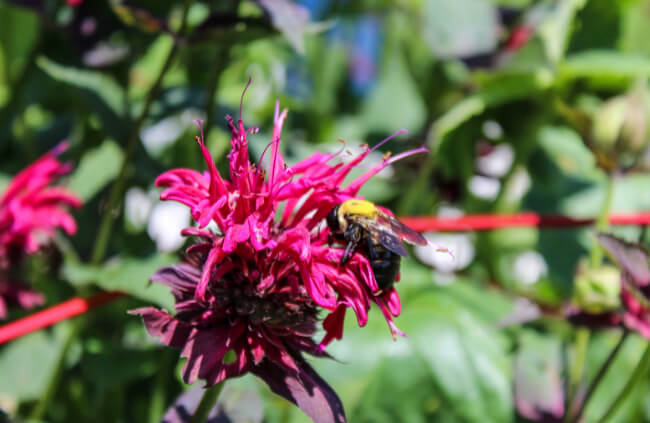
Bee balm got its name from its soothing anti-inflammatory properties, traditionally used to soothe bee stings and insect bites. It’s also, coincidentally, an excellent way to lure bees into your garden thanks to its open flowers, accessible pollen, and long flowering season.
Does bee balm need deadheading?
Bee balm definitely needs deadheading through summer. It will survive and look good regardless, but with deadheading you can extend your season from two months of flower to five or even six.
Is bee balm invasive?
Bee balm isn’t an invasive species, as it doesn’t self-seed easily in Australia, but it does spread in the garden through rhizomatous roots, meaning it needs to be divided and spreading growth controlled every couple of years.
What’s wrong with my bee balm?
The most common thing that goes wrong with bee balm is mildew, causing a powdery white coating over large sections of leaf. This can be treated with topical fungicides, but it is best treated by reducing watering and cutting out any damaged growth.
Does bee balm lose its leaves in winter?
Bee balm loses its leaves every winter, and regrows them every spring, with an exception of a handful of annual species.
Why doesn’t my bee balm smell?
If your bee balm doesn’t have the same strong fragrance you were initially attracted to, it’s probably due to a lack of light. Bee balm in brighter locations produces more fragrance, which is released into the air on warm days.
Are bergamot and bee balm the same?
Bergamot and bee balm are both common names for Monarda, a varied genus of herbaceous plants, though strictly speaking bergamot is a name given due to its fragrance similarities to bergamot oranges, whose peel gives flavour to bergamot tea and earl grey.
Wrapping Up Our Bee Balm Growing Guide
Bee balm might be thuggish, but it’s worth the upkeep. There are no other herbaceous plants that offer the same level of fragrance along with annually refreshed foliage and floating swathes of colourful blooms.
Add to that their fascinating flavour, and there’s honestly nothing that should put you off growing them. For the sake of cutting them back once every couple of years, you can grow bee balm anywhere and everywhere, and the benefits are undeniable.
Published on August 6, 2023 by Maisie Blevins
Last Updated on September 20, 2025

