Digging up a healthy harvest of homegrown potatoes is one of the most exciting moments in any gardening year. These earthy, waxy, or fluffy tubers are incredibly easy to grow, but with a little bit of extra know-how, you can set yourself up for a huge harvest that’ll keep your cupboard stocked all year round.
Follow our guide on how to grow potatoes in Australia every step of the way to get the most out of your little patch of earth.
More...
Family: | Solanaceae |
|---|---|
Genus: | Solanum |
Species: | S. tuberosum |
Common Names: | Potato |
Location: | Outdoor |
Type: | Vegetable |
Growth: | 1m (H) x 0.5m (W) |
Sun requirements: | Full sun |
Foliage Colour: | Green |
Flower Colour: | White & purple |
Flowering: | Summer to autumn |
Fruit: | Edible tubers (roots) |
Maintenance level: | Medium |
Poisonous for pets: | Foliage and raw tubers are toxic to cats and dogs |
Getting to Know Potatoes
How Do Potatoes Grow?
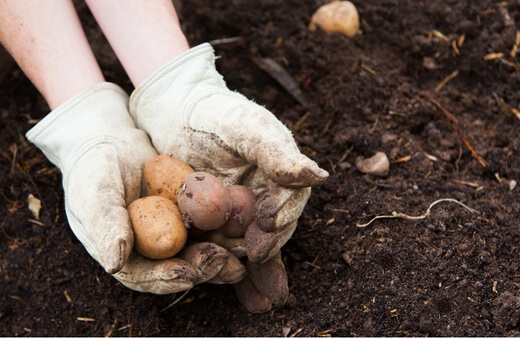
Potatoes grow from underground tubers; swollen roots that store nutrients, moisture, and energy to feed the plant above. Like any potato in your cupboard for slightly too long, those tubers will send out multiple shoots from divots called ‘eyes’.
Those eyes can be individually propagated, or planted as one entire tuber. We’ll look into the differences and pros and cons later, but in both methods, the top growth develops as multiple green stems are covered in loose but broad green leaves.
Towards the end of their development, potato plants produce white and purple blooms with yellow centres. When those flowers fade, the plant begins to droop. This is a good sign that the tubers below are almost ready to harvest.
Different Types of Potatoes
There are three different types of potatoes, but they share the same basic genetics and grow in the same way. The only real difference is how long they take to flower, and their tolerance to cold temperatures.
Generally, potatoes that are harvested later in the year are firmer, waxy potatoes, while early potatoes tend to be a little flourier.
First Early Potatoes
First early potatoes can be planted pretty much all year round, but do best when planted in early spring or even late winter, after any risk of frost. In most of Australia, first early potatoes have a relatively short harvest time; just over four months in most cases.
First earlies include small salad potatoes and large waxy varieties but tend to be best for boiling.
Second Early Potatoes
Second early potatoes can be planted any time from late spring through to early summer. I prefer planting them in early summer to stagger the crop from my first earlies. Second earlies are usually ready to harvest after 4-5 months. For me, that’s usually mid-autumn.
Main Crop Potatoes
Main crop potatoes can be planted at the same time as other potatoes, but do benefit from slightly cooler conditions closer to cropping, so I’d always suggest planting them in the summer so they can carry on through to winter.
Their flower's fading is a good indication of ripeness, but it’s good to leave their stems to wilt down slightly before harvesting as this helps to harden their skins so they store for longer.
How to Grow Potatoes in Australia
This guide to growing potatoes is great for beginners and seasoned pros alike, so take some time to get to grips with the most important timings and care tips for growing potatoes in Australia.
Guide to Planting Potatoes
Each type of potato needs slightly different planting times, and their harvest times will vary based on climate. In NSW and QLD, it’s worth checking for warm-climate potatoes, as nearly all common varieties prefer cooler soil towards the end of their growing time, making them difficult to grow through summer.


Get Your Free Guide:
Master Growing Australian Natives eBook
A Must Have Complete Guide for Every Australian Garden
Get Your Free Guide:
Master Growing Australian Natives eBook
A Must Have Complete Guide for Every Australian Garden

Planting first early potatoes
First early potatoes, or new potatoes, should be planted in September and October, taking advantage of the slightly warmer soil, while the air is still quite cool.
When to plant second early potatoes
Plant second earlies in late spring. Any time from October to December is fine, while there is still enough moisture in the soil to keep them going as young plants, but the air temperature is rising to encourage vigorous top growth (and more regularly hilling up, which we’ll talk about later).
Planting main crop potatoes
Plant main crop potatoes in early or mid-summer. Try to avoid late summer when droughts are more common. If you live in warmer parts of Australia it's worth planting them in autumn as they can cope with winter temperatures as long as it doesn’t freeze.
I usually plant my main crops in January or February, but March would be fine further north.
How to Propagate Potatoes
There’s some bizarrely conflicting information online about how to propagate potatoes, so let me start by saying that potato seeds are not a sensible option. At all.
There is a big difference between a potato seed and a seed potato; most importantly, potato seeds have nothing to do with the tuber, develop in flowers, and take about two or even three years to mature into a plant that is worth harvesting.
Seed potatoes are the name given to potatoes themselves, stored over winter in dark, cool, dry conditions, and sprouted a few weeks before harvest.
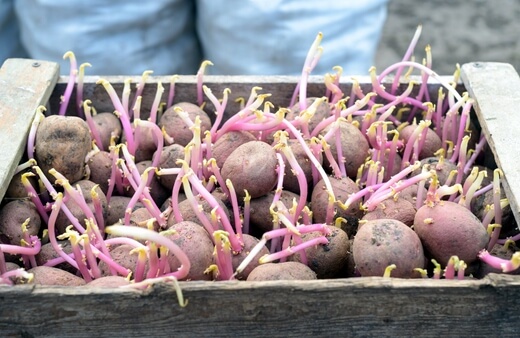
Understanding potato tubers & seed potatoes
Potato tubers, the fleshy roots that end up on our plates, are essentially swollen sections of root designed to store water and nutrients. As the plant dies back in winter, any remaining energy is put back into the tuber.
When stored through winter, that tuber will toughen its skin, and the insides will break down slightly, producing a ball of energy that’s ready to sprout again, so always keep a few potatoes from each harvest for next year. These are your seed potatoes.
How to prepare seed potatoes for planting
There are two ways to prepare seed potatoes for planting; the easiest is to chit them, but you can often get more plants, and bigger tubers by separating each eye. The eye of a seed potato is the dimple or protruding node.
Some potato tubers can have up to six of these, and each will grow into a new plant. To help balance nutrients and create a less-dense growing space, many gardeners prefer to cut each tuber, then leave it to callous over for a week.
Once calloused, they can be planted like any other seed potato; 1 ft apart, 15cm deep, and with plenty of compost of manure.
Should you chit your seed potatoes?
Chitting is the process of bringing your potatoes out of storage as gently as possible. Rather than plunging them straight into the ground, you can rest each tuber in an egg box segment and leave it in the sun for a week.
The eyes will start to sprout, and when there are small leaves beginning to unfurl, they are ready to plant out in the garden. I always chit my seed potatoes, but it's more a habit than a necessity.
My grandad always taught me that chitting helped to kick start potatoes and that it sped up the harvest time. However, the reality is that it doesn’t make a huge difference.
You can plant potatoes directly into the ground, and the moisture and warmth will quickly trigger new growth. Chitting potatoes is useful though, and if nothing else, an important gardening tradition that’s worth trying.
Preparing Soil for Potatoes
Potatoes are very, very, hungry plants, and are one of the main reasons we practise crop rotation in our gardens (more on that in a minute). Nitrogen and carbon are hugely important parts of their diet, and by far the best way to do that is with well-rotted manure, but there are some great liquid fertilisers that have similar effects.
To prepare the soil for potatoes:
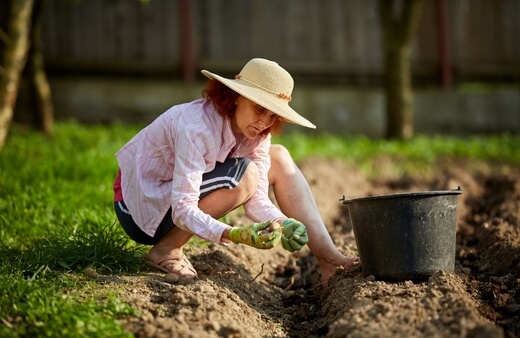
- Dig out a trench that is at least one foot deep, moving the soil to one side of each trench.
- You should end up with rows of hilled soil, and channels or sunken soil.
- Fill the base of each trench with 5-10 cm of manure or compost (some gardeners use hay or kitchen waste).
- Use a similar technique for pots, but keep enough soil to refill the pot to one side (We’ll come to that later).
Compost vs Manure; What’s Best for Potatoes?
Horse manure, rabbit poo, or chicken manure are ideal for potatoes, but always make sure they are rotted down to the point that they no longer resemble lumps or dung, and are easily pliable, almost like soil.
They are all high in carbon and nitrogen and give a huge boost to potatoes. If you don’t fancy the idea of a manure-covered garden, compost is a useful alternative, but holds less moisture, and releases less potent nutrients.
In a bind, any growing medium will do though, just make sure you fertilise it well throughout its growth.
Choosing the Best Location for Potatoes
Potatoes need full sun and plenty of moisture, but should never be left sitting in damp, waterlogged conditions. At worst, this will rot the tubers, and cause blight that kills the top of the plant.
At best, it will restrict growth, and cause tubers to stop storing water, producing smaller potatoes as a result. Choose a bright, sunny spot, and never plant potatoes in the same spot two years in a row.
The best method for a healthy veggie garden is to practise a four-year crop rotation, meaning four raised beds, each with a different crop. Every year, you move the crops to the next bed over.
This helps to replenish nutrients (beans and sweetcorn re-nitrogenate the soil after potatoes) and reduce pests (potatoes have frustrating pests and diseases that live in the soil for up to three years.
By leaving a three-year gap between potatoes in the same spot, you eliminate the pests and can start fresh each time.
Planting Potatoes in the Ground vs in Pots
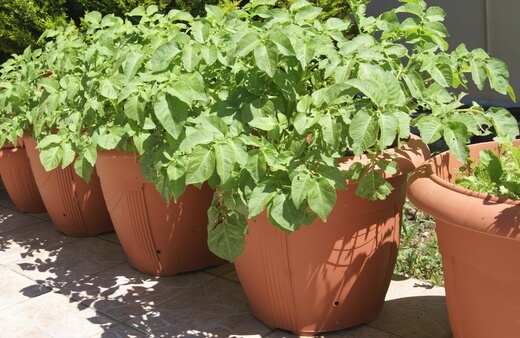
If you don’t have raised beds, potatoes grow really well in pots, potato grow bags, or even cardboard boxes (but they will degrade through the year). Always use black bags or pots, as these will help to keep the soil warmer through winter, while the leafy growth stays in cooler conditions above ground.
Recycle compost bags by turning them inside out, and piercing drainage holes in the base, and 2” above the base so your potatoes don’t sit in water. Turning them inside out utilises their black inner lining.
How Deep to Plant Potatoes
Potatoes, like any bulb or tuber, should be planted at three times their own depth. That means that a new potato should be planted about 10cm deep, while a large baking variety should be planted 15-20cm deep.
If you’ve chatted your potatoes, try to keep the leafy growth just poking out of the soil surface when you plant them.
How to Care for Potatoes
After planting, potatoes still need some attention, but will still grow quite happily even if you forget about them. For example, this year we found a potato plant growing in the soil from a tuber we missed last year.
We’ve done nothing for it (no water, no fertiliser, nothing!) and I dug it up this week to find at least 2 kg of potatoes underground. Not the biggest harvest, but certainly not bad for zero effort.
If, however, you want more reliable yields, healthier crops, and less chance of pest damage, follow our guide below for step-by-step potato care through the growing season.
Mulching potatoes (Hilling up potatoes)
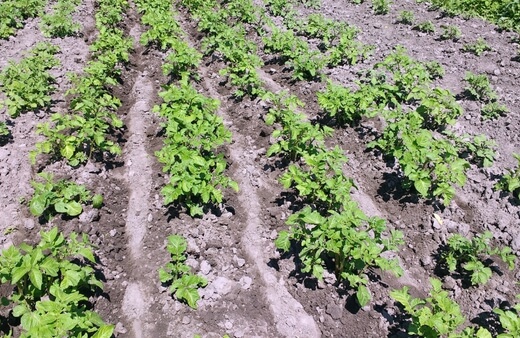
Mulching potatoes, also called ‘hilling up’, is the process of drawing the soil beside each channel back over the potatoes. Eventually, you’ll have a hill over the plant, rather than next to it. Here's an illustration of hilling potatoes for reference.
When we planted the potatoes earlier in the guide, we said to move the soil to the side, to create hills (or to keep it to one side for pots and bags). Each week, or every two weeks, cover the new growth of your potato plants with new compost, manure, or soil, leaving just the leaves visible.
This does four things; retains moisture; renews nutrients; encourages roots and tubers to form from the stems; blocks light. The first two are fairly obvious, but still important as potatoes need constantly renewed nutrients through their growing cycle. The second two are pretty fascinating.
By hilling up your potatoes you encourage the stems to convert to roots, which can produce a few extra potatoes along the way (these will obviously be smaller than the lower-down tubers, which will be forming really well underground at this point).
You also block light to the tubers by hilling up. When light hits a potato tuber, its skin turns green. Green potato skins contain high concentrations of a toxin called solenoid, which is mildly poisonous, and in large quantities causes serious stomach issues – a reversion back to its shared DNA with deadly nightshade.
What is the best fertiliser for potatoes
Potatoes need a fairly balanced diet of nitrogen, phosphorus, and potassium (potash). Manure and compost can provide this by themselves if regularly hilled up, but you can supplement those nutrients with liquid seaweed, or even a basic tomato fertiliser.
Essentially, anything with an NPK of 5:5:8 or thereabouts will be absolutely fine.
If you prefer to use solid fertilisers than liquid fertilisers, sprinkle a small amount of chicken manure over the bed once a month for a slower release of nutrients. One handful per square metre is more than enough.
How often to water potatoes
Potatoes, in theory, don’t need watering. Rainwater is often enough for them, but that relies on your climate providing enough water to balance the summer temperatures, which is problematic in warmer parts of Australia.
The most straightforward advice here is to water them if the soil seems at all dry on the surface. I tend to water my potatoes once a week, really generously, which helps to keep them regular.
If there has been heavy rainfall, I’ll skip a week. If it’s mid-summer, and mid-drought, I’ll water generously once every 3-4 days so the tubers don’t dry up.
Pruning and trimming potato plants
If you want impressive potatoes, and you don’t care about the overall harvest, you can cut back new sprouts as they appear, and stick to just one sprout per tuber (similar to growing from eyes, rather than seed potatoes).
Essentially, the localised nutrients focus on a handful of tubers from one sprout, rather than tubers coming from every eye of the seed potato. Personally, I prefer to leave the entire plant growing naturally, as the yield will be higher, but tubers will be individually smaller and easier to cook with.
If you notice brown stems or foliage, cut it back as this is usually a sign of fungal problems. Other than that, there is no reason to prune or trim potatoes.
Harvesting Potatoes
With pretty significant differences between harvest times for first early potatoes, second earlies, and main crop potatoes, it’s important to understand the visual signs, over and above dates and timings.
However, as a very rough guide, if you plant first early potatoes in September, they will be ready to harvest 10-12 weeks later. Second early potatoes are ready 12-16 weeks after planting, regardless of when you start them.
Main crop potatoes can vary widely in harvest time, but I would say 16-24 weeks is a good time to be looking for clues from the top growth.
When are potatoes ready for harvest?
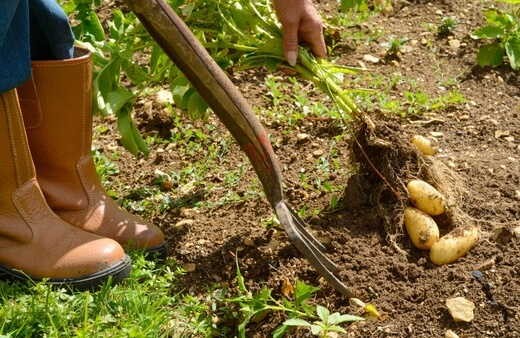
Potatoes are ready to harvest when the flowers have finished, and the top growth begins to wilt. Don’t leave them for too long, as potatoes stored in the ground after the plant has finished are likely to develop pustular lesions, or split their skins.
Flowers are a good sign that potato tubers and seed tomatoes have done their job, so when they fade, the potato underground is ready. If you notice pollinated flowers, they will look like green tomatoes.
This isn’t anything to worry about, just don’t be tempted to eat them as they are incredibly toxic!
How to prepare potato plants for harvest
Once flowers have faded and the stems and foliage begin to wilt slightly, stop watering your potatoes, and allow the soil to dry out a little for the next two weeks. This will help to develop tougher skins and prepare them for longer storage.
How to harvest potatoes
If you planted your potatoes in pots, harvesting potatoes is beyond simple. Just tip the pot out gently, and take out any potatoes you find. Done. Potatoes in the ground are slightly more complicated as it’s virtually impossible not to stab a few while you dig them up.
Aim to dig to the side of a potato trench with a wide tined fork, and lift the plant with one hand, while you lift the soil with the fork. Be gentle but thorough, and don’t be upset if you break a few potatoes in this process.
It will always happen, and if you wash them, they are fine to use for up to a week even when split in half.
How to Store Potatoes
Do not wash potatoes when you harvest them. Leave them to dry, and then rub the dry soil off by hand, or with a brush. Washing potatoes fresh from the ground will take off their skins, and prevent them from storing properly.
Leave your dry, slightly soily potatoes somewhere cool, dark, and dry, and they can keep for up to six months. It sounds like a long time, but you would be amazed at how long raw potatoes will stay in a dry cupboard.
Just keep them away from light, and protect them from humidity.
Potato Growing Problems
The main challenge when growing any potato variety in Australia is temperature. Warm summers will put a strain on your crops, so you will need to manage this with more regular watering, without creating soggy or boggy conditions.
Potato Pests and Diseases
Aside from climate-related problems, there are a few common pests and diseases that are pretty much inevitable over time. Hopefully, you’ll avoid them, and will usually be ok in your first year.
In your second growing year, make sure to practise crop rotation to reduce the recurrence of any problems in the first year.
And don’t take too much of what you read online that seriously. Remember, we benefit from rigorous environmental protections and import regulations in Australia, so the majority of ‘potato’ pests online have never been found on our shores.
Colorado Potato Beetles, Vegetable Leaf Miners, Serpentine Leaf Miners, Black Bean Aphids, Pale Cyst Nematodes, Root Knot Nematodes, and Zebra Chips do not pose any threat to potatoes in Australia.
Equally, late potato blight is a very damaging disease to potatoes across the world but has yet to be a problem for Australian growers. The fungal pathogen has, thankfully, not reached our shores.
So let’s take a look at the most common potato problems below, but please don’t let them put you off. Reading about any plant pathogen can be enough to discourage eager gardeners, but keep in mind that most are rare, and many will barely affect your plants if you catch them early.
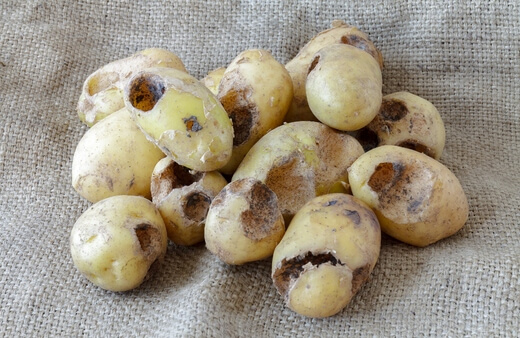
Common Potato Pests
African Black Beetles
African Black Beetles are damaging to most crops in Australia, and are not put off by the strong scents of rosemary, lavender, or eucalyptus like most pests. They are about 1-2cm long, with smooth black shells and hairy blood-red legs.
They bore into the stems of plants, and eat down into the stem, often below soil level, causing severe problems for potatoes. They spread by flight and are to eradicate, but encouraging birds into the garden will go a long way to removing these challenging pests.
Cluster Caterpillars
Cluster Caterpillars won’t directly kill potato plants, but do create the conditions for other fungal problems to occur, and will limit photosynthesis. The brown, mottled moths lay eggs on the underside of leaves in a furry capsule.
As the caterpillars develop they wrap leaves around themselves for protection creating a cigar shape and feeding on the inner rolls. Removing any curled leaves will remove the young caterpillars, as when they mature, the leaves will uncurl, revealing a mostly eaten leaf.
Potato tuber moths
Potato tuber moths are kind of fascinating, but really do cause a lot of damage. Unlike most caterpillars, their eggs are laid on leaves, but the larvae will travel down the stem and feed on the tuber.
When you dig up the tuber, these slow-forming moths can often be in high numbers and larvae are only detectable when you cut open your tuber to find it’s ruined.
Moth pheromone traps do help to limit this, but if you are aware of them in your region, just make sure to net your potatoes. The moths are about 17-20mm across, so you will need fine mesh netting.
Aphids
Aphids are common on potatoes and will be present in your garden no matter how hard you try. They are one of the most widely spread creatures on the planet and are impossible to get rid of completely. Personally, I have never found aphids to be a big problem for potatoes, as they will move on if a plant is getting weak, and it will recover.
If, however, you do find yourself with a severe infestation, rinse the aphids off potato plants with a strong jet, and then sprinkle baking powder onto the soil, or spray neem oil onto the soil. Neem oil is less likely to damage other pollinators when applied to soil.
Potato psyllids
Potato psyllids affect tomatoes, potatoes, peppers, and aubergines in equal measure as they are all part of the same plant family. They are tiny winged insects (3mm long at most) that suck the sap from every part of the plant.
As the nymphs develop they can travel underground and even feed on the tubers. Early signs of psyllids are puckered and unevenly curling leaves, which will often develop fungal problems as a result.
Remove these parts of the plant, and check the rest of your potato plants for signs. They are mostly found in WA and have movement controls applied beyond WA. Treat them with an organic insecticide where possible.
Common Potato Diseases
Early blight
Early blight is a common fungal problem with any member of the Solanaceae family (tomatoes, potatoes, peppers, and aubergines). It is caused by high humidity, moisture standing on foliage, and spread by insects, wind, and dirty tools.
Initial signs will be yellow lesions on leaves, which later turn brown with yellow rings around them, and eventually grey, with a fluffy mould. Remove and burn any signs of early blight to prevent spread and protect your soil for next year’s crops.
Bacterial wilt
Bacterial wilt is present in hundreds of plant species and is not limited to soft-leaved, annual, or perennial plants. Bacterial wilts are not recoverable and can live in the soil for up to six years, making it difficult to manage potato crops in future years.
If you notice evenly wilting foliage but the soil is perfectly moist, and nutrient levels are good, dig up one plant. If the tubers are also damaged, it is likely to be bacterial wilt.
Remove that plant, and those that are in contact with it, making sure not to make contact with other plants. Remove the affected soil, and allow other plants in the bed to develop in the hope that you catch it early. Do not plant potatoes there again for several years.
Frequently Asked Questions on How to Grow Potatoes

Can you grow a potato plant from any potato?
Literally, any potato you buy from the grocery store will grow into another potato. If you’ve got potatoes in the cupboard that are starting to sprout, leave them somewhere sunny for a few weeks and you’ll have stems and leaves showing in no time.
If you like that particular variety from the store, plant it in the garden and grow your own using our simple guide.
How many potatoes can you grow from one potato?
The eyes of a seed potato are not what determines the number of potatoes you ultimately get. New tubers will form on the fibrous roots, as well as any new roots that grow from the stem as you hill up.
So, depending on care, you can get anywhere from six to twenty-six potatoes from a single tuber in one growing season.
Are potatoes good for you?
Potatoes aren’t exactly a super food, but they do have some nutritional benefits and are certainly better for you than other carb-heavy foods. They are rich in vitamin C and contain loads of minerals and fibre, which can help with a balanced immune system, and digestion (maybe just don’t eat them every day if you’re on a diet…).
What plants grow well with potatoes?
Any Solanum species, including potatoes, grow well alongside basil or marigolds. These pest-repelling plants will help to deter aphids, slugs, and white flies, which can keep your crops healthier and pest free for longer.
How long do potatoes take to grow after planting?
Potatoes take anywhere from 3 months to 6 months from planting to harvest, depending on the varieties and when you plant them. First early potatoes, or new potatoes can be ready to harvest incredibly quickly while main crop or alter crop potatoes can be planted in spring for a winter crop.
Can you grow potatoes in 2 months?
While most potatoes are ready to harvest after 3-6 months, there are a few exceptionally fast-growing new potatoes that can be ready to go from tuber to harvest in as little as two months.
Plant them in late spring with excellent moisture levels in highly nutritious soil, and they can be ready for harvesting in mid-summer or a crop of small, soft-skinned salad potatoes.
How do I know when my potatoes are ready to harvest?
Potatoes are ready to harvest when the top growth begins to droop. If you harvest while the stems and leaves are all green, there is still plenty of life in your crop, and too much water for effective storage.
If you wait until the vines have died, there is a high chance of soil-borne infection that can damage the crop too, so dig them up as the plant begins to fade.
How often should potatoes be watered?
Potatoes need 2 inches of water per week as a minimum in most of Australia. In moist conditions with partial afternoon shade, that can be reduced, but in full sun in warmer parts of the country, they will need 2-3 inches of soil and should never be allowed to dry out completely.
How long after flowering are potatoes ready to dig?
Potatoes can be dug up while flowers are still on the plants, and sometimes you won’t get any flower at all until it’s time to harvest, so avoid using flowers as a guide for potatoes.
If your potatoes do flower, remove the flowers as they are wasting energy for the crop below.
Will I get potatoes if they don’t flower?
If your potatoes don’t flower, it will not affect the crop below ground. Flowers produce tomato-like seed pods, which can set seed, and will eventually produce new plants, but it’s not worth keeping them and they are not edible.
What happens if you dig up potatoes too early?
If you dig up your potatoes too early they won’t be fully developed and will not store properly due to excess moisture. When you think it’s time to dig up your potato crop, just try to gently check them with your hand.
If you can feel a few decent potatoes under the soil, dig away. If there’s nothing there, leave it another week or two and then try again.
Can I plant potatoes I just harvested?
Potatoes are perennial vegetables that grow from underground tubers. In cold damp winters, their tubers can rot off, but in Australian winters they are more than fine to be left in the ground and will produce again next year.
We always leave a few potatoes in the ground by accident, and they invariably come back up each year.
For more plants to grow in your garden, have a look at our in-depth growing guide on Murnong yam daisy, an Australian native plant that taste the same as potatoes.
That's Everything You Need to Know on How to Grow Potatoes in Australia
Growing potatoes at home needn’t be a chore. It can be something to get the whole family involved in. If you’ve got kids, nieces, or nephews, let them grow their own potatoes in a bucket and race to see who gets the most. It’s as fun for you as it will be for them, and you get to eat the end results!
However you decide to grow potatoes, stick to the basic rules in this guide and you won’t go far wrong. Australia is, without a doubt, a challenging climate for potato growers, but that doesn’t mean you can’t grow potatoes here.
Just make sure you’re adapting to the weather so your plans can too. So there you have it! Now you know how to grow potatoes here in Australia.
Published on January 28, 2023 by Maisie Blevins
Last Updated on September 20, 2024

