Dramatic and blousy are the words instantly cultivated whenever I come across spider lilies. There are few flowers that share their sheer presence in a garden, and fewer still that can compete with them for attention during their short flowering window.
I think, perhaps, that they suffer in popularity because of the confusion surrounding their breeding, but they deserve space in all of our gardens. If you decide to grow spider lilies at home, you’ll be doing yourself a favour, and adding something really quite unusual to your borders.
Learn how to grow spider lilies with our in-depth guide to these spectacular bulbs, which are long overdue a revival.
More...
Family: | Amaryllidaceae |
|---|---|
Genus: | Hymenocallis, Lycoris, Crinum and Nerine |
Species: | Various |
Origin: | Eastern and southern Asia (Lycoris), South-eastern United States and South America (Hymenocallis) |
Common Names: | Spider Lily, Corpse Flower |
Location: | Outdoor |
Type: | Bulbous perennial |
Growth: | 30-60 cm tall |
Sun requirements: | Full sun or light shade |
Foliage Colour: | Green |
Flower Colour: | Various (red, blue, orange, white) |
Flowering: | Late summer |
Edible Parts: | None |
Maintenance level: | Medium |
Poisonous for pets: | Toxic to cats and dogs |
What are Spider Lilies?
‘Spider lily’ is a fairly general term for a group of plants in the Amaryllidaceae family. Nearly all plants in the family are bold bulbs, with towering flower stems, tipped with flared umbels, or globes of tightly packed blooms. The most famous members being onions and Amaryllis.
Thanks to the variety of genera that make up the spider lily group, there is, quite literally, a spider lily for every condition and every garden, whether it’s dry, rocky, or even marshland conditions.
Different Types of Spider lilies
‘Spider lily’ is the common name for a group of four genera; Crinum, Hymenocallis, Lycoris, and Nerine. We’ll look at each in detail in this guide, because despite some similarities in their flower form, they all require slightly different conditions, and have quite distinct characters.
Hymenocallis
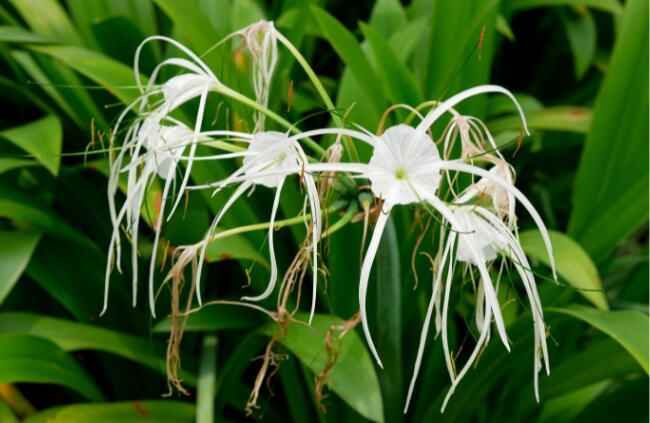
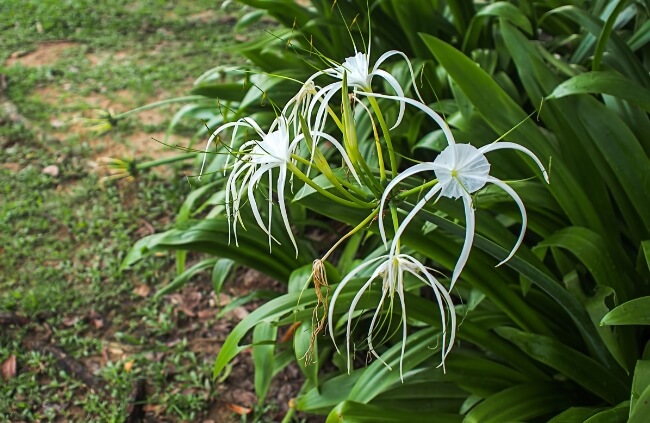
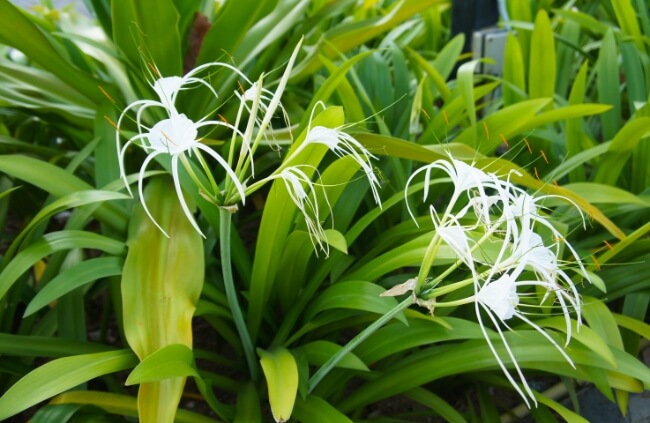
There are 65 distinct species of Hymenocallis, and several hybrids. Nearly all are cultivated for garden use. They are bulbous perennials, which will grow in a variety of positions, generally guided by their native habitats.
The majority of Hymenocallis bulbs are native to marshy parts of North and Central America. They are brilliantly suited to any moisture retentive conditions, and thrive on pond edges as long as the outside temperatures don’t drop below 5°C.
Some species are native to the Caribbean and South America. These species require free drainage, and will rot if temperatures drop below 8°C or moisture levels through autumn and winter are higher than average.
Nerine
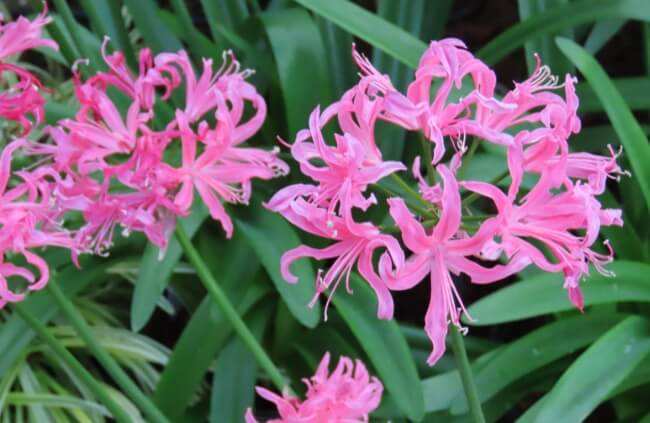
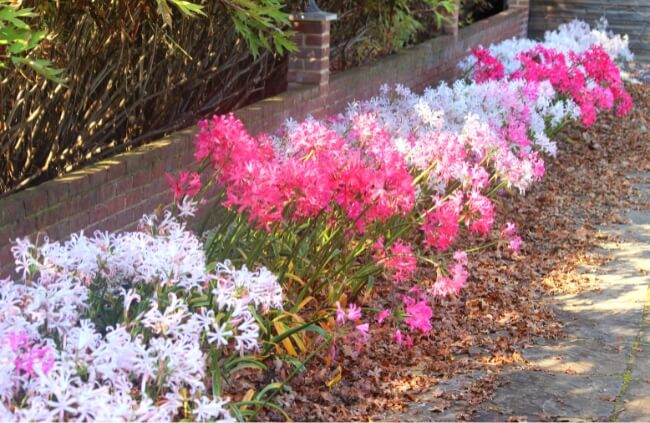
Nerines are the easiest spider lilies to grow, and can generally cope with any soil conditions, provided they are not left damp over winter. They are a small genus of spider lilies, with just twenty-five recognised species, all of which are native to South Africa, where they grow mostly in free-draining conditions.
Brief frosts tend not to bother Nerines, so they are fine to leave in the ground through winter in most parts of Australia, though they are best grown in pots, where they can be stored dormant and dry through winter.
Lycoris
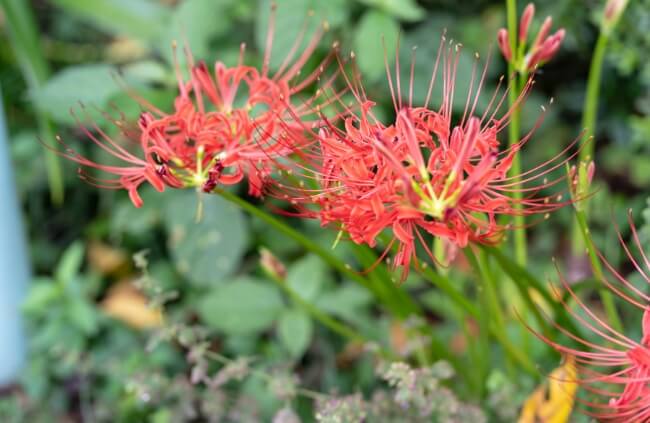
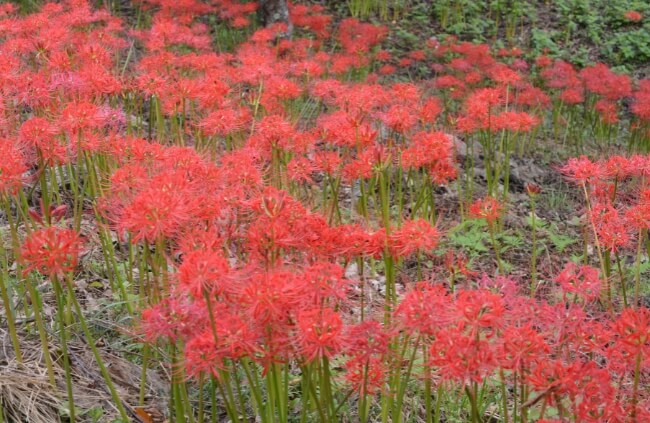
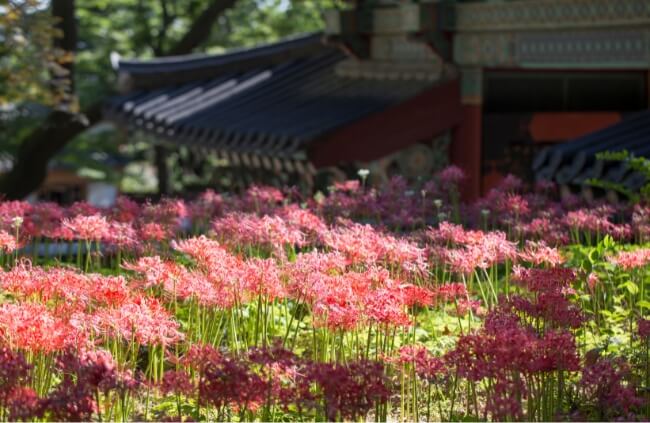
Lycoris are native to southern and eastern Asia, but are also commonly found in the USA where they have naturalised easily. They grow to about 60-70 cm tall, with varied flowers, which on some species are sparse but delicately bell-shaped, and on others, intensely spidery, with frilled petals curling every which way.
Lycoris are generally grown in gardens in one of just twenty two species choices, and each has its own charm, making them the most popular spider lily choice for gardens across the globe as they will generally grow back even if winter reaches 0°C.
Crinum
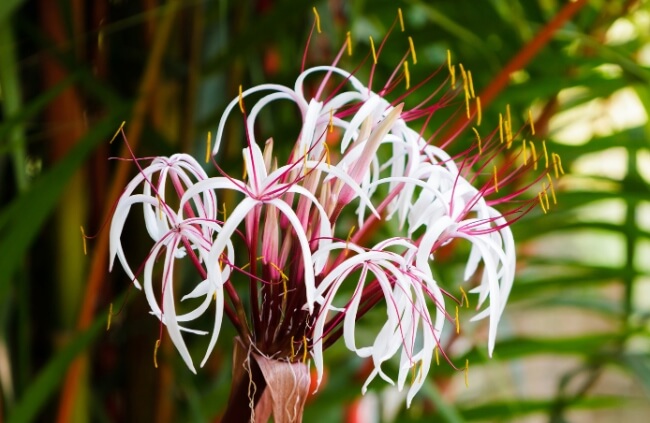
All 105 species of Crinum are native to subtropical regions but without any specific geographic limitation. They will grow quite happily in warm marshland, stream sides, or moist grassland.


Get Your Free Guide:
Master Growing Australian Natives eBook
A Must Have Complete Guide for Every Australian Garden
Get Your Free Guide:
Master Growing Australian Natives eBook
A Must Have Complete Guide for Every Australian Garden
In our gardens, thanks to their inability to withstand cooler temperatures (only hardy down to 10°C), they can be tricky to grow. They are commonly referred to as spider lilies, but their flowers tend to resemble alliums like onions, in sparse globes, rather than other spider lilies with frilled petals.
How to Grow Hymenocallis
Hymenocallis are easy to grow, but challenging to keep alive in cooler climates. Thankfully, provided they are kept moist between sprouting in early summer and flowering in late summer or autumn, they will grow in a variety of light conditions, so if you find the right spot, they are incredibly rewarding plants.
They are hardy down to about 5°C, but we’ve had reasonable success with leaving them in the ground right through winter, even when temperatures dropped below freezing for a few nights a couple of years ago.
To be safe, it’s always best to plant them in pots that can be moved into a greenhouse, or indoors after flowering.
When to Plant Hymenocallis
Plant Hymenocallis bulbs in pots in mid-spring. In cooler parts of Australia, you can still start them in spring, but plant them in pots in a greenhouse for a head start, and bring them outdoors when temperatures reliably get to about 16°C.
How to Plant Hymenocallis
Plant Hymenocallis bulbs at least four times the depth of the bulb, and ideally about 20 cm deep. The depth, particularly in loamy soils, means the bulbs have better access to moisture in summer, and won’t dry out as quickly, and the bulb will be better anchored, producing stronger flowering scapes.
Where to Plant Hymenocallis
Hymenocallis grow best in full sun, on moist soil. They are naturally damp-loving plants (other than a few species that very specifically like good drainage). In warmer parts of Australia with mild winters, they can be planted straight into any loamy, moisture-retentive soil with good sun.
How to Care for Hymenocallis
After flowering, allow foliage to die back before cutting it. The foliage helps to feed the bulbs for next year. If you grow Hymenocallis in pots, move them indoors or into a greenhouse for winter.
Hymenocallis in the ground can either be lifted and dried off for planting next spring, or mulched over to protect from any brief and unexpected frosts.
How to Grow Nerines
Nerines are my personal favourite of the spider lilies. While there isn’t as much choice as Hymenocallis, or the vibrancy of Lycoris, they are much more graceful plants and, particularly the more delicate coloured ones, work beautifully in combination with other herbaceous planting.
When to Plant Nerines
Nerines won’t grow in cold soils, so plant them in late spring or early summer when the soil is thoroughly warmed through.
How to Plant Nerines
For the best flowering performance, plant Nerines deeply in a mix of loose loamy soil and compost, with some sand or grit mixed through. Unlike most spider lilies, Nerines do benefit from good drainage during the growing and flowering months, so add crocks to the base of your container before planting.
Where to Plant Nerines
Nerines are one of the less picky types of spider lilies, and one of the best adapted to Australian summers, with reasonable drought tolerance.
However, don’t get too comfortable as they require regular irrigation for the best possible flowering display.
Caring for Nerines
Nerines can be lifted or stored indoors for winter if there is a frost predicted, but they are reasonably hardy and will generally come back the following year without any extra effort.
Allow nerine foliage to die back completely before tidying it up. If it’s looking messy, roll any foliage back into a ball around the base of the plant after flowering.
How to Grow Lycoris
Lycoris are all about the show. It makes them easily the most exciting spider lily to grow, but it also means there’s a bit more work when it comes to planting and caring for them.
When to Plant Lycoris
There are one or two spring-flowering Lycoris, but the majority are late-summer flowers. Unless it specifically says on the bulbs to plant in autumn, they are late-summer flowering plants, and will generally be in leaf from November or December, and flower from February to March.
Plant Lycoris in late spring for long-lasting displays.
How to Plant Lycoris
Lycoris should nearly always be planted in pots. They aren’t hardy plants unless you live in distinctly tropical or subtropical regions, and require well-drained soils for the strongest stems.
Planting in pots also helps with winter care as they need to stay dry right through winter and spring to prevent bulb rot.
Where to Plant Lycoris
Plant Lycoris in a sunny spot, with as much protection from wind as possible. They are showy, but definitely not strong-stemmed.
How to Care for Lycoris
Lycoris spider lilies should be protected from frost and damp soil from the point the flowers fade until they sprout in late spring or easily summer. That means either lifting the bulbs and drying them out for winter storage, or moving containers into a greenhouse.
How to Grow Crinums
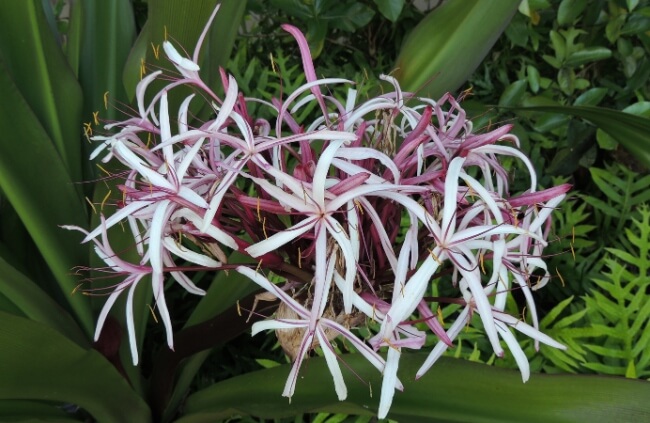
Crinums are neither lilies, nor particularly spidery, but they are incredibly beautiful plants, with tough bulbs that can last through damp winters – just not cold ones.
When to Plant Crinums
Crinum bulbs should be planted in late spring. They will quickly sprout after planting, and develop tall flowering stems, and vigorous foliage before blooming in late summer.
How to Plant Crinums
Crinum bulbs should be planted quite shallow, with the tip of the bulb slightly poking out of the soil. Through summer, they can grow in damp conditions, but thrive on well-drained loam with regular irrigation, producing some of the most dramatic flowers, and bold spear-shaped foliage of any garden plant.
Where to Plant Crinums
Plant crinum spider lilies in bright conditions. They can cope with full sun, but some afternoon shade, at least around the base of the plant, will help them retain adequate moisture.
Crinums can cope with some wind, but filtered wind protection helps to limit rocking once foliage emerges, particularly on taller varieties.
Caring for Crinums
Crinum lilies are not winter hardy so should be dug up after flowering, and after the foliage has died back. If you’re storing crinum lily bulbs without soil, dry them off and store them somewhere cool, dark, and dry over winter before repeating the process.
In warmer parts of Australia, crinum lily bulbs can be left in the ground with a drainage mulch-like wood chip to protect from low temperatures.
How to Propagate Spider Lilies
Each genus of spider lilies develops in slightly different ways, but they can generally be propagated using the same instructions.
The main difference is in seed development, with some developing true bulbil (like leeks and some garlic species) which develop within a year into a developing bulb, and over two or three years into flowering bulbs.
Others develop dense round pods of green seeds, which need sunlight to photosynthesise as soon as they leave the parent plant.
Like alliums and other members of the Amaryllidaceae family, the bulbs will naturally split and divide underground. This can be encouraged by removing spent flowers to focus energy back into the bulbs.
Simply digging clumps of bulbs up in spring will give you instant new plants to move around the garden.
Propagating Spider Lilies from Seed or Bulbils
The seeds and bulbils of all types of spider lilies are best planted immediately when they become ripe. They are usually green, bulb-shaped seeds or bulbils, and should be planted on the surface of a tray of perlite and moisture-retentive compost.
Keep the tray of seeds warm and reasonably moist until they germinate and then store them in a greenhouse or cold frame with dappled shade through winter, with a light misting of water if the soil dries out.
In spring, each seed or bulbil should have produced a small root system. They can now be pricked out and planted into individual small pots to grow on. Keep them somewhere bright, but out of the way for a year while they develop their first season of foliage, and let that die back into the bulb.
In most cases, they can be planted out in their second spring to flower at the end of summer.
Common Spider lily Pests and Diseases
Like any Amaryllidaceae plant, fungal rust, yellow leaves or dry rot are a common problem, and stagnant water or standing water in the soil can cause fungal problems for bulbs regardless of whether they like damp or free-draining conditions.
Good soil preparation ensures moisture retention, but some drainage will generally prevent any fungal problems. They are related, albeit distantly, to alliums and onions, so are actually quite effective at deterring pests all by themselves, but some species can suffer in early summer from mites and aphids.
Chemical control is rarely necessary, and if you notice any yellowing foliage, it’s usually caused by damp conditions and can often be solved by reducing watering.
Spider Lilies Frequently Asked Questions
Why are spider lilies called corpse flowers?
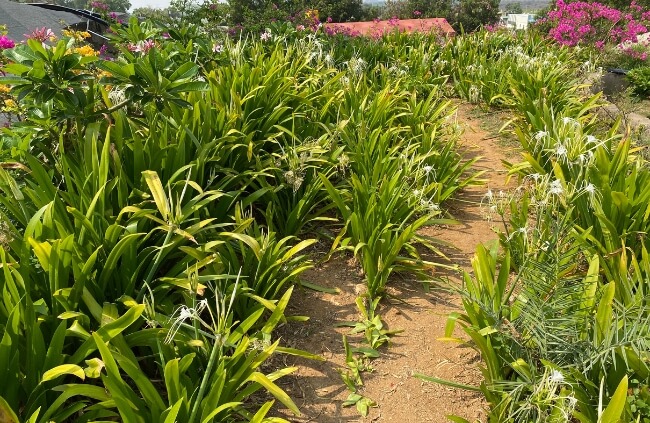
Spider lilies, particularly Hymenocallis and Lycoris, are often referred to as corpse flowers (not to be confused with Titan arum of the same common name), because they are toxic to nearly all mammals, and therefore traditionally planted around graves to ward off animals that may dig up dead bodies.
How do you protect spider lilies in winter?
After flowering, you can feed spider lilies with high-phosphorus fertilisers to strengthen their bulb and reduce the chances of winter damage in mild climates. In cold climates, spider lilies should be stored somewhere dry and protected from frost.
What do you do with spider lilies after flowering?
After flowering, spider lilies should be left to die back. By deadheading, you will discourage the production of seeds, and the plant will focus its energy back on the bulb, helping it to survive winter and improve flowering in the following year.
What is the best fertiliser for spider lilies?
The best fertiliser for spider lilies is nitrogen. In spring a high nitrogen feed will give a big boost to blooming on these bulbous perennials. Feed them just as the first signs of growth begin to show.
What happens if you touch a spider lily?
Spider lilies are toxic to eat, and will cause a rash if you have sensitive skin. If the stems are broken, the sap can cause a significant itching rash on normal skin.
Do spider lilies only bloom once?
Spider lilies are bulbous perennials so only flower once in a season. After cutting back the dead scapes and foliage, they will flower again the following year, as well as forming new bulbs at their base.
Do spider lilies spread?
Spider lilies do spread in a garden, but are easy to manage. Their scapes can develop bulbils or bulbous seeds if not deadheaded, that germinate when they flop down to the ground. The bulbs of spider lilies will also multiply.
What do spider lilies smell like?
Spider lilies have a beautiful fragrance which is predominantly released in the early evenings as the sun fades. The fragrance is usually a heavy vanilla scent, but different types of spider lilies have varying aromas, though most are fairly sweet.
Wrapping Up Our Guide to Spider Lilies
Spider lilies are fascinating plants, and a wonderful way to become more hands-on in your garden. They might not be the easiest plants to grow, and even in warmer parts of the country, it can pay to give them a bit more protection in winter, but they are well worth the effort.
If you’re trying to add drama to your garden, and want something truly reliable, then getting to know how to grow spider lilies in more detail will really enhance your garden design.
Published on September 1, 2023 by Gary Clarke
Last Updated on September 20, 2024


Hello Gary
I've been trying to find how to treat my spider? lilies for what I think is fungal rust. These lilies since new have always had both green and yellow leaves which I love, but I was told recently that the yellow leaves shouldn't be there, and that the rusty-looking marks are actually a virus.
I've never seen any bugs on them, and they're certainly not overwatered.
Can I please send you a couple of photos to get your opinion?
Hi Linda,
Please do send over some pictures, because there are variegated forms of spider lilies you can buy. If you’re growing one of them then you’re absolutely right to enjoy them.
Fungal rust (if that’s what it is) is caused by overwatering or poorly drained soil (which can be caused by compacted subsoil and dozens of other things, so its not necessarily an issue of care), but it’s usually very apparent with clear pustules of orange-yellow dots, followed by yellow blotches, rather than entirely yellow leaves.
If you can send some pictures (email address: [email protected]), we would be really grateful and then I can hopefully give you more specific advice.
Best regards,
Gary Clarke