In the hundreds of thousands of years that humans have existed on earth, cultivated it, and harvested from it, somehow, no one has ever quite worked out what plant label to use in a way that looks good, without the pen rubbing off.
I know it's not the most eye-watering of problems, but I do find it utterly frustrating that nearly every method of labelling plants comes with a compromise.
So here, using my own exasperated expertise, I’ll share some of the most effective ways to label plants, long term and short term, as well as making it affordable and aesthetically pleasing along the way.
More...
Plant Labels Australian Gardening Guide

What are Garden Labels, and Why You Need Them?
Garden labels are anything you use to mark your plants, specify their cultivar or species, and help you keep track of your collections.
For some, those collections might be extensive archives of a particular genus, so labelling is an essential way to maintain the heritage of one variety. For others, it’s just a way of reminding you which tomato plant needs a cane and which doesn’t.
For me, plant labels are an integral part of garden design. I’m fascinated by the way plants develop, and the subtle differences between plants in the same genus that make them unique.
And by labelling my plants, I’m able to share that fascination with visitors to my own garden, who can explore the varieties in the borders and greenhouses in their own time.
I love experimenting with plant labels, and particularly enjoy following their fashions.
Currently there is a particular vogue for black labels with white writing. The chalk and paint pens do rub off and fade with rain, but they are easy to read, and the text is striking without having white labels glaring out of the foliage. But this is a fashion inspired by tradition.
More recently, embossing was a huge trend in garden design. Either embossing brass labels, or plastic labels. The results were hard to read, but long-lasting, without any chance of them rubbing off.
Garden Labels in Garden Design
Today, labels provide real beauty in botanical collections, with ornate hanging chalkboards, standing proud of the soil for the longevity of the text, or embossed ceramics, and comic vegetables strewn across more whimsical gardens and greenhouses.
If you’re serious about your garden, I strongly advise taking time over the subject of this article, because the right plant labels can become a unifying theme in even the most disparate gardens.
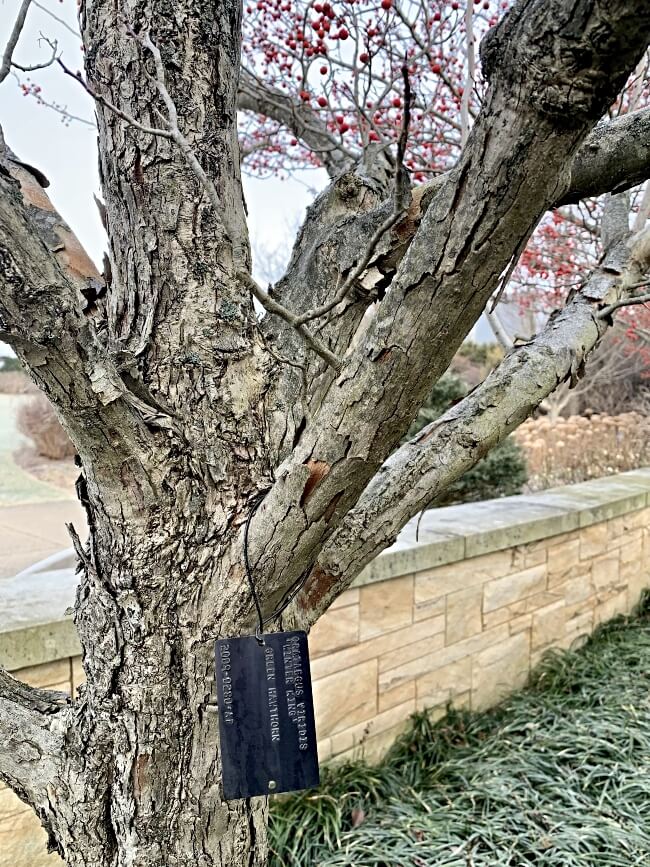
Source: The Arboretum at Penn State
Take arboricultural labelling as an example. The above image is Penn State Arboretum, but it exemplifies other tree collections. They are nearly always embossed plastic, or embossed stainless steel.
They are sometimes attached to trees using plastic screws (the plastic doesn’t rust), and sometimes tied around younger branches.
These labels are as much for visitors as for the garden’s managers, and they have a formality to them that is simply beautiful. But there’s a big difference between those labels, designed to last decades, and those we are more used to seeing which are designed to last a single year.
Types of Garden Labels
The most common types of garden label are the cheap white plant labels that stick in your soil, get written on in permanent marker, and are forgotten about.
They last for about a year before the marker pen starts to fade, but can sometimes frustratingly fade much sooner if left outdoors – leaving you with a mystery row of vegetables that could be just about anything until the fruit appears.
There are alternatives though. You can, even on a budget, look at a few different kinds of garden labels, and find something that’s perfect for you, without spending an absolute fortune.
We’ll look at some common types below, and then run through some of our favourite DIY plant tag ideas that have really inspired us this year.
And finally, at the end of this guide, I want to share a few simple links to affordable but beautiful plant tags and garden labels that can give you an instant revamp in the most practical of ways.
Plant Tags
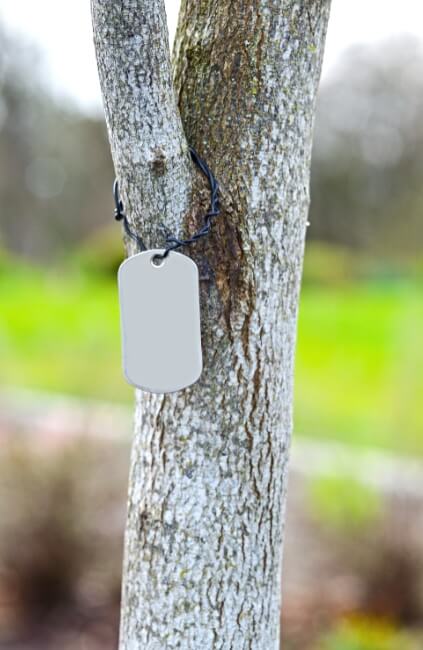
Plant tags are the most underrated form of plant label. They tie onto a branch or truss, which keeps them away from water, and up at eye level. For most gardeners, it’s much-needed relief from the usual bending and crouching of day-to-day gardening.
Regardless of materials, by elevating your plant tags they are easy to manage, and easy to spot, and even the cheapest of marker pens or pencil scrawls should remain legible for at least one season.
Plant Labels
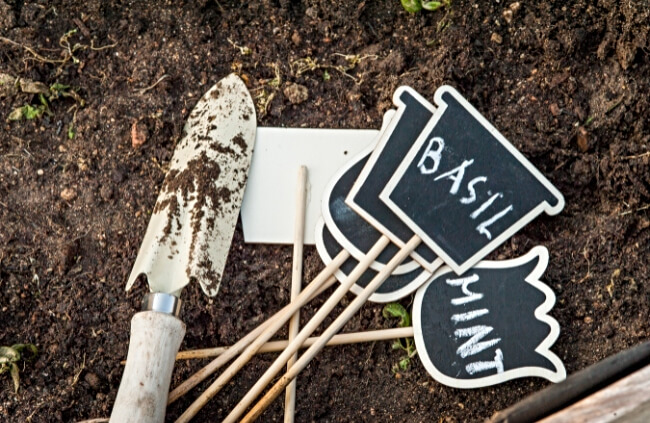
Plant labels are generally anything that is inserted into the soil, with text to clarify the type of plant, species or cultivar. They can be made from any material, and in any colour, with other types of plant markers including painted stones, decorative and ornamental markers, and even simple stakes to remind you that there is a plant there, so not to dig in that spot.
Note: when gardeners refer to plant markers, it often refers to the latter, marking plants that have been cut back for winter, or the site of some tubers of bulbs that are yet to emerge.
Tree Plaques
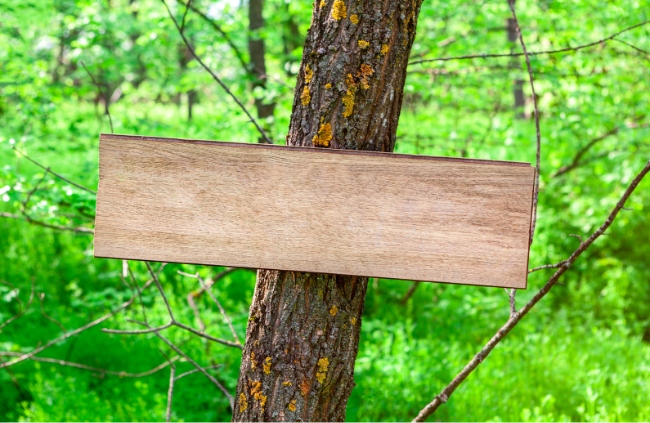
Tree plaques are the most permanent form of plant marker, and the same materials can be applied to pretty much anything. For example, our garden isn’t huge. We’ve got four mature trees and about twelve young espaliered fruit trees to save space. They don’t need labelling because we know which is which.
What does need labelling are our tomatoes. We grow dozens of tomato varieties, and several of each, but we tend to grow the same varieties every year. Rather than remaking labels each year, we embossed stainless steel tree plaques with the varieties we use most often.
They hook onto the sides of tomato pots, or hang from trusses, and will last forever – just like the bespoke plaques at arboretums around the world.
What to Look for When Buying Garden labels
Now for the important bit – how to choose. Even if you’re going to make your own (see our DIY plant label tips for inspiration below), choosing the right colour, materials and size is essential.
Colour
White plant labels are easy to spot, but stand out like a sore thumb. Black plant labels are elegant and aesthetically pleasing, but you’re then limited to writing in chalk or paint pens, which wash off in the rain.
Other than black and white, it’s all about creative choices. Coppers, reds, blues, greens, oranges, whatever works. Just make sure it works for you and puts a smile on your face.
Materials
Personally, I like metallic labels. They last longer and can be made from recycled cola cans or soup tins, meaning they’re completely free if you’re willing to emboss them yourself.
But even then, the DIY version will rust, and the metal does catch the light, meaning it's very much a feature in the garden, without blending into the background.
Another option, as well as traditional plastic plant labels, is to use ceramic or terracotta plant labels. They can be painted, varnished, or even embossed before firing for a more permanent solution, and one particularly fastidious gardener friend of mine even marked up all of their pots by painting the crops that grow in them on the outside.
They use the same pots every year and varnish them to preserve the paint. Provided they store them indoors and away from frost, they’ll keep forever.
The only material to avoid, despite it being the cheapest, and easiest to obtain, is softwood. Wooden plant labels like lollipop sticks, if inserted into soil, will rot much faster than you’d expect, quickly turning mouldy, and degrading the writing on them too.
How to Write on Plant Labels & Pots
The physical act of writing onto your plant labels might seem simple, but there is a fine science to it. Sharpies and other permanent markers are never quite as permanent as you think when you use them for outdoor applications.
The longevity of ink changes depending on the surface you write on.
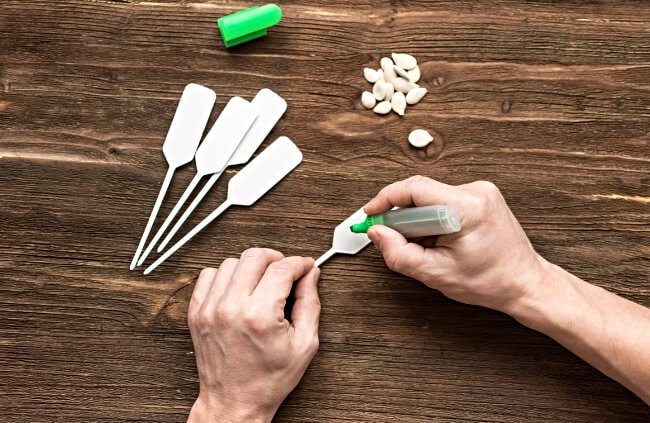
Waterproof Pens or Permanent Markers
The most common is the humble Sharpie (other brands are available), which will do a good job of marking up white or light-coloured pots or labels. Personally, I like to use a permanent marker to write on pots when sowing. It usually washes off over the course of the year, but it saves using unnecessary plastics and wasting plant labels while seeds germinate.
Use green, grey, or pale plastic pots so you can write clearly.
If you do the same on wooden or plastic markers, the ink will fade in the sun and rain through summer. To help these sorts of labels last longer, punch holes in them and use them as hanging plant tags so they are protected from watering.
Paint Pens Vs Chalk Pens
Black pots, slate plant markers and plant markers that have been painted black need white pens to write on them. This can be done either with chalk markers or paint pens.
Paint pens are significantly more effective, neater, and longer lasting than chalk or chalk pens for this purpose. The paint pen ink lasts for a few months before it needs rewriting, and for indoor plants, or plants in a greenhouse, can last a full season without losing its impact.
Again, this can be done on a variety of materials, directly onto pots, or onto any black labels.
Pencil
White plastic labels are cheap, and writing with permanent markers is effective enough, but you might be surprised to hear that the same plain white labels, written out with pencil can last just as long.
The text isn’t as visible, but if you’re stuck for other tools, a humble pencil will do the trick.
15 DIY Plant Label Ideas
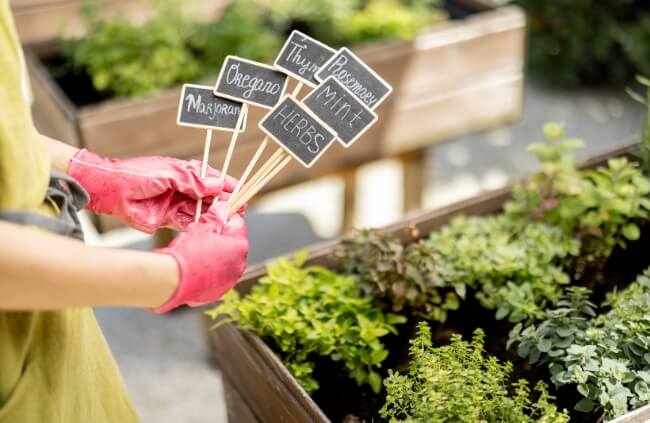
There are no limits to how you can label your plants, so I encourage everyone to put their own spin on some of the DIY plant label ideas below. They are some of the quirkiest, but also most affordable ways to organise your garden.
In these DIY garden label ideas, I’ve tried to share ways that suit every garden, from classics to contemporary twists, there’s something in here for everyone.
1. Plastic Bottles and Yoghurt Pots
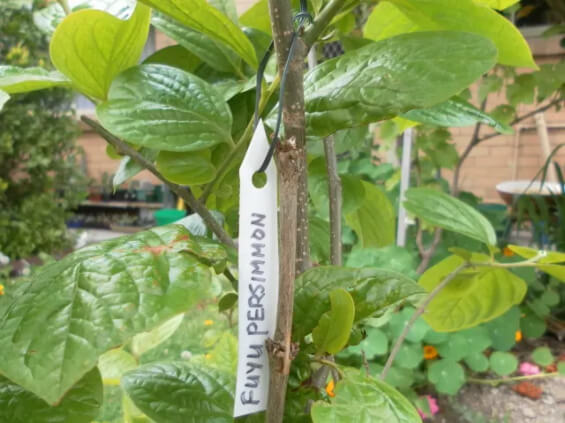
Image Source: dengarden.com
Let’s start with the two simplest. They’re tried, they’re tested, and they work. First, plastic pots (yoghurt pots, bottles, cups, basically just anything you’ve got sat in the recycling bin).
These labels will last forever, but the text on them will rub off eventually. Even though they’re not perfect, they offer a quick fix, and are completely reusable, year after year.
All you need is a hole punch, some scissors and a permanent marker. Cut your plastic tubs up into 1-2cm wide strips, punch a hole in the top, and that’s it. Then write the name of your plants.
Seedlings can start with them as labels in the soil, and as they grow they can be hooked onto stems and trusses to keep them away from water and help the text last longer.
2. Lollipop Sticks
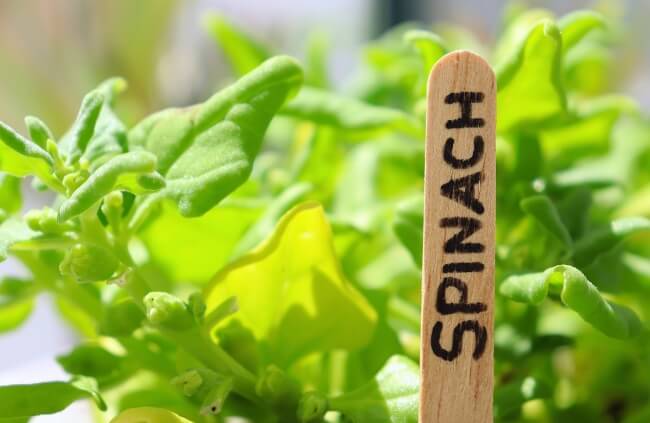
Lollipop sticks are a valuable resource. They won’t last forever, and the cheap wood they’re made from will quickly rot in the soil. However, for houseplants that like to be kept dry, or as a quick fix for seed sowing, they work just as well as anything else, and it saves throwing them into landfill.
If you want them to last longer, paint them with fence paint or outdoor paints, and then write on the surface with a permanent marker.
3. Stamping and Embossing labels
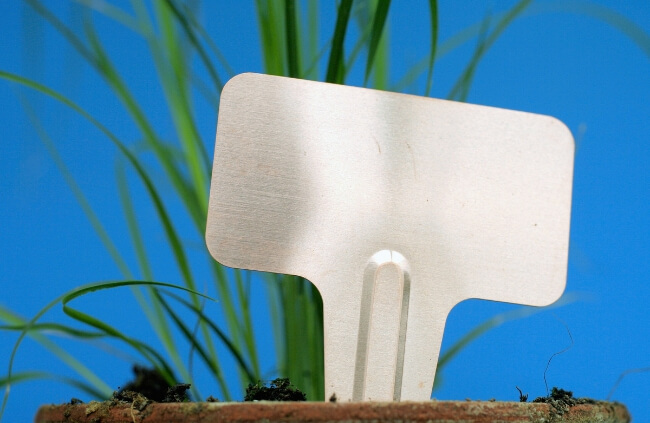
You can use any sheet metal, and a variety of tools to create longer-lasting embossed plant labels. The easiest is to use thin sheets of copper and simply write the names of your plant using a firm stylus, but you can get gorgeous letter stamps to create even neater designs next to nothing.
Not only do these embossed metal plant labels last longer, but they also look more considered and add a sense of genuine passion to your plants. You can make these from drink cans, soup tins and pretty much any old metals you’ve got lying around.
Letter stamps for metal don’t need to cost the earth, and these neatly packaged stamps from Horusdy are very affordable.
4. Dymo Plant Labels
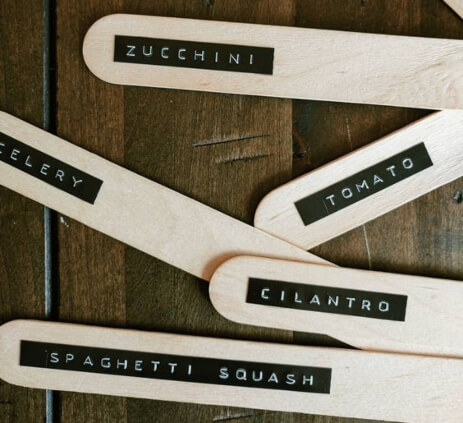
Image Source: JoyfullyGrowing
Regardless of the base material, using a budget sticker-maker like the Dymo embosser, allows you to quickly and repeatedly make gorgeous labels for all of your plants.
The stickers can be stuck to tags, in-soil labels, or straight onto the sides of pots. We stick them to the windows of the greenhouse behind each pot so they don’t lose stick when we water our tomatoes and peppers.
You can grab a Dymo label maker to quickly make these labels at home.
5. Wooden Spoons
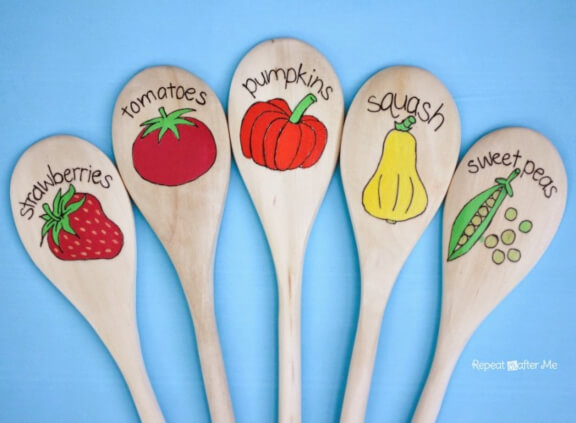
Image Source: Repeatcrafterme.com
Wooden spoons are a really simple, traditional, quirky way to label your plants. Like lollipop sticks, they will need varnishing, and painting in order to last for more than a couple of years, especially in regularly watered soils.
However, because of their larger surface, you’ve got much more space to get creative. Plant labels don’t just need to be named, get painting, and turn your plant labels into artworks scattered all over the garden.
6. Embossed Spoon and Cutlery
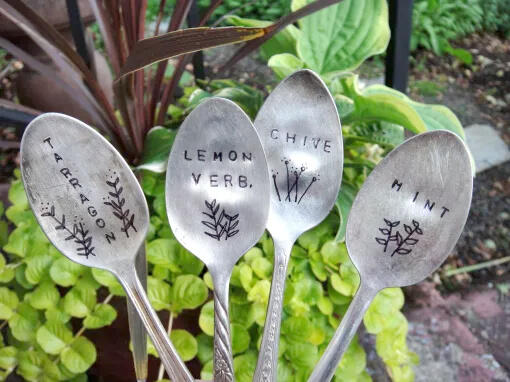
Image Source: Paper and Planes
For something a little more Alice in Wonderland, why not transform some old silverware into plant labels? Flatten spoons with a rubber mallet first, to make them easier to stamp, but then use the same stamp set we shared earlier for copper labels.
Once you’ve stamped all your veggie varieties onto the silverware (spoons and knives work much better than forks for obvious reasons), colour in the embossed sections with permanent marker, and then polish up the rest.
This will leave a really clear embossed section that’s easy to read and looks wonderfully considered.
7. Painted Rocks as Plant Labels
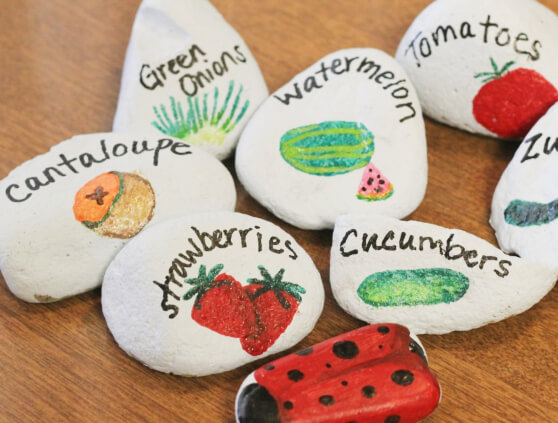
Source: Momendeavors
Another great way to get creative, especially if you’ve got kids, is to create a collection of plant labelling rocks. Any large pebbles will do, but the bigger the better. All you need to do is clean them up, removing any dirt or grease, before painting them with acrylic paints.
When you’re finished, leave them to dry and then varnish the whole rocks, which will last outdoors for years, and indoors or in the greenhouse for a lifetime.
Don’t just stop at one or two either, create as many as you can, because these DIY plant labels add a serious personal touch to your garden, and are lovely to stumble across when you’re wandering around.
8. Pegs as Plant Labels
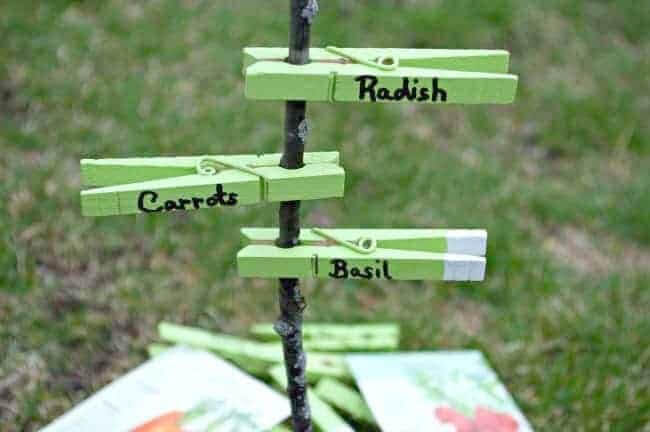
Source: Chatfield Court
Clothes pegs make the perfect plant label. Just paint them up to help them withstand wet weather, and give permanent ink something to stick to without bleeding into damp wood, and you’re good to go.
There’s no special preparation and they can even be clipped around young stems, or simply grab onto the side of your pots.
If I had to pick out a DIY plant label to do for the rest of my life, it would probably be this. It’s easy, it's quick, and they last forever because they’re never anywhere near damp soil.
9. Making Plant Labels from Sticks
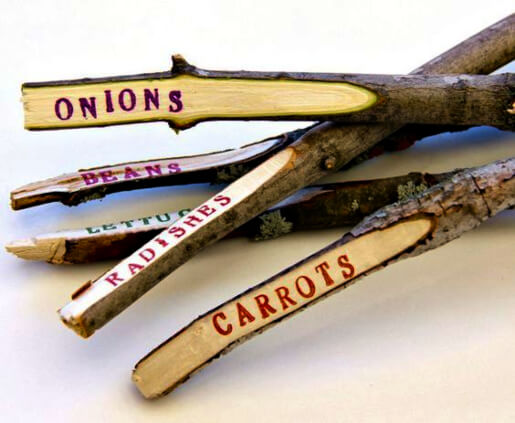
Source: Urban Gardens
If you’ve got any hardwood sticks around the garden from this year’s pruning tasks, they make wonderful, long-lasting and very cute plant labels. Use a sharp knife to remove a section of bark, and then write or burn the text into the exposed wood.
They last for years and they’re completely compostable, without costing you anything at all to buy. If you want a budget-friendly option, that will eventually be able to add goodness back into your garden compost, these quirky plant labels are ideal.
10. Decorated or Embossed Terracotta Plant Labels
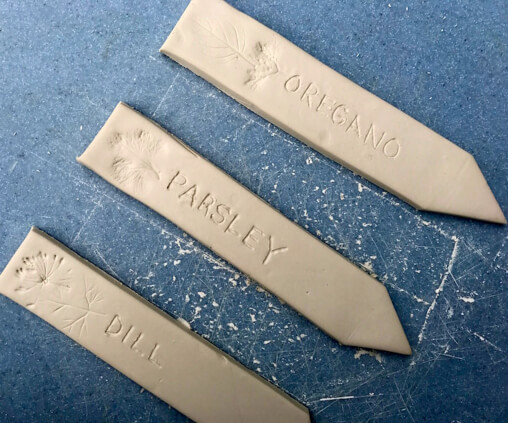
Source: Hobby Farm
Terracotta makes the most elegant plant labels, but unless you’ve got a kiln, it's impossible to make your own. Thankfully, you can use oven clay or even air-drying clay to make your own bespoke house plant labels without any special equipment.
The labels last forever when used with houseplants, but if you are using air-drying clay, or oven-drying clay, keep in mind that it isn’t as durable as terracotta or kiln-fired ceramics, so should not be stored out in the rain.
And one final hack for this method… if you want to save even more, you don’t need to buy any special stamps. Dry alphabet pasta makes the perfect embossing tool for clay!
11. Hardwood Plant Labels
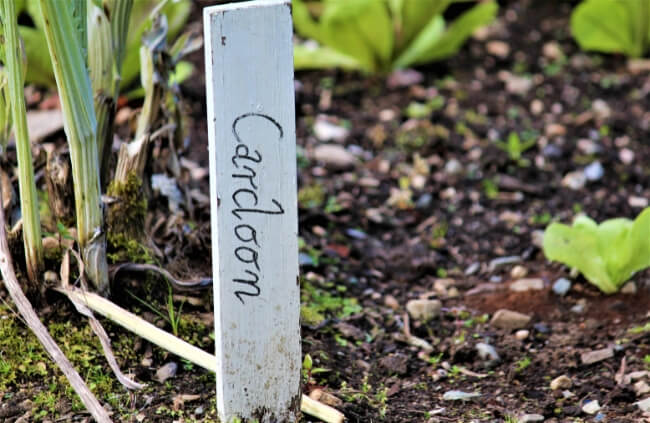
Part of the problem with wooden plant labels like lollipop sticks is that they just don’t last. So why not use strips of old hardwood (even veneer) to bring garden labels to life?
Use reasonably chunky strips so they stand up to general wear and tear, and burn the lettering into the wood so it lasts longer.
12. Beaded Plant Labels
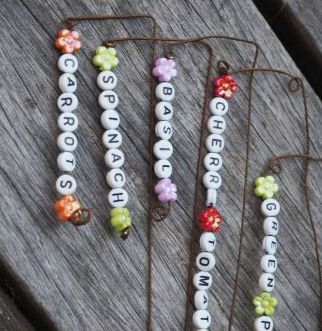
Source: PagingFunMums
And if you really want to try something different then why not experiment with beaded labels? You know that bag of beads you’ve had stashed in the sewing box for years? Well, why not use it for plant labels?
Beading is super simple and incredibly relaxing, and with just a little bit of garden wire, you can create completely unique garden labels for next to nothing, and with something you’ve probably just got lying around in a cupboard.
13. Painted Pots
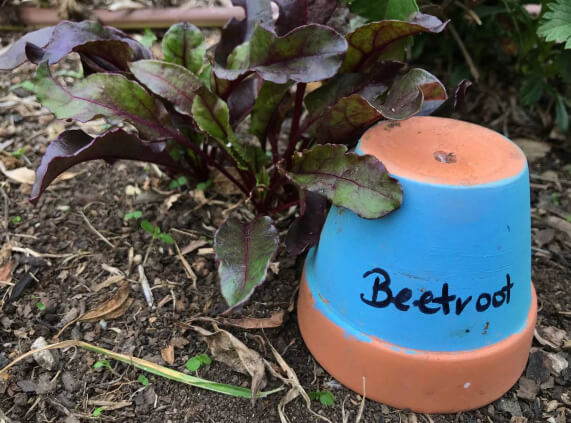
Source: The Seed Collection
Using old pots like this as stackable plant labels is a super simple way to add some upcycled decoration to your borders, but they also work to plant straight into. For bedding and veggies, it’s a beautiful way to jazz up your plant labelling systems and turn entire pots into labels for their contents.
Even if it’s as simple as colour-coding your veggies, or painting their names across the rims of pots. It is a great semi-permanent way to organise your garden, but it also gives you a whole new canvas to colour in and add life and liveliness to your outdoor space.
14. Blackboard Pots
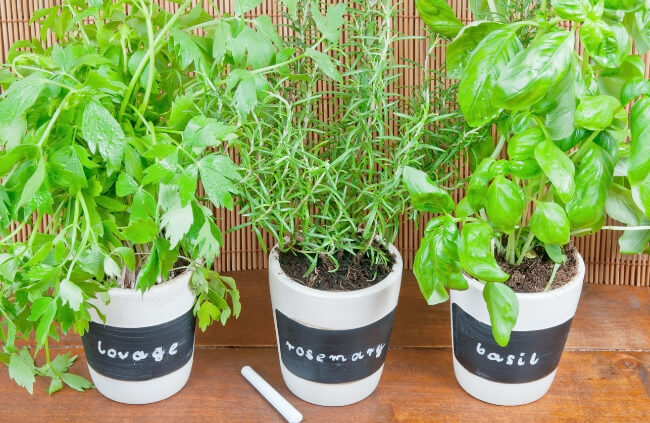
One of my all-time favourite plant labelling methods is the humble blackboard pot. You could buy blackboard paint, and quickly paint your pots, ready for labelling, but where’s the fun in that?
If you really want to DIY it, then find some black acrylic paint and some old tile grout (baking soda or ground-up chalk works too – you just need a texture). The ratio isn’t important but works with roughly 2oz of paint to 2tbsp of powder.
Paint it on in three layers, leaving it to dry between each layer. When the third layer has dried, you’ve got a pot that can be written on time and time again, and the black surface heats up, helping seeds to germinate earlier in the year.
15. Using Jar Lids as Plant Labels
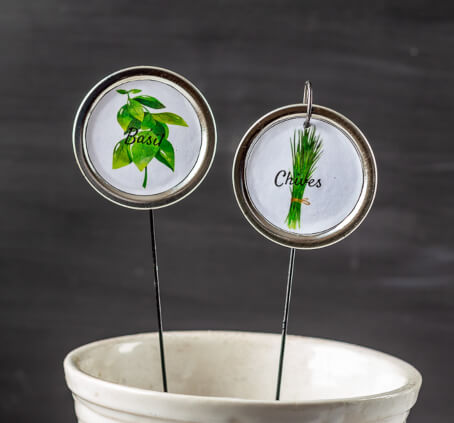
Source: Heart &Vine
And finally, you can use the same paint mix as above to paint up old jar lids that can be glued to sticks, or hung from wire stakes to label plants.
The basic idea of using the jar lids is that the writing is slightly protected from the elements by the threaded rims, but the real beauty is that it is adaptable enough to be used absolutely anywhere.
Best Garden Labels for 2024
When it comes to buying plant labels, rather than making them, there’s generally quite a limited choice, but from a wide selection of manufacturers.
Essentially, they all make the same product, just for different prices, so below, we’ve pulled a few of the best value plant labels together, which means you’re not shopping around and choosing between loads of the same.
1. Copper Plant Labels
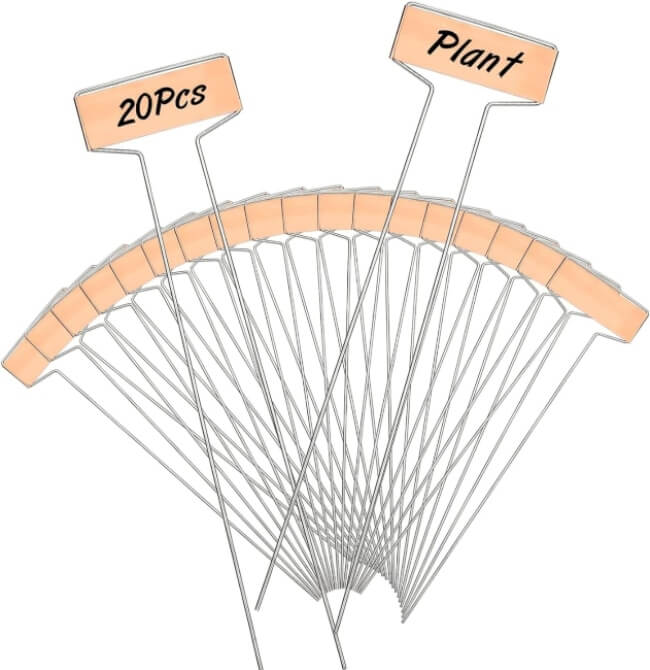
Copper plant labels are really easy to make if you’ve got the right materials, but if not, just shopping around for the cheapest is the next best thing.
These thin copper labels can be written on or embossed by using a metal stylus to create more permanent labels, and have well-sprung ground spikes too.
If you’re going to buy metal plant labels, they don’t need to be expensive, just go for something practical and they’ll look better for it.
Pros
Cons
2. Plastic Nursery Plant Tags
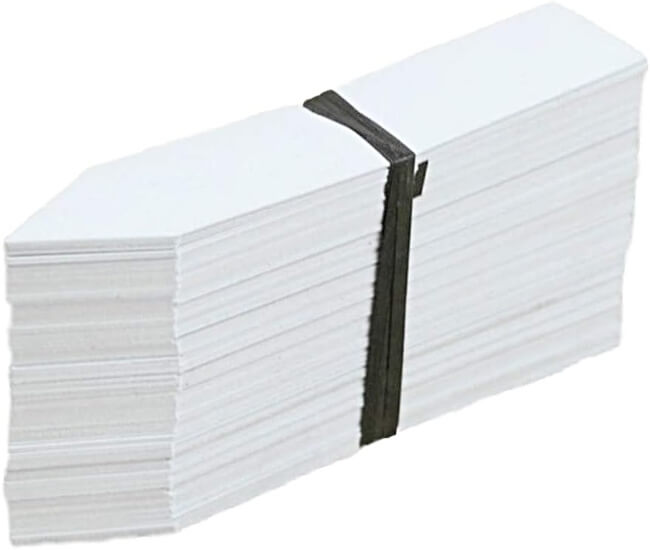
The cheapest option you’ll find is these absolutely basic plastic plant tags. They’re made from thin plastic, and they’re not exactly environmentally friendly, but if you take care of them, and reuse them each year, they are by far the cheapest option.
And as we’ve said before, cheap might not be attractive but it's practical. And part of making a garden look loved is sticking to what’s practical.
These might not be exciting, but as less than $0.10 per tag, they’re worth every cent.
Pros
Cons
3. Plastic Hanging Plant Labels

Another budget-friendly choice is this pack of 100 tree tags. They might say tree tags on them, but they’re just as useful for tomatoes, peppers and climbing veggies like pumpkins or cucumbers.
They come in a range of colours and are significantly cheaper than nearly anything else online of a similar quality. For simple and attractive plant labels, that are just a little bit more considered than the very cheapest, these are a clear choice.
Pros
Cons
4. Black Plastic T-Type Plastic Plant Labels
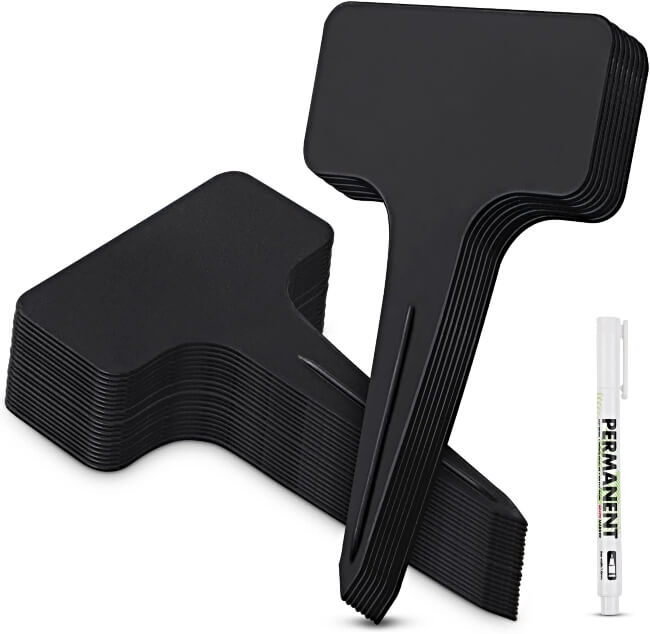
These basic black plastic plant labels are simple, and not particularly exciting, but if you’re trying to keep track of a serious collection and don’t want to detract from the plants themselves they are probably the most effective to do it.
The black label blends into the background, and a good quality white paint pen will offer clear and easy-to-read name labels. Or, as they do in the shows, you can print labels to stick onto them for that slightly more professional finish.
Pros
Cons
5. Reusable Slate Stone Garden Plant Labels
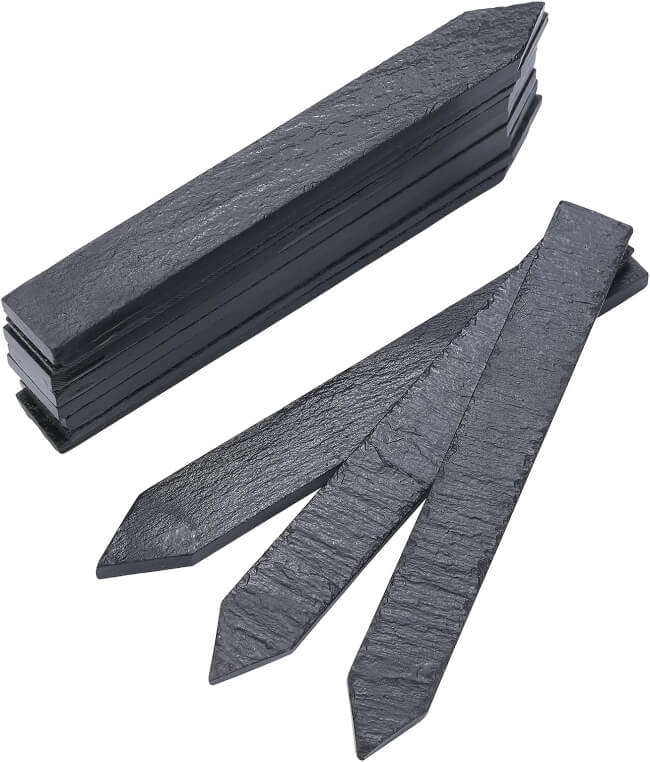
Perhaps not the most cost-effective plant labels, but certainly amongst the best looking are these simple slate plant tags, which come as a pack of twelve and are infinitely reusable.
Just like the black plastic labels they can be written on with paint pens for longer-lasting finishes, but unlike the plastic alternatives they will literally last forever, without getting lost in the garden, and adding to the universal litter problem.
Pros
Cons
Garden Labels Frequently Asked Questions
How do you permanently label plants?
Embossing stainless steel is a great way to permanently label your plants. Similarly, and with less effort, label embossers can be used to create plastic, non-degradable plant labels with ease.
How do you clean plastic plant labels?
The quickest way to clean down a big batch of plastic plant labels with smudged, worn-out ink left on them from last year is to rub them all down with wire wool. It will quickly wear away last year’s ink and leave you with clean and clear plastic labels that are as good as new.
How do you label plants?
If you’re going for botanical accuracy, you should always label plants with their genus, species, then cultivar, in this format: Genus species ‘cultivar’. The genus should be capitalised and italicised, followed by the species in lowercase, also italicised, and the cultivar (variety) name in quotes.
If only the species or cultivar names are known, that’s fine and often still maintains botanical accuracy.
Enhance Your Hardening experience with Plant Labels
Plant tags, garden labels, garden markers, whatever you call them, they all serve an important purpose; keeping track of our successes (and occasional failures). Plant labels are much more important than we give them credit for, and I can’t shake the feeling I’ll be writing something similar in a few years’ time. So, please, take your time this year. Get to know your garden.
Even those stubbornly established shrubs whose names you’ve forgotten. Dig out their details and label them so you’ll never forget them again. And if you’re growing your own home-grown food, just find the most practical DIY plant labels that work for you and run with it.
Published on June 7, 2023 by Nathan Schwartz
Last Updated on May 7, 2024


