The bold flowers of Clivia make it the perfect addition to any shady garden, or patio in need of brightening up. Despite its tender habits, it grows well outdoors throughout Australia and is reasonably easy to care for.
In this guide, we’ll be sharing tips on how to plant, propagate and care for clivias, as well as looking at our favourite varieties to grow in Australian gardens.
Family: | Amaryllidaceae |
|---|---|
Genus: | Clivia |
Common Names: | Natal lily, bush lily |
Location: | Outdoor |
Type: | Evergreen perennial |
Growth: | 45cm (H) x 30cm (W) |
Sun requirements: | Bright, indirect light - dappled shade |
Foliage Colour: | Green |
Flower Colour: | Orange, yellow, peach |
Flowering: | Spring to summer |
Fruit: | None |
Maintenance level: | Low |
Poisonous for pets: | Toxic to cats and dogs |
More...
What are Clivias?
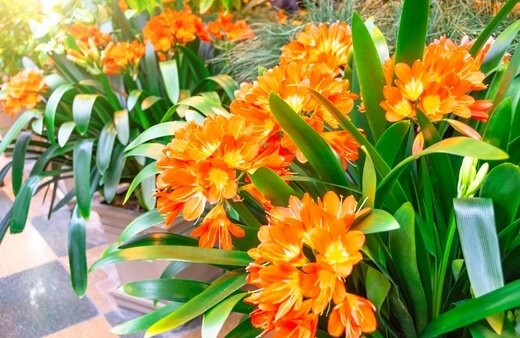
Clivia, also known as Natal Lilies and Bush Lilies, are unrelated to the lily family. They are actually more closely related to onions, as a member of the Amaryllidaceae family which included spider lilies, onions, chives, daffodils, snowdrops, and amaryllis.
Also read: How to Snowdrops Galanthus in Australia
A quick look at their structure is evidence of these relationships, with layered bulbs which can grow in most conditions, and flower surprisingly well when restricted, or grown in poor soils.
The dense florets of elongated leaves shoot up for small bulbs, producing two to three flowering stems per plant, each with multiple flowers. Once pollinated, the flowers drop, leaving bright red berries behind which provide interest in pots and borders through into autumn.
Natural Habitat of Clivias
Clivia is native to South African woodlands, where it benefits from natural leaf mulches, dappled shade, and high temperatures. It’s also a helpful adaptation for our gardens as it doesn’t mind rowing with competition or restriction, and is commonly found growing around Australia’s warmer suburbs, having naturalised very effectively over the last few decades.
With minimal watering, Clivia can grow into substantial clumps, making it a great low-maintenance choice for outdoor cultivation.
Six Clivia Species to Choose From
There are just six distinct species of Clivia but each has dozens of cultivars and named hybrids under this banner. Before we talk in detail about how to grow clivias, it's worth familiarising yourself with some of the basic growing habits of the different species, so you know you’re buying the right Clivia for your garden.
1. Clivia miniata
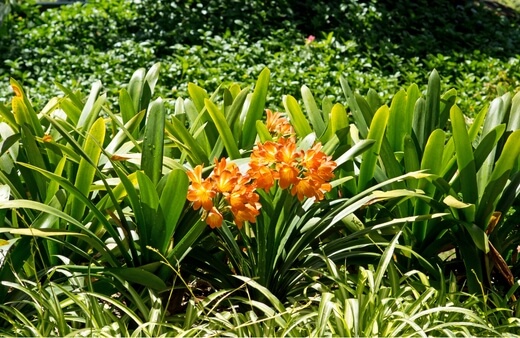
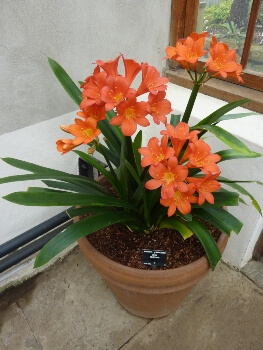
The most common Clivia you can grow at home is C. miniata. Its salmon-coloured petals grow in dense clusters at the top of 50cm spikes, surrounded by dense, evergreen foliage. They like to be fed every two years with leaf mould to boost soil nutrients and will grow in any well-drained conditions.
For a budget-friendly way to fill your borders, C. miniata is a useful choice spreading freely after its second year to form dense clumps that are reasonably easy to manage by division.
Check out our in-depth guide to growing Clivia miniata for more info.
2. Clivia caulescens
Source: commons.wikimedia.org
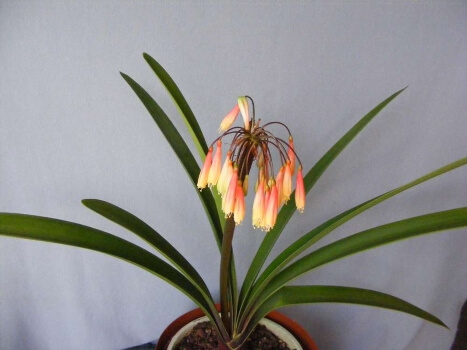
The bell-shaped, pendulous flowers of C. caulescens stand out from other plants thanks to their unique blooms, with peachy petals, tipped in lime green, standing tall on stems that can reach up to 1.5m tall.


Get Your Free Guide:
Master Growing Australian Natives eBook
A Must Have Complete Guide for Every Australian Garden
Get Your Free Guide:
Master Growing Australian Natives eBook
A Must Have Complete Guide for Every Australian Garden
While they flower best in part-shade, it’s imperative to provide them with excellent drainage, as they rarely grow in soil in their natural environment, preferring to root into dead wood and even mossy rocks, where they source moisture from the plant materials around them. In gardens, providing excellent drainage is essential for peak performance.
3. Clivia mirabilis
Source: cliviape.co.za
Of all the Clivia you can grow in your garden there are few more otherworldly than C. mirabilis. Its Day-Glo colouring shines in the sun and will grow reasonably well in slightly brighter conditions than most.
In fact, C. mirabilis can cope with up to eight hours of sun per day, despite preferring to grow in dappled light. For reliable spring and summer colour in most positions, C. mirabilis is just perfect.
4. Clivia nobilis
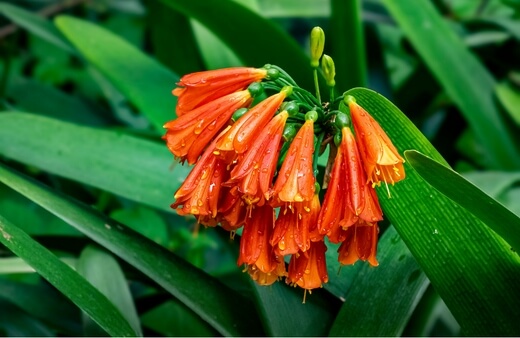
Of all the pendulous civias, C. nobilis is perhaps the least exciting, with paler blooms, and a washed-out green stem. Its saving grace is its ability to flower through winter, typically starting to flower in July in most of Australia, providing plenty of colour in challenging times.
5. Clivia gardenii
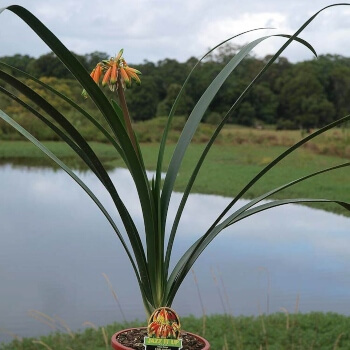
Source: clivias.com.au
While shorter than C. caulescens, C. gardenii has very similar forms, with peachy, bell-shaped flowers, drooping down from the top of a tall flower spike, usually reaching about 90cm-1m tall.
If you have a south-facing bed, with some shade from a wall, or evergreen trees, C. gardenii will thrive in most soils. Just give them good shade and plenty of drainage.
For gardens with deep shade, C. gardenii is a great choice, as they will grow and flower well with as little as 4 hours of direct light per day.
6. Clivia robusta
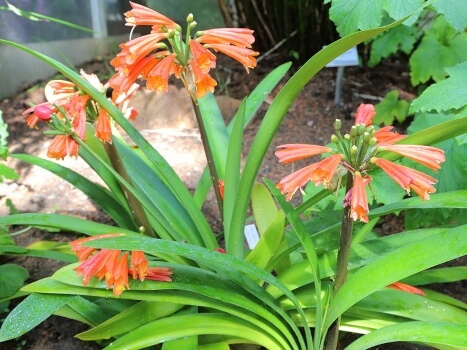
Source: commons.wikimedia.org
Flowering from May to June, C. robusta is perhaps the most useful Clivia to grow for autumn and winter colours in Australia. It doesn’t need any additional cold snap to promote flowering (as many other varieties do), and will perform reliably in almost any conditions, provided it is never water-logged and is kept out of full summer sun, which would wither and dry out its foliage before it ah a chance to flower.
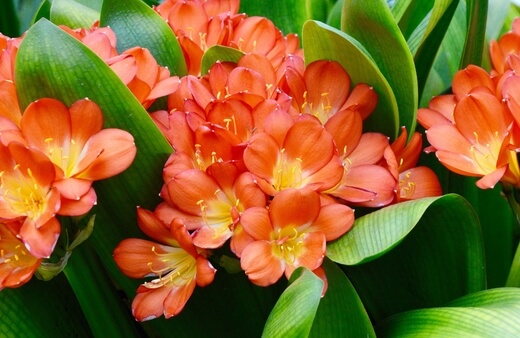
1. Clivia miniataThe most common Clivia you can grow at home is C. miniata. Its salmon-coloured petals grow in dense clusters at the top of 50cm spikes, surrounded by dense, evergreen foliage. They like to be fed every two years with leaf mould to boost soil nutrients and will grow in any well-drained conditions. For a budget-friendly way to fill your borders, C. miniata is a useful choice spreading freely after its second year to form dense clumps that are reasonably easy to manage by division. Check out our in-depth guide to growing Clivia miniata for more info. |  |
2. Clivia caulescensThe bell-shaped, pendulous flowers of C. caulescens stand out from other plants thanks to their unique blooms, with peachy petals, tipped in lime green, standing tall on stems that can reach up to 1.5m tall. While they flower best in part-shade, it’s imperative to provide them with excellent drainage, as they rarely grow in soil in their natural environment, preferring to root into dead wood and even mossy rocks, where they source moisture from the plant materials around them. In gardens, providing excellent drainage is essential for peak performance. |  Source: commons.wikimedia.org |
3. Clivia mirabilisOf all the Clivia you can grow in your garden there are few more otherworldly than C. mirabilis. Its Day-Glo colouring shines in the sun and will grow reasonably well in slightly brighter conditions than most. In fact, C. mirabilis can cope with up to eight hours of sun per day, despite preferring to grow in dappled light. For reliable spring and summer colour in most positions, C. mirabilis is just perfect. |  Source: cliviape.co.za |
4. Clivia nobilisOf all the pendulous clivias, C. nobilis is perhaps the least exciting, with paler blooms, and a washed-out green stem. Its saving grace is its ability to flower through winter, typically starting to flower in July in most of Australia, providing plenty of colour in challenging times. |  |
5. Clivia gardeniiWhile shorter than C. caulescens, C. gardenii has very similar forms, with peachy, bell-shaped flowers, drooping down from the top of a tall flower spike, usually reaching about 90cm-1m tall. If you have a south-facing bed, with some shade from a wall, or evergreen trees, C. gardenii will thrive in most soils. Just give them good shade and plenty of drainage. For gardens with deep shade, C. gardenii is a great choice, as they will grow and flower well with as little as 4 hours of direct light per day. |  Source: clivias.com.au |
6. Clivia robustaFlowering from May to June, C. robusta is perhaps the most useful Clivia to grow for autumn and winter colours in Australia. It doesn’t need any additional cold snap to promote flowering (as many other varieties do), and will perform reliably in almost any conditions, provided it is never water-logged and is kept out of full summer sun, which would wither and dry out its foliage before it ah a chance to flower. |  Source: commons.wikimedia.org |
How to Grow Clivias in Australia
Clivias will grow in most conditions, but in full sun they will struggle without lots of water, and like the rest of the Amaryllis family, they flower too early, and for less time. In full shade, they develop limp, leggy growth that isn’t nearly as attractive as it should be.
Follow our guide below for the right light conditions, find the best soil, and how to water them after planting.
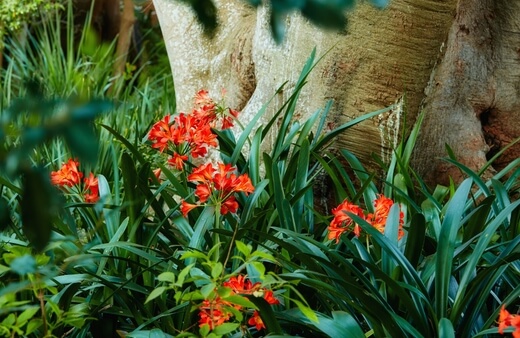
Best Conditions for Planting Clivias
Clivias should be planted at about 10-15cm deep, which helps to give the bulb stability and gives them better access to ground moisture. No soil preparation is needed in most gardens, but do be sure to plant each bulb 20-30cm apart to avoid them growing too densely in their first year while bulbs establish.
Sunlight Needs
Clivias perform best in dappled light, or in partial shade. Full shade is ok, but it won’t perform to its best. In full sun, clivias struggle to bloom properly and can wilt quickly due to dry soil.
Temperatures
If you live in Southern Australia, or Tasmania, clivias can be grown outdoors, provided they get a reasonably cold winter. Without a cold spell, clivias will either not flower, or flower poorly, so it’s important to keep in pots in warmer parts of the country.
In WA, it’s worth growing clivia in pots, and lifting their bulbs after the foliage has died back in autumn, then giving them a week in an air-tight bag in the fridge. It might sound extreme, but this will promote much healthier blooms the following year.
Watering Clivia
Clivia bulbs should be watered in really well at first, and the soil kept moist once they begin to flower. Try not to create boggy conditions, as clivias store much of their water in the small bulbs.
After the first year, there is really no need to water as they are more likely to suffer from over watering than underwatering.
What Soil to Use
Well-drained, fairly poor soil is ideal for clivia. In their natural habitat, they benefit from low-level nutrients from fallen leaf litter, which helps to aerate and feed nitrogen into the soil. You can replicate this with compost made from 50% leaf mould, and 50% garden soil in pots.
Growing Clivias Indoors
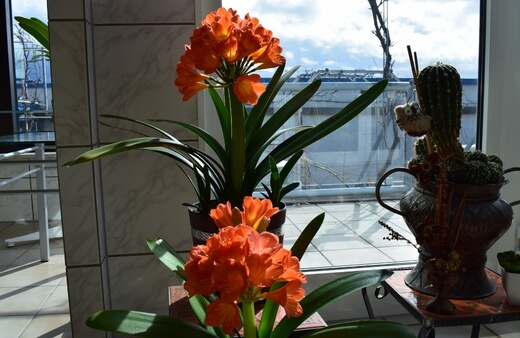
Clivia can be kept as gorgeous houseplants, as well as out in the garden, and you have the advantage of control! Controlling light levels by moving containers around and growing clivia plants in slightly more humid spaces can help them out.
However, as with growers in WA, it’s worth giving your plants a cold snap in autumn or winter, when the foliage has died back, to promote healthier blooms the following year.
You can do this by taking it outside to a shaded spot or, as above, giving bulbs a brief snap in the fridge.
How to Propagate Clivias
Clivia can be propagated in a few different ways. If you have existing plants in your garden, the easiest way to create new clumps of clivias is to divide existing clumps every three years. If you don’t yet have your own clivia collection, seeds and bulbs can be bought from garden centres.
Propagating Clivia from Seed
Clivia seeds germinate best at temperatures over 20°c, and because they need their bulbs to be fully formed before flowering, that makes summer the perfect time to sow clivias.
In warmer regions, you can sow clivia in spring for a longer growing season, but in any case, they will need to grow through winter, and into their second year before flowering.
- Sow seeds in spring or summer (depending on temperatures in your area).
- Fill small pots with reasonably well-drained compost.
- Sow seeds on the surface of the compost.
- Water well.
- Place the pots somewhere with good ventilation to avoid rot.
- After one month, seeds should have germinated below ground, and begin producing roots.
- After another month there will be some top growth, and roots will appear at the bottom of the pot.
- Keep the soil moist, but not soaked.
- For the first year, you will just get foliage, as the bulb develops below ground.
- In the second spring, move the pot somewhere brighter, but out of full sun. The bulb should have developed enough to see a full flush of flowers in this second year and is ready for planting.
Clivia Propagation from Bulbs
Clivia bulbs are available to buy in garden centres in early autumn but are best planted in late autumn, or early winter, when they benefit from a cold snap. Try to keep the planting area from becoming sodden over winter (if planting in pots, keep them under a canopy through winter, and do not water).
Move planted bulbs into a brighter spot in spring if they’re in pots. Begin watering when the first signs of foliage appear and continue watering lightly every week through summer until the flowers and foliage start to die back.
Propagating Clivia from Division
If you have an existing clump of clivia, it’s well worth dividing it every three years as standard. This helps to reinvigorate the plant and promote the development of bigger new bulbs around the edge of the clump.
To create new plants, all you have to do is dig out a section of clivia in spring, when the foliage is about 15-20cm tall, and replant it immediately in the garden, or in pots.
It will flower less vigorously this year, but boom into bloom in the next growing season.
Caring for Clivias
Caring for clivia once it has established is so simple that you barely even need to think about it, but there are some things you can do to boost its vigour, and keep old plants blooming.
Clivia is a clump-forming perennial but does not like warm winters, and when it becomes too densely packed in one clump it will start to strange its own new bulbs, producing strained flowers and drooping foliage.
Follow the notes below on keeping clivia looking good year after year.
Mulching Clivia
In the wild, clivia is a forest-floor plant. That means it is used to grow through fallen leaves in spring, enjoys the nutritional benefits of nitrogen as leaves decay, and is worked into the soil by worms, and soil life.
While an annual mulch can create the conditions for mould, and potentially rot bulbs, mulching with rotted leaf mould in spring, every two years, does help to improve the soil conditions, and create better conditions by encouraging worms to churn through the soil.
Pruning and Repotting
Clivia does not need any pruning. In fact, it is best to leave its foliage to die right back after flowering, so that its decaying leaves can feed back into the bulb. This is the same for most members of this plant family, like Daffodils or Amaryllis.
However, clivias do need regular repotting as they are prolifically clump-forming, and actively enjoy being restricted in poor conditions. So while it’s a bad idea to plant clumps into pots that are a lot larger than them, it’s also worth giving them a little bit of space to breathe.
Avoid terracotta pots, as they can easily be cracked by expanding bulbs. Use decorative plastic pots, or drop plastic pots into decorative ceramics for a cleaner look.
When clivia clumps reach the very edge of their container, pot them up to something about 2” bigger. They will be fine in their new container for 2-3 years.
Deadheading Clivia
Clivia put a lot of energy into their seed, and this can limit the performance of the bulb the following year. Unless you plan on collecting seeds and sowing even more, it’s worth deadheading after they finish flowering.
Clivia will not reflower after deadheading, but they will flower better next year as a result.
Possible Clivia Pests and Diseases to Look Out For
Clivia tends not to suffer from pests, but indoor plants can be subject to mealybugs, like any house plant. To remove mealybugs, simply dab rubbing alcohol directly onto the individual insect. It will kill them almost instantly, and regular treatment will break the breeding cycle.
Outdoor clivia can be damaged by slugs in spring, but it is rare. If you notice leaves being eaten outdoors, place beer traps around the garden to stop the slugs in their tracks.
As for diseases, clivia needs good drainage, so is very susceptible to root rot in damp conditions, which is mainly caused by a bacterial problem caused by Erwinia, which thrives in damp conditions, and rots the bulbs.
The first signs of this will be brown patches on the foliage, which are a sign of Erwinia. Treatment is quite extreme and involves removing any affected bulbs and replanting the rest in fresh compost.
Clivia Frequently Asked Questions
Do clivias flower more than once?
Clivias will not reflower after deadheading, but in very cool parts of the country they can go through two seasons in one year, and houseplants can be tricked into re-flowering by subjecting them to cool temperatures after flowering, but this will reduce the lifespan of each bulb.
What time of year do clivias flower?
Clivias flower naturally in spring and summer, but there are some varieties that flower prolifically from autumn right through winter, and continue flowering into spring.
These are brilliant for Australian gardens as they make the most of the cooler season, and don’t need cold treatment in the same way as other clivias.
How often do you water clivias?
Clivias need regular watering through spring and summer to help them cope with higher temperatures, and battle brighter sun, but they should need to be completely drenched, so water them gently once a week.
Why do Clivia leaves turn yellow?
Yellow clivia leaves are a sign of overwatering. Effectively, when the roots and bulbs are overly damp, the nutrients in the soil are too diluted to have any benefit to the plant.
This causes faded yellowing foliage. Simply allow the soil to dry out, and then feed the soil to refresh any lost nutrients with a balanced fertiliser (NPK of 10-10-10, or 20-20-20 is perfect)
Wrapping Up Our Clivia Growing Guide
From creamy whites to acid oranges, clivias adds unusual and unexpected colour to gardens at times of year when bright colours can be hard to find. With relatively little effort you can add spring, autumn, and winter colour to your garden just by selecting the right cultivar of clivia.
We, quite obviously, love clivias, and we’re passionate about getting more Australians to grow them. So, if you can, make space in your garden, or add some new pots this year, and pack them full of clivias.
Published on October 25, 2022 by Maisie Blevins
Last Updated on September 19, 2024



why do my clivia flowers droop and not open fully ….
Hi Trish,
Where do you live? Clivias need a cold snap (8-12 degrees) for at least 4 weeks to trigger flowering, but 6 weeks is better. Even if they begin to flower naturally in spring, they won’t have the same vigour. Another possibility is if they’re at all wet around the roots.
Clivias are picky, but when you get them right, it’s all worth it!
Best regards,
Gary Clarke
I burnt my Clivia just before flowering, some of my very best, ( Seasol? or chemical in the air from unknown source)) and now the leaves are burnt badly… they look terrible… but also some have developed mould.
I have tried many things and about to try another method, can I do this while they are flowering?
Also can I spray with white oil while they are flowering? I want to give one away and want to give one looking it's best…
Hi Jullianne,
What does the burn look like? Brown tips are sometimes just from over exposure to summer sun, and can also be a sign of frost damage. It sounds like you’re a pretty attentive Clivia parent, so it’s unlikely to be anything related to overwatering, which is the most common cause of mould on any plant, but I’ve never seen overfeeding affect Clivia with any sort of mouldy rot like you describe.
Are they indoors? If so, it’s safe to spray with white oil during flowering. Try to avoid the flowers as it can gum them up and prevent others from opening. If they’re outdoors, try not to use any fungicides or pesticides during flowering as it can harm pollinators.
And in terms of protecting them for the future, if they’ve got mould on the leaves, it’s well worth cutting those leaves off. They won’t recover, and it’s best to encourage new leaves by cutting damaged ones off.
Best regards,
Maisie Blevins