Published on September 1, 2015 by Clinton Anderson
One of the most common questions I get asked by backyard gardeners goes something along the lines of this – “What can I do about the grass dying under my trees?”
You know the story. Those bare dirt patches under your trees. They might have a few spindly patches of grass or weeds, but generally, they look pretty terrible.
Now there are a few reasons why this happens, and a few different ways you can go about fixing your grass, but they’re not really that practical unless you’re keen to put in the hard yards, or start all the way from scratch again, and even then, the same issue will probably repeat itself again further down the track.
So what else can you do?
Making a Tree Mulch Ring
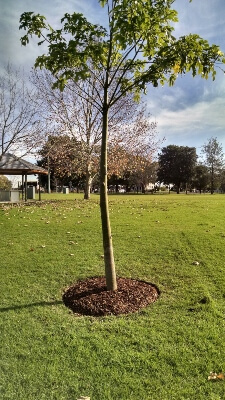
One quick, easy and good looking solution that you might not have considered is making a tree mulch ring! Doing away with the turf all together and putting a nice ring of mulch around the trunk of your tree will cover any unsightly bare patches, and completely transform the look of the area.
This technique is really popular in public parks and gardens for a couple of reasons. Firstly, it covers up those ugly bare patches that form in and around the shady and nutrient deprived base area of trees. It turns a nothing area into a type of picture frame for your tree, giving it something to highlight it and help it contrast its surrounds.
Secondly, it really helps with mowing and tree maintenance. With the turf growing further away from the stem, there’s no risk of breaking branches or getting hit in the face when getting the mower around it, and no chance of damaging the trunk by whipper snipping the grass right up to it!
Sound like what you need in your backyard? Here’s a quick guide to help you through.
Step 1. Figure out how much you want to cover.
The best way to figure out how far you want to mulch is by going to the furthest point where your turf turns good. This could be quite far depending on the size of the tree, but you generally want to make it a uniform size all around the trunk, and it needs to match the trees size so neither look too big or small. You also want to be able to make a nice clean edge with the grass.
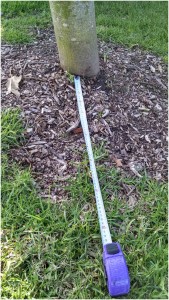
On the tree I’m working on, I’ve taken it out 600mm, which was where the furthest patch of good grass was. It’s probably on the smaller side, and I wouldn’t want to go any less, but it will match the size of some other trees in the same location. I’m going for a circle here, so the best bet is to grab the tape, and mark out a rough circle of dots all the way around. Join the dots up and you’ll have a line to follow.
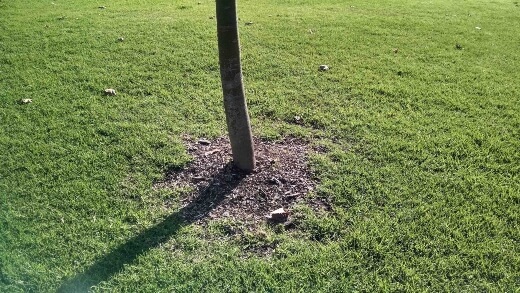
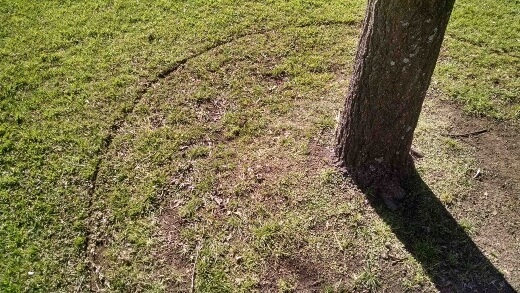
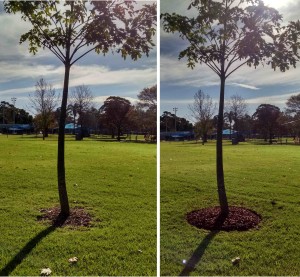
The dead area here isn’t too big, and looks like it’s had some mulch there before, but it’s definitely been left too long. This tree (Brachychiton acerifolius) is a bit of a feature tree in this setting, so I want the mulch ring to help it pop, and stand out even more in the landscape
Step 2. Clear the area.
Once you’ve marked the area, grab a shovel or maddock, and dig in your edge, scratching the grass away as you go. My tree is pretty good, and didn’t have too much grass, so I easily got the bulk of it out.


Get Your Free Guide:
Master Growing Australian Natives eBook
A Must Have Complete Guide for Every Australian Garden
Get Your Free Guide:
Master Growing Australian Natives eBook
A Must Have Complete Guide for Every Australian Garden
If your tree has a lot of grass you need to remove, then consider mowing or whipper snipping it really low to take off the bulk of it, then spraying it with some glyphosate or steam (works just as well!) a few days before hand. This will take the top layer of height off, and should make the surface sit just below the grass.
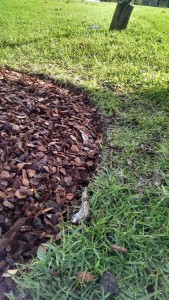
This is a different tree, but you can see the difference doing this makes when the grass is quite thick. This option is a lot easier than digging it out by hand, so is worth a try.
Step 3. Clean up your edge.
When you’ve scratched out everything you need to, go back to your edge and do some fine tunning with your shovel. Try to make sure it’s a nice, clean edge with nothing sticking out of place. It can be quite tricky when you’re doing a circle, and it’s really easy to lose your shape, so be careful.
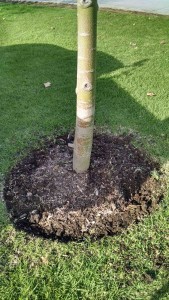
I’ve gone back here and made the edge much more prominent and deep (I also did my circle by eye because it’s not such an obvious spot, so excuse the slight warped shape).
Step 4. Mulch.
Once you’re happy with the shape and have moved away any debris from the area, it’s time to mulch. Because we’re not trying to improve the quality of our soil, and are going for a long lasting visual impact, I would strongly recommend using bark chip mulch for tree rings instead of grass clippings or sugarcane mulch.
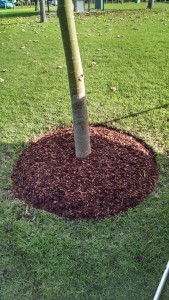
Hort grade chip or forest fines from nursery supply stores is the best bet, but you could get away with some large wood chips, or even free chip mulch from a local arborist. I’m using hort grade mixed with some playground soft fall mulch that I had left over from some other jobs. It’s got a lovely natural red tinge to it, and really contrasts the green of the turf.
Fill your area with at least 100mm of mulch, and push it right down into the edge. Press it in with your foot a few times, and then smooth over with your hand, or a rake. Try to gently mound it up towards the centre towards the stem of the tree, making sure not to go too high up the trunk. Play around with it a bit untill you’re happy, but you generally want a nice defined edge that you can follow with some garden shears or an edger with a gentle rise to the middle.
That’s it!
To maintain, all that needs to be done is a quick edge done the same time as mowing, and some hand weeding or chemical spraying if a few spots of grass shoot through. Ideally, you’d want to be topping up the mulch to keep the visual appeal about once a year, but you could definitely stretch it out if you need to. For my tree, well I’ll probably need to expand it every year or so as the tree gets bigger and the drip zone of the canopy deteriorates the grass.
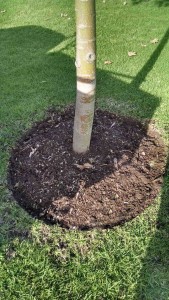
This took me around 15 minutes, and turned this uninspiring tree base into the perfect picture frame this feature tree deserves. Hopefully you can do the same in your garden.
Last Updated on July 9, 2022



#AussieGreenThumb: DIY Gardening tips: Mulch Rings – One of the most common questions I get asked by backyard gard… http://t.co/M5ZDbrN4hC