Taking cuttings is a great way to create new plants, and despite having a reputation as a task for more experienced gardeners, cuttings really couldn’t be easier.
In this ultimate guide to taking cuttings, we’re going to separate the different types of cuttings, and when to take them, so next time you want to double the plants in your garden, you won’t need to pay a cent.
No guide on how to take cuttings would be complete without some tips and tricks too, so we’ve included some of the easiest plants to take a cutting from at the end of the article so you can have a go yourself using some common garden plants you’ve probably got at home.
More...
What is a Plant Cutting?
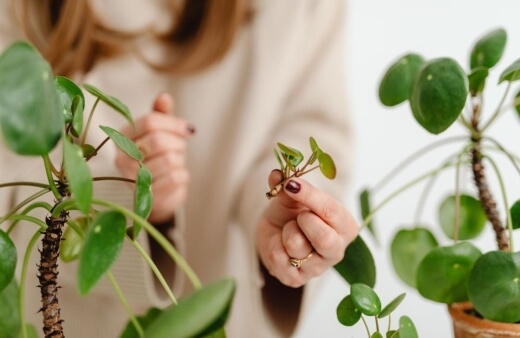
Plant cutting is the process of using an existing piece of a plant (a stem, root, or leaf) to create new plants without needing to sow seeds. Plant cuttings are clones of the plant you take the cutting from.
Thanks to the incredible ability of plants to change their cell function, they can grow roots from pretty much any part of themselves in the right conditions. But knowing how, where and when to cut each plant is the key to success.
Growing plants from seed runs the risk of cross-pollination which can create hybrid plants. While that’s appealing for many gardeners (particularly in the vegetable garden), it also means that reliable plants can be weakened, so by taking cuttings you strengthen future plants by directly adopting the benefits of their parents.
How do Plant Cuttings work?
The only real way to explain the difference between animal and plant cells is to create a pretty gruesome image. If you were to remove your arm, the wound would heal up thanks to red blood cells creating collagen and forming a scab and, eventually, scar tissue. The arm itself would be lost.
When a plant loses its arm, branch, or leaf, it’s entirely possible for the cut point on the removed material to regrow its own roots, and develop into a new plant. This ability is called totipotency, meaning that cells are able to morph into different types of cells).
But it’s probably for the best that human arms don’t regrow feet and roam the earth.
Different Types of Cuttings
There are quite a few different ways to take plant cuttings, so to help you get your head around them, we’ve divided them into five core groups.
The method of taking cuttings for each group is different, but there are some variations within each group that are worth looking at in detail later:
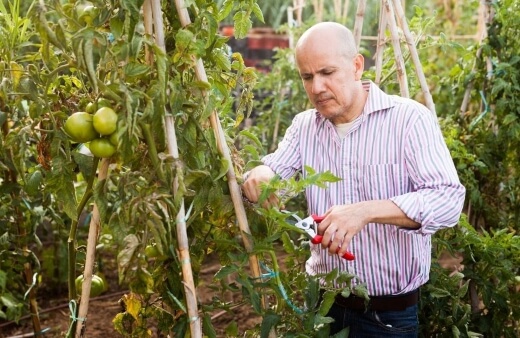
- Softwood cuttings (Nodal, Greenwood & Basal Cuttings)
- Hardwood cuttings
- Layering
- Leaf cuttings
- Root cuttings
Softwood cuttings are the most common cutting method, following the most basic instincts of gardeners by needing nodes, and tender growth which creates new stems.
There are different forms of softwood cuttings that can be taken throughout the year too. In the next section, we look in more detail at each type of cutting.
How to Propagate Plants Using Different Types of Cuttings
Before you take any cuttings, clean your tools. It is absolutely essential to use clean tools when you’re removing living plant material that you wish to reuse. It’s also important to understand why garden centres sell “seed and cutting compost”, and what that means.


Get Your Free Guide:
Master Growing Australian Natives eBook
A Must Have Complete Guide for Every Australian Garden
Get Your Free Guide:
Master Growing Australian Natives eBook
A Must Have Complete Guide for Every Australian Garden
Seed and cutting compost is sieved, sterile, weed-free compost with low nutrients, stored in dry conditions so you can easily manage early watering. Seed and cutting compost is not essential, but it helps.
Alternatively, use vermiculite, or sieved garden compost being careful to remove all remaining roots. Water your cuttings properly while they establish.
Follow the guide below on how to take plant cutting, but consider using rainwater or distilled water for cuttings if you have access to either as they are gentler to plants.
How to Take and Propagate Using Softwood Cutting
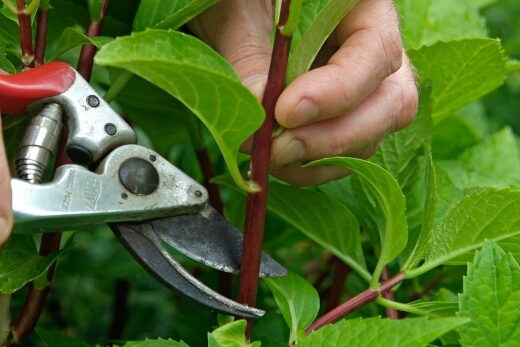
Source: gardenersworld.com
In this guide, we’ve separated basal softwood cuttings as their method is slightly different. Here we’ll talk you through how to take nodal and greenwood softwood cuttings.
Softwood cuttings step by step:
- Fill a small square pot with an equal mix of cutting compost and vermiculite. Dib a hole in each corner.
- Using clean secateurs (get the best secateurs available online here) or garden scissors, cut 5mm below a leaf node (the swollen part of the stem where the leaf emerges), taking 2-5” of stem above the cut.
- Slice off the lower leaves (anything that will be below compost level), and dip in rooting compound.
- Drop your cuttings into the holes you made in the compost earlier.
- Water them well, and place your cuttings in a cloche or propagator (watering will fill soil into the holes around the stems).
- If the soil dries out, water them, but otherwise, keep them in a cold frame, windowsill, or covered up for humidity, and most plants should develop roots within around 4 weeks.
When to Take a Softwood Cutting
Nodal cuttings should be taken in spring and early summer using new growth, provided you have at least 2-3” of new growth to work with.
Take greenwood cuttings in exactly the same way, but use the older growth in early autumn so your plant spends winter developing roots. Greenwood cuttings only work from plants that completely winter hardy in your area.
Where to Cut a Softwood Cutting
Softwood cuttings, including nodal and greenwood cuttings, should be taken from just below a leaf, or set of leaves. Every plant is different, but as a rule of thumb, cut 5mm below the node (where the leaf comes out of the stem) and trim off any leaves that will be below the soil level, leaving at least 5cm of growth above the soil with some leaves to help photosynthesis above ground when roots establish.
Taking Basal Softwood Cutting
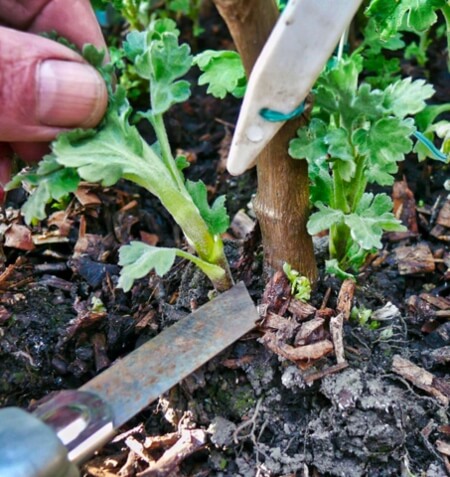
Source: thegardenersalmanac.co.uk
Basal softwood cuttings are slightly different to nodal and greenwood cuttings, in that they require young growth in spring, and are taken where a new shoot leaves the main stem, or rhizome (Dahlias are a great way to practice basal cuttings).
Basal cuttings are a fairly reliable method to take cuttings from herbaceous perennials with rhizomatous roots. Thick or fleshy roots are usually best taken as root cuttings, which we’ll explain later).
When to Take a Basal Cutting
Take basal cuttings as soon as you notice new growth. When young shoots in late winter or early spring reach 5-10cm long, this is the time to take cuttings. Once those shoots develop flower buds or new shoots from themselves it’s too late to take cuttings.
Some plants, like chrysanthemums, should be taken as basal cuttings in mid-winter (healthy plants will send hoots up from the soil around 6 weeks after they finish flowering and their late autumn leaf has dropped.
Where to Cut a Basal Cutting
Cut basal cuttings from strong shoots emerging from roots or old-growth at the base of herbaceous perennials. Try to keep a small portion of the root (or node, for cuttings taken from woody stems) and then plant them exactly as you would plant a nodal or greenwood cutting.
How to Take and Propagate Hardwood Cuttings
Source: theaustralian.com.au
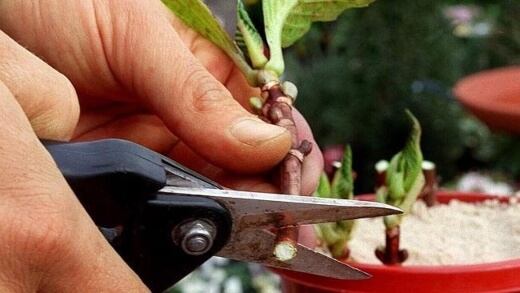
Hardwood cuttings are the ones that usually scare beginners away from cuttings, as they can be hard to take successfully when you don’t use the right material or right plant.
If you want to build confidence with more complicated cuttings try to start with Dogwood or Willow, which are incredibly easy to take hardwood cuttings from.
Willow cuttings are usually called willow whips, and they can even be allowed to dry out between cuttings and planting, as the calloused cuts help them to rot base plates for their roots.
Hardwood cuttings step by step:
- Find a strong shoot in autumn, which has grown since this spring (for Willow, this might be 6ft tall, and for Roses, it could be 6”).
- Remove any really young green growth at the tip to prevent rot over winter.
- For higher yields, you can cut the stem into sections of 6 inches to 1 foot long, as each one will be another plant. Deciduous plants will only root from the part of the stem that was pointing down originally. Cut a straight cut on the bottom of each cutting, and a sloped cut at the top to mark the top and bottom.
- Prepare a trench in the garden with 50% compost and 50% garden soil.
- Plant the cuttings 6” – 1ft apart, and firm them in with your heel so they have good contact with the soil
- Do not move them until next winter when they are dormant and have shown clear new growth.
When to Take a Hardwood Cutting
Hardwood cuttings need to be taken when a plant is dormant. For most deciduous plants dormancy is from late autumn to late winter, but for others, there is only a short window or dormancy in mid-winter before they set bud for next year.
It’s safer to take hardwood cuttings in late winter when temperatures are starting to warm and the days are slowly getting longer again, which reduces the chance of frost or wet rot.
Where to Cut a Hardwood Cutting
The best place to take a hardwood cutting is just beneath a leaf node. By the point you take the cutting, all leaves should have fallen from the plant, so look for the raised bumps along the stem that look like they could break into leaves next year. Cut just below this point.
Cutting and Propagating by Layering
Source: agardenforthehouse.com
Layering is by far the easiest way to take a cutting, but it takes patience, and you do need to have some empty space in the garden around your shrubs for it to work.
Layering plants, step by step:
- Find a young shoot, close to the ground, or one that can be bent down to the floor without snapping.
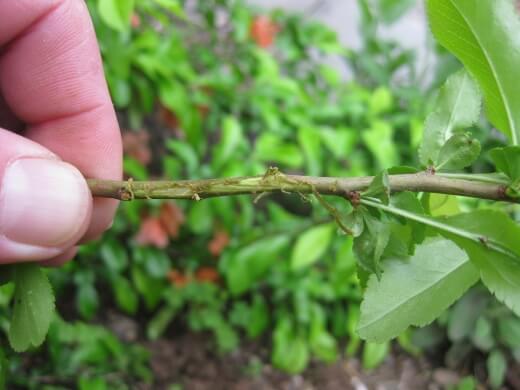
- Remove a section of bark from the shoot so the green part inside the stem is visible (this is where roots will form).
- If you have rooting hormone, apply it to the cut (powdered works best for layering).
- Peg the shoot to the soil, and then cover with 10cm of compost.
Place a bamboo cane next to the cut, and tie any growth beyond the buried stem in, so it sits vertically. This will form the new main stem.
When to Prepare Layering Cuttings
Layering can be done at any time of year as it uses the energy of existing plants but is best done when the plant is dormant.
Evergreen shrubs tend to have more success from layering new plants in spring. Their cuts can callous over in autumn when temperatures are still warmer in the soil from summer, so use the benefit of cooler soils in spring.
Deciduous plants should be layered in autumn as they are usually sending out new fibrous roots at this point anyway.
Where to Cut a Layered Cutting
Layered cuttings are taken from 1-2-year-old branches that are 3-4ft long. Take the cutting as close to the parent plant as possible, provided it can be bent down and pegged to the ground without snapping.
Slice off some bark around halfway along the branch, leaving it attached to the parent, then peg it into place, leaving 1-2ft of stem beyond the cut point to develop leaf in spring and summer.
Different Types of Layering
Propagating by Soil-Layering
This technique, like any other propagating technique, doesn’t work for all plants but it will work for those that have leggy, pliable stems that grow leaves along them. Practise with some of your shrubs and analyse the results.
To propagate by soil-layering use the following steps;
Locate a suitable stem - as previously mentioned find a leggy, pliable stem that grows leaves along it.
Make an underside incision - find a place along the stem that can bend low enough to reach the ground. Make an incision on the part of the stem that touches the soil as an upward slant, taking care not to cut through more than 1/3 of the stem.
Dust with hormone powder - I have never used rooting hormone in soil-layering and have nearly always had success but if you find that you don’t want to risk the result use a little of the powder or gel around the cut.
Remove some soil - scoop enough topsoil to create a small trench for the stem to lay along. Lay the stem down and then cover again with remaining soil.
Hold the stem down - use a metal “U” turned upside down to hold the stem in the soil. The only time you will fail with this technique is when the stem comes away from the soil and air affects the incision.
As an alternative, you can use a pot to grow the plant in by replacing the soil method with some potting mix in a container.
Propagating by Air-Layering
Air-layering is a very similar procedure but rather than keeping the cut stem below the ground the process keeps it in the air. It’s a very successful technique which can be applied to most of the same plants that can be soil-layered.
To propagate by soil-layering use the following steps;
Locate a suitable stem - find a leggy, pliable stem that grows leaves along it.
Make an underside incision - find a place along the stem that won’t reach the ground. Make an incision on the stem at upward slant, taking care not to cut through more than 1/3 of the stem.
Dust with hormone powder if you don’t want to risk the result use a little of the powder or gel around the cut.
Pre moisten your sphagnum moss - the key to successfully propagating by air-layering is that the sphagnum moss remains moist throughout the process. If it dries out, the roots will suffer before they start and will wither and die.
Encase the incision with the sphagnum moss - make sure the sphagnum moss is packed heavily around the cut so as to not leave any area exposed. Then wrap plastic wrap around the moss and tie each end securely using electricians tape.
This will keep the moss from drying out.The benefit of the plastic wrap is that you will be able to see when the roots have begun to form and will know when it is time to cut the new plant away.
Plant it out - cut the stem just below the moss leaving the upper part of the stem with leaves intact. Remove the plastic keeping the moss still tight against the new plant and plant out in some premium potting mix. Keep your new plant in a greenhouse or under plastic for a couple of weeks as it establishes itself in the pot.
(Previously, we advocated for the use of peat/sphagnum moss. However, recognizing its environmental consequences, we've modified our guidance to highlight eco-conscious alternatives that deliver comparable or superior benefits. Refer to our comprehensive guide to learn more about peat moss and its alternatives.)
How to Take Leaf Cuttings
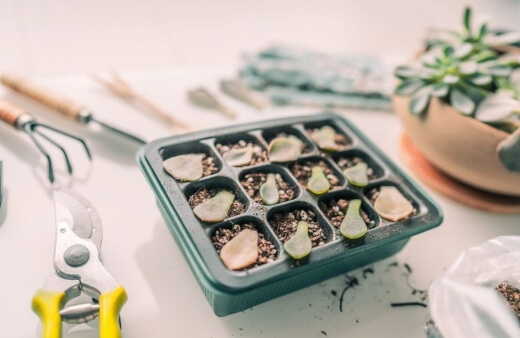
Most cuttings prefer the high concentration of rooting hormones in the node for cuttings, but there are many tropical plants that can be taken easily from leaf cuttings.
Succulents and begonias in particular roots incredibly well from their leaves, but every leaf-cutting needs to be taken differently.
When to Take a Leaf Cutting
Leaf cuttings can only be taken when a plant is in leaf, and are best taken in summer when the leaf is at its healthiest, but for many succulents that hold their leaves all year round you can take leaf cuttings and propagate them indoors at any time of year.
Where to Cut a Leaf Cutting
Whole-leaf cuttings, such as ferns and begonias can simply be placed on the soil surface and left in reasonable humidity until they root. They don’t require any particular cut point but should be removed entirely from their parent plant.
Part leaf cuttings, like sansevieria (mother-in-law’s tongue), can be taken by cutting 1” sections of a leaf and leaving it to slightly callous before placing it half-submerged in compost.
They will root quickly but have two large cuts so should not be over-humidified until new growth appears to prevent infection.
Taking Root Cutting
Source: gkvks.com
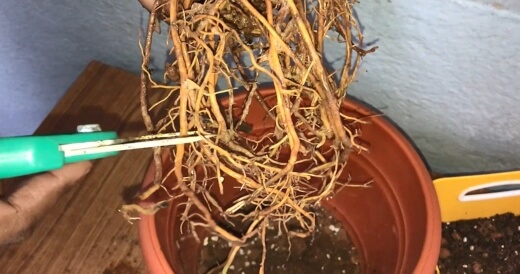
Root cuttings can be a great way to propagate new plants, but there are limited plants that will regrow from root cuttings without succumbing to root rot.
Firstly, it’s important to only use plants with thick roots. Some rhizomatous plants can be propagated from roots, but this is best done by simply dividing the plant in spring.
Root cuttings can be taken in spring and summer, and can often be a more efficient way to create new plants.
Root cuttings step by step:
- Dig up plants with fleshy roots in late autumn (or when dormant).
- Find a young healthy root around the width of a pencil.
- Cut off any fibrous roots from the main root, and snip off the tip.
- Cut roots into 5 - 10cm pieces, cutting the lower end at an angle, to mark the bottom so you plant it upright.
- Fill small pots with seed and cutting compost, and push the entire root into the soil so the top is 1cm deep.
- Cover with grit to stop water splashing young leaves in spring.
- Water them until the soil is just moist, not wet, then leave them in a cold frame over winter, and start watering in spring when new growth appears.
When to Take a Root Cutting
There are some plants, like Comfrey and Japanese Anemone that can be propagated from root cuttings in late winter and even early spring, but as a rule of thumb, most plants prefer to have root cuttings taken in late autumn and early winter when they are entering dormancy.
Where to Cut a Root Cutting
To take a root cutting, dig up dormant plants and find a root about the width of a pencil. This root should be a healthy colour (usually a pale brown, with no signs of rot or weakness).
Cut the root as close as possible to the main root ball it leaves, taking 5-10cm of root as a minimum. Root cuttings can then be separated into 5-10cm chunks which can all be individually propagated using the guide above.
Bonus: How To Propagate Plants by Division
Clumping plants often require division for their own general health and well-being but one advantage of this practice is that you end up with more plants. This is by far one of the easier and most successful ways to propagate plants.
To divide clumping perennials like agapanthus, clivias and even chives start by using two gardening forks like a pair of salad spoons under the base of the plant. You need to position these far enough below the base of the plant to ensure you don’t remove the leaves from the roots.
Lever the two forks against each other as you prise the root ball from the earth and are left with the complete plant out of the ground. Then, begin to divide the clump by finding foliage and roots that could appear to be a separate plant if they were to grow on their own.
Using a sharp knife sever this possible smaller plant from the main clump while keeping as many roots as possible attached. Continue cutting these little plants away until the whole clump is divided.
When you’ve finished dividing the clump, plant out the cuttings in a potting mix or back in the place where they were taken from. You might want to dust the roots with a fungicide prior to planting to increase your chances of success.
Easiest Plants to Take Cuttings From
Best Garden Plants to Take Cuttings from (and How)
There are some really common plants in Australian gardens that can be used for cutting material all year round.
Verbena Bonariensis are one of the most vibrant plants that have come right back into fashion in recent years and are a really easy way to trial basal and nodal cuttings in late winter. They throw out dozens of young shoots in late winter before they begin producing true leaves.
For autumnal cuttings, try Rhododendron greenwood cuttings, or even layering the same plant in spring.
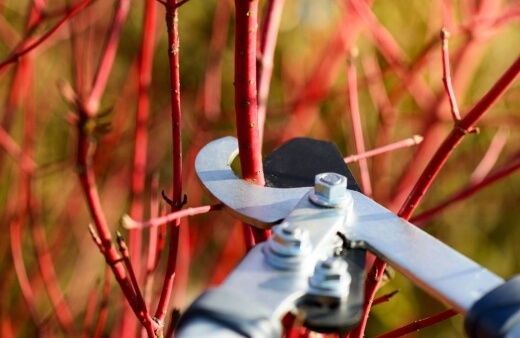
The simplest cutting you can take from most gardens is from the vibrant red dogwoods, which are super simple to take cuttings from in winter, using pretty much any part of this years’ growth and pushing into the soil near the parent plant. It should sprout new leaves in spring.
Best Houseplants to Grow from Cuttings (and How)
Monstera is one of the simplest plants to propagate from cuttings and a great way to create a jungle look in your home in no time at all. You can take a form of nodal cuttings called “wet stick” cuttings, or “chonks”.
The method is the same as the guide above, but you should try to keep a large leaf on the stem for the cutting and start your cutting in water until new roots emerge from the nodes.
Begonia cuttings are really easy cuttings to take too. Simply cut off a leaf in summer when your plant is growing well. This lets young leaves grow out to fill the space and improves overall plant health, and the leaf you remove can be laid flat onto the soil to create new plants. Just water once a week until it sprouts.
The easiest cuttings to take are kalanchoe. If you have a Flaming Katy plant, you need to cut it back to the ground every year to maintain the shape as they can go incredibly leggy, so when you do this, place everything you cut into a jar of tap water.
Pretty much every stem will root, and they can be planted deep in new compost to create dozens of new plants.
Click here to find out more about Kalanchoe and the best varieties to grow in Australia.
Now You Know How to Take Cuttings
Cuttings are a great way to create a whole garden for free. In lockdown 2020 we got special permission to take a cutting from a local park while visitors were away, so I spent my birthday taking basal cuttings from dahlias.
Now we’ve got dozens of bright red and white plants filling the flower beds around our veggies and it didn’t cost a penny.
This ultimate guide on how to take cuttings was put together through trial and a lot of error, so we hope you make the most of this mass of newfound knowledge and throw yourself into the world of plant propagation.
Published on April 1, 2022 by Gary Clarke
Last Updated on September 20, 2025


