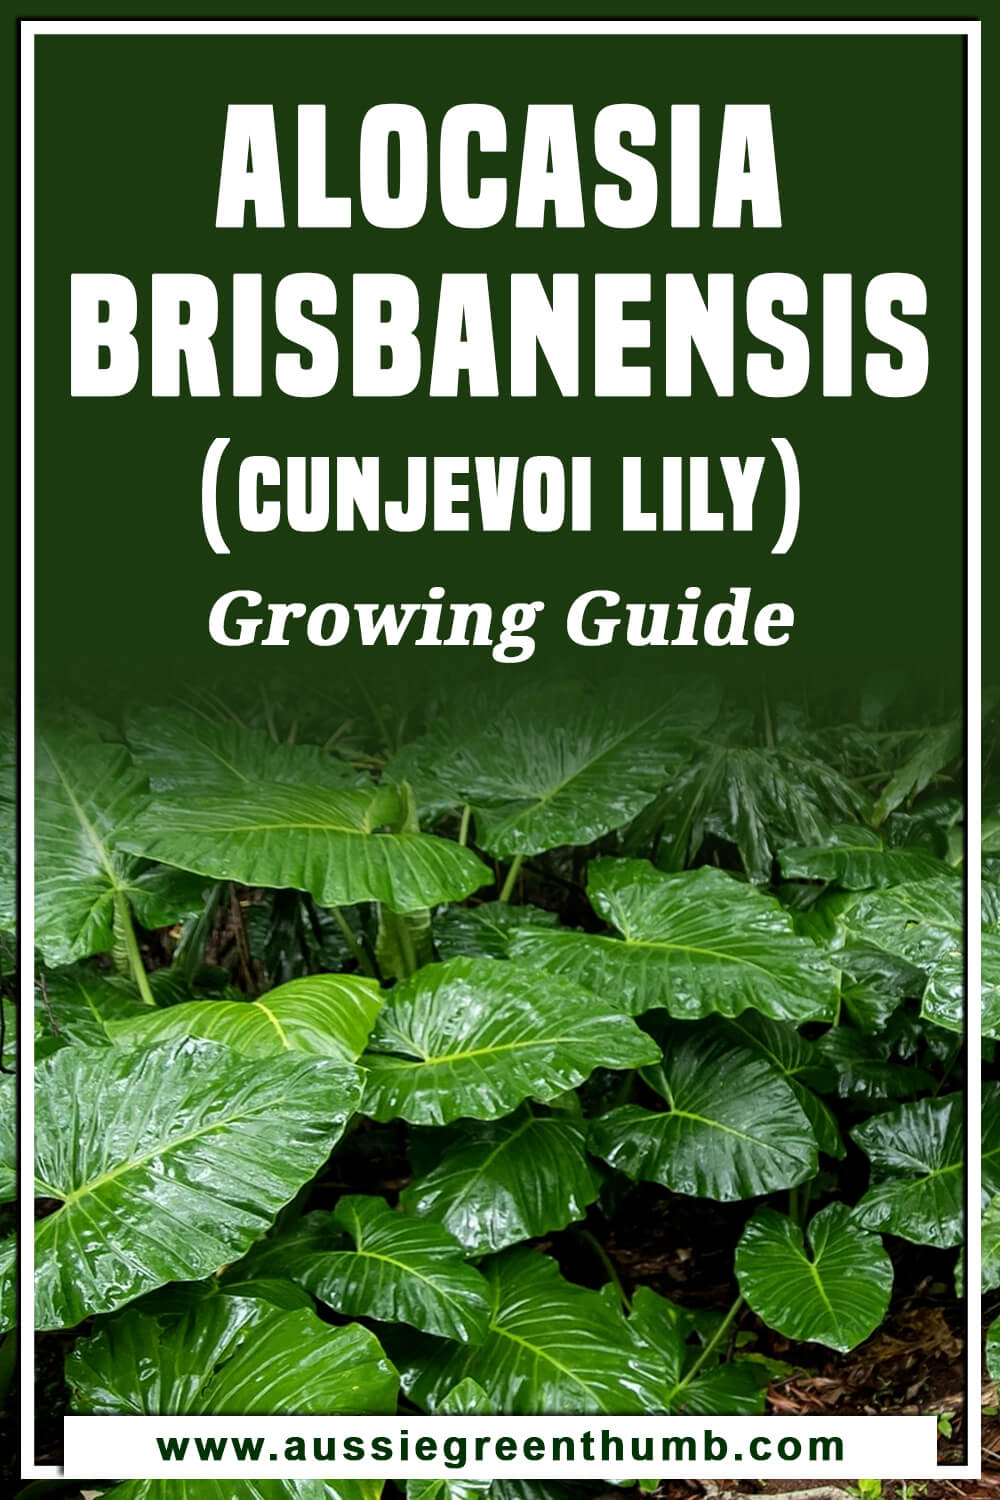
Alocasia brisbanensis is one of the easiest plants to grow in Australia, requiring little care or attention and providing tropical foliage to gardens in almost every climate across the country.
The native Alocasia is architecturally stunning, with leaves that can reach up to 2.5 ft. in length, and petioles (leaf stems) that reach 4-5 ft. long and can be over 3 inches wide at the base.
In this article, we’re going to talk about growing Alocasia brisbanensis and finding the right spot in your garden, as well as a few safety tips for this potentially deadly plant.
More...
Genus: | Alocasia |
|---|---|
Species: | A. brisbanensis |
Family: | Araceae |
Common Names: | Cunjevoi Lily and Spoon lily |
Location: | Outdoor |
Type: | Herbaceous perennial |
Growth: | 7.5ft x 4ft |
Sun requirements: | Shade |
Foliage Colour: | Green |
Flower Colour: | Green, opening to cream |
Flowering: | Summer |
Fruit: | Poisonous red berry clusters |
Maintenance level: | Low |
Poisonous for pets: | Highly toxic if chewed or swallowed |
What is Alocasia brisbanensis?
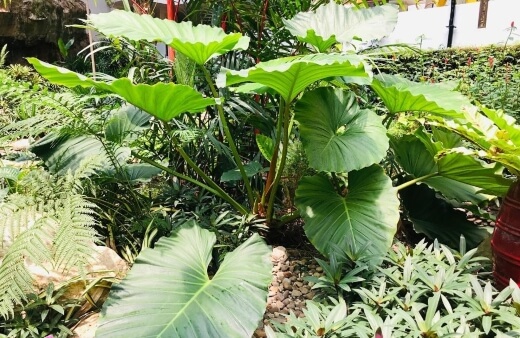
Alocasia brisbanensis, also known as Spoon lily and Cunjevoi lily, was initially classified as a lily, hence its common name, thanks to its distinctive flowers that resemble oversized peace lilies. (Learn more about peace lilies here)
The flowers of Alocasia brisbanensis open up from closed green spikes to reveal a delicately coloured cream teardrop, with a striking yellow pollen spike. As the flowers die off they reveal a pod of bright red berries.
There is something truly mystical that comes from this visual likeness to the peace lily, and it is equally poisonous to cats and dogs as its namesake.
Thankfully, when grown outdoors it doesn’t attract mammals or birds to its pollen and relies entirely on flies.
Cunjevoi Lily's Natural Habitat
Alocasia brisbanensis is native to the rainforests of Eastern Australia. This gives us a very good clue to its care. Rainforest plants thrive in moist, but not damp soil.
Remember that the essence of rainforest is always its trees, so everything growing under their canopy needs to cope with regulated water, limited light, and has a low tolerance to wind.
To mimic their natural habitat, you should grow Alocasia in moist soil but not boggy conditions, and give it plenty of shade. Alocasia brisbanensis are hardy in most of Australia but should be cut back and covered with fleece when frosts are predicted.
Is Alocasia brisbanensis Poisonous?
Every part of the Alocasia brisbanensis plant is highly toxic to cats and dogs as well as humans. If you see your child or pet chewing or swallowing any part of the plant, seek immediate medical attention.
Contact with the eyes can cause severe irritation and should be washed out immediately. If itching or pain persists after washing, seek medical attention.
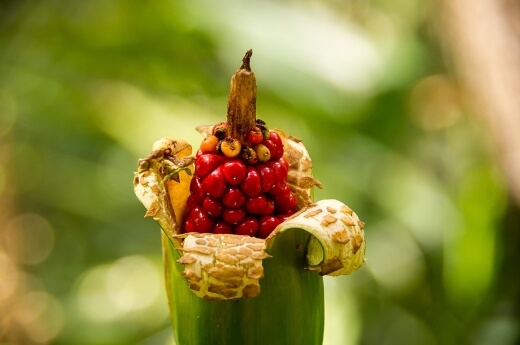
What are the signs of Alocasia poisoning?
The first signs of Alocasia poisoning will be discomfort, with painful irritation and burning across the lips, mouth, throat and tongue. Later signs included nausea, vomiting and diarrhoea.
Pets will paw at their mouths, and quickly begin to foam at the mouth. Immediate veterinary attention should be sought. If consumed by humans, seek medical advice immediately.
Alocasia brisbanensis Varieties
While it can be difficult to cross-pollinate different species of Alocasia, there are controlled variations in breeding with Alocasia brisbanensis. The only difference being their stem colour, with height, spread, and leaf size all identical between the two sub-genuses.
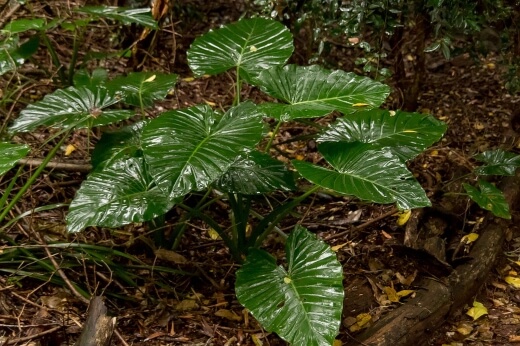
Dark Stemmed Alocasia brisbanensis
Dark stemmed Alocasia brisbanensis give a very particular depth to the edge of a border. If you’re used to gardening in the traditional tiered border style (ground cover plants at the front, stepping up to taller shrubs at the back) then try growing dark stemmed Alocasia brisbanensis at the front of a shaded border.
The dark stems give structure, and windows through to your other plants breaking up traditional planting beautifully.
Light Stemmed Alocasia brisbanensis
Light stemmed Alocasia brisbanensis are quintessentially tropical plants. Planted in a slightly damp shaded corner of the garden. they’ll give you bright green foliage all year round and provide the perfect backdrop to flowering tropical perennials, or even as a contrast to informal cottage garden planting.
How to Grow Alocasia brisbanensis
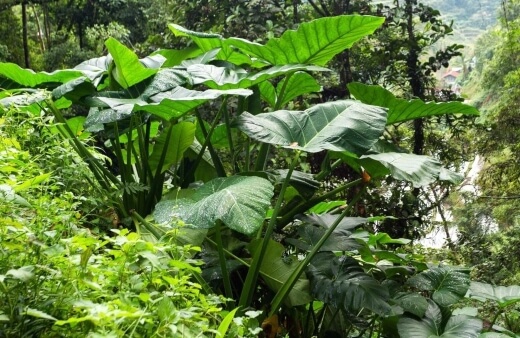
Alocasia brisbanensis are best grown outdoors, but it is possible to grow them as a houseplant, just like their smaller cousins. Remember though that A. brisbanensis can reach heights of up to 7.5 ft. at maturity (after around 5 years) so will eventually need to be planted out in the garden, or kept in a well-watered container.
How to Grow Spoon lily Outdoors
Alocasia brisbanensis are best grown outdoors and require very little care or attention if planted in the right spot. The best location for Alocasia brisbanensis is a shaded border, with rich, moist soil.
They are native to Australia so are happy through most parts of the country, rarely needing watering unless they dry out around the base of the plant.
For Alocasia planted outdoors in dry conditions, or in containers, water once a week in spring and summer to avoid dehydration.
Growing Cunjevoi Indoors
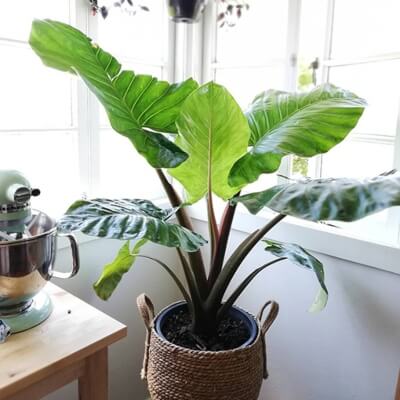
Source: thejunglecollective.com.au
To grow Alocasia indoors, keep it well watered never allowing the soil surface to dry completely, but never watering while the soil is still wet.
Keep it in a bright location, but away from direct light by sitting its pot on the opposite side of a room to a North facing window. While all Alocasia enjoy humidity, they should be well-ventilated to prevent fungal issues or bacterial rot.
They grow on petioles (leaf stems) rather than stems or branches, so do not have the reliance on many more shrubby plants against fungal infection.
If you are looking into adding more plants indoors then don't miss our Rhapis palm growing guide for everything you will need to know.
Alocasia brisbanensis Propagation
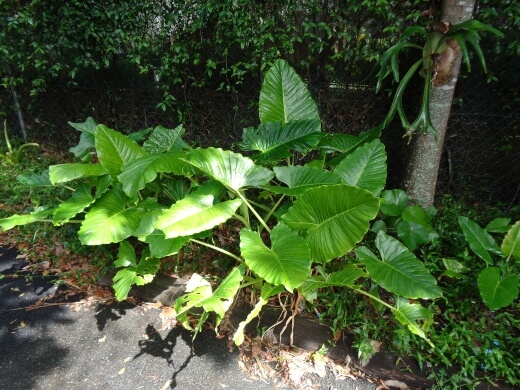
Source: ppnn.org.au
Propagating Alocasia brisbanensis from Seed
It’s difficult to find Alocasia brisbanensis in typical garden centres, but there are plenty available from dedicated seed shops specialising in rare and native plants.
Alocasia brisbanensis seeds are best sown fresh, but the method of sowing is the same for fresh and dried seeds:
- Soak seeds in water for 12 hours
- 9cm pots with a mix of sieved garden compost and perlite (do not use seed compost as it is too free draining).
- Sow seeds on the surface of the soil, and cover with 5mm of your perlite and compost mix.
- Keep them moist, but not damp.
- Germination should begin after 2-3 weeks at around 20°C.
- Transplant seedling when the roots are poking out of the bottom of the container, and the first leaves have opened.
Propagating Cunjevoi Lily from Cuttings
Alocasia grows on petioles rather than stems and has rhizomatous roots so cannot be propagated from cuttings.
Alocasia brisbanensis Propagation from Division
Alocasia has thick rhizomes beneath the soil surface with a network of finer roots spreading out from there. As your Alocasia matures you’ll notice new plants cropping up at the base of the old plant. These can be dug up, or divided easily from existing plants.
To divide Alocasia brisbanensis, it’s best to dig out the entire plant and insert two garden forks between the bases of the leaf clumps. Pull the roots apart using garden forks, and that’s it – new plants!
Alocasia brisbanensis Care Tips
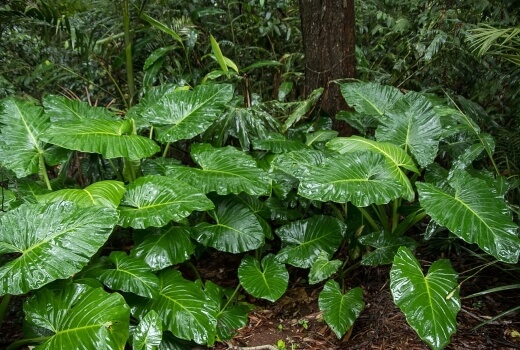
Mulching Cunjevoi Lily
Alocasia should never be allowed to dry out completely, so a good way to feed them as well help retain moisture as temperatures rise in spring is to give them a generous mulch of garden compost.
Don’t use anything too rich like manure, as the main purpose here is to retain water and stop evaporation from the soil surface.
Mulch Alocasia brisbanensis in spring with at least 2 inches of compost around the entire base of each plant. For Alocasia grown in containers, it’s a good idea to scrape off an inch of soil from the top of the container, and replace it with fresh compost.
What Fertiliser to Use
Alocasia brisbanensis are light feeders so don’t need any feeding unless they are showing signs of specific deficiencies (see common problems below). Mulching A. brisbanensis in spring with compost or well-rotted manure will provide all the nutrients it needs for the year ahead.
Watering Alocasia brisbanensis
If kept indoors or planted in free-draining soil, Alocasia brisbanensis should be watered regularly to prevent the root ball from drying out. In nature, these plants require humidity and evenly moist soil, so your aim as their carer is to provide an environment as close to that as possible.
Their large leaves are designed to capture water and channel it to their roots, so one big drink, once every 3-4 weeks is enough to keep them going even in dry shade.
Pruning and Repotting Cunjevoi
In colder parts of Australia where it can freeze in winter, it’s advised to cut back stems to 3-4 inches above the soil level, then wrap the crown in fleece to protect it from frost.
New leaves grow quickly in spring when the ground temperatures rise. Here is a comprehensive guide on how to prune Australian natives.
Cunjevoi Pests and Diseases to Look Out For
Alocasia brisbanensis are very resistant to pests and even in Sydney, where temperatures are more conducive to pests, they tend to steer clear of these flavourless plants.
But Alocasia has no particular resistance to pests like aphids or mealybugs, so it's still worth keeping an eye on its leaves occasionally in case an infestation appears.
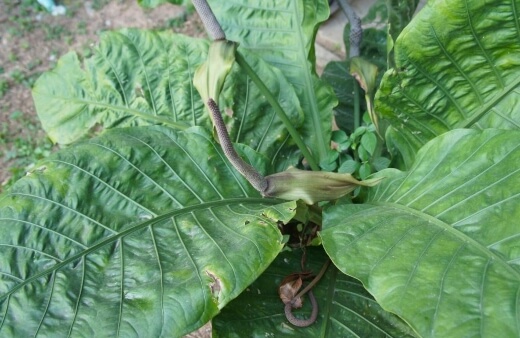
Spider Mites
Spider mites are the most common pest on Alocasia, and even with A. brisbanensis they can make their home happily on the leaves, making the most of the chlorophyll that gives leaves their lustre and colour.
Spider mites are arachnids, spinning silk webs to protect their young, though they rarely use them to spin typical webs. For very bad infestations you’ll see silk strands between leaves, or simply drooping from leaf tips of Alocasia brisbanensis.
Before you notice the bugs themselves, you’ll notice dry leaves that start to turn slightly brown and starved of water, despite the soil being moist, and the rest of the plant looking perfectly healthy.
Essentially, what’s happening here is that they are reducing the leaf's ability to store water.
Neem oil is the best long term treatment of spider mites on most plants and does little harm to your plants, but unlike other Alocasia that are grown as houseplants, A. brisbanensis has a trick up its sleeves… it’s boring.
Spider mites, when blasted off Alocasia brisbanensis with a hose, almost never return. Most spider mite infestations end up on A. brisbanensis by mistake, and live happily there, but will usually find a more productive home once blasted to the ground with good old fashioned water.
Mealybug
Mealybugs are very distinctive insects, covering themselves in a bitter coat of their own foamy saliva to protect them from predators. If you ever see white dots around your leaves but have yet to notice problems with the plant, it is likely mealy bugs that you’re dealing with.
For more serious infestations they can cause fungal infections as they increase the humidity in particular spots on leaves, creating brown and yellow spots that later turn black.
This can spread down the petiole to the rhizomes so mealy bugs should be removed whenever you see them. Like spider mites, mealybugs don’t aim for Alocasia brisbanensis, they just end up there by mistake, and once they’re there, they stay there.
The easiest way to get rid of them is to clean them off with a cloth – squishing as you go. It’s unpleasant work but it has to be done. For a less hands-on approach, you can apply a diluted neem oil solution as an organic pesticide.
Root Rot
Root rot is most often a sign of overwatering. It is the most common cause of death for mature Alocasia brisbanensis in the garden in recent years as our climate changes and conditions in the garden change with it.
Where springs are warming, they are also more humid, and the arid summer temperatures can dry roots out before wet autumns. These extreme weather conditions cause rhizomes to split, shrink and expand, and bacterial and fungal spores can take hold.
Once root rot has taken hold of a mature Alocasia you need to take fast, and potentially drastic, action. Signs of root rot in Alocasia brisbanensis are yellowing leaves.
The leaves yellow as water isn’t reaching them, and they can’t produce green chlorophyll fast enough to maintain their vibrancy. This is due to their roots failing and no longer supplying water.
Root rot needs to be dealt with quickly. When root rot spreads in Alocasia brisbanensis it can affect the entire plant, and it will not recover.
If you notice signs of root rot, such as moisture staying in the soil for longer than usual, blacking petioles, or yellowing leaves, then dig out your plant, and check for any black, brown, or squashy roots.
Any root that isn’t a pale brown, white, cream or green colour should be removed, even if that means getting rid of 90% of the plant. Shake off any excess soil, clean the remaining root ball, and replant with new compost.
Sun Scorch and Leaf Burn
Alocasia brisbanensis like shade, and partial shade. At most, they should be planted in dappled light. When they are exposed to full sun they quickly crisp on the edges of their large leaves.
Sun scorch in Alocasia brisbanensis isn’t much to worry about. It’s a resilient plant against temperature changes, so for potted plants, simply move them to a more shaded position.
For plants in the border, dig them out and move them somewhere more shaded, or if you’re determined to keep them in position, water more frequently, and never water their leaves directly.
Alocasia brisbanensis FAQs
Is Alocasia brisbanensis poisonous to touch?
Alocasia brisbanensis is poisonous when consumed and can cause severe skin irritation thanks to the calcium oxalate crystals, which have sharp pointed edges that create tiny painful scratches to any part of the body.
Always wear gloves when handling these plants, and never touch your face or eyes after pruning.
Do Alocasia brisbanensis need misting?
Alocasia brisbanensis should be misted weekly if grown indoors. Grown outdoors, there is no need to mist or spray the leaves of Alocasia brisbanensis in Australia, as it is happily left alone in shade.
Is Alocasia brisbanensis an air purifier?
Alocasia brisbanensis, like all forms of Alocasia, is an air purifying plant recognised by NASA for its distinct ability to filter toxins from the air.
Have Fun Growing Alocasia brisbanensis Both Indoors and Outdoors
Whether you’re interested in Alocasia brisbanensis for its beauty, its attraction as a native plant, or simply because it’s easy to grow, you can’t go wrong with these excellent foliage plants which will look after themselves in almost all circumstances.
However, remember to take extra care with any pruning, don’t touch your face after handling Alocasia brisbanensis, and never allow your pets or children to chew, swallow or make prolonged contact with its poisonous leaves.
Published on April 30, 2022 by Lorri Hopkins
Last Updated on February 26, 2024

