Brussels sprouts are, without question, the most hated vegetable in the world. It’s a shame, because when cooked right and grown well, they have a firm bite, and a rich flavour that outperforms most cabbages at the dinner table.
As well as celebrating the much-maligned sprout, we’re going to teach you everything you need to know about growing brussel sprouts in Australia, and some more unusual varieties and hybrids you can grow that might just win you round to these delicious leafy greens.
More...
Family: | Brassicaceae |
|---|---|
Genus: | Brassica |
Species: | B. oleracea var. gemmifera |
Common Names: | Brussels Sprouts, Sprouts |
Location: | Outdoor |
Type: | Biennial, vegetable |
Growth: | 1m tall x 0.5m wide |
Sun requirements: | Full sun / partial shade |
Foliage Colour: | Green |
Flower Colour: | Yellow |
Flowering: | Spring (the second year) |
Fruit: | None |
Maintenance level: | Medium |
Poisonous for pets: | Non-toxic to cats and dogs |
What are Brussels Sprouts?
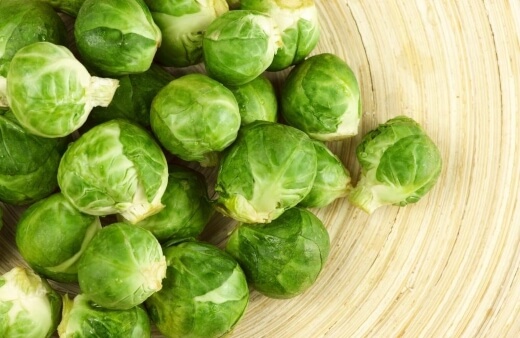
Brussels sprouts are a unique member of the Brassica family. Common brassicas include kohlrabi, cabbages, broccoli, rutabaga, cauliflower and kale, but there are rarer forms like collard greens and mustard, or those that are often misunderstood like turnips.
Even rapeseed comes from a cross between turnips and mustard). What makes sprouts so unique though is their growth habit. They don’t grow like cabbages, as individual balls on the ground. Instead, their closed leaf cups form along a thick stem, with bushy foliage at the top.
In fact, you can actually eat those tough stems if you steam or boil them for long enough (though we really wouldn’t advise it).
Brussels Sprouts’ Natural Habitat
Brussels sprouts are not a naturally occurring vegetable, and their origins are murky at best. While there are reports that they were first grown in Rome, it’s more likely that the leaf stalks eaten in Rome were actually bolted cabbages or an unknown form of kale.
Sprouts, unlike other cabbages, develop tall stalks, with bushy foliage at the top. Some naturally occurring brassicas, like kale, grow the same way, but without balling up their lower leaves.
Centuries of cultivation and adaptation led to the popular vegetable which got its name from Brussels, Belgium, where it became popular in the 13th century.
Best Varieties of Brussels Sprouts to Grow in Australia
1. Dagan Brussels SproutsDagan are gorgeous Brussel sprouts, and have a fresh spring green flavour, unlike most sprouts you can grow at home. They ripen well and evenly together on the stalk, so there is no need to regularly harvest young sprouts as they form. | 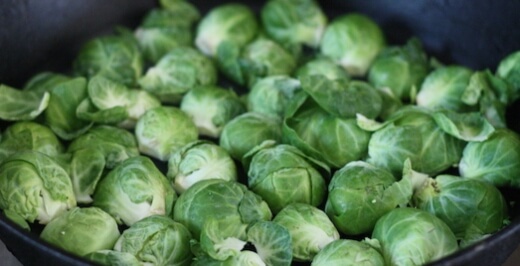 Source: gaiaorganics.ca |
2. KalettesKalettes are technically not brussels sprouts, but if you’re looking for something a little different, they have a zesty to them that just isn’t there in other brussels sprout varieties. Their loose, fluffy leaf forms hold sauces beautifully, and sliced down the middle they taste glorious straight off the BBQ. | 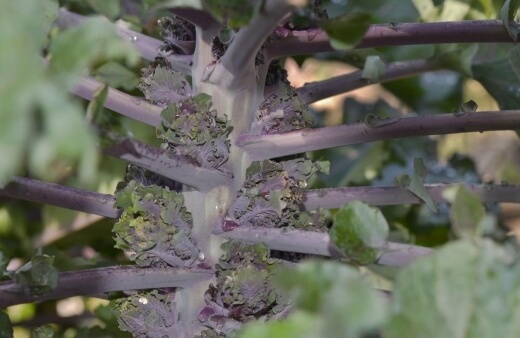 |
3. Catskill Brussels SproutsCatskill are a great heritage variety, developed in 1941 for shorter stalks and larger sprouts. They typically grow to around 60cm tall and have sprouts between 5-7cm in diameter. Freeze after harvesting to improve their flavour as they are the epitome of bad sprout flavour if cooked fresh. | 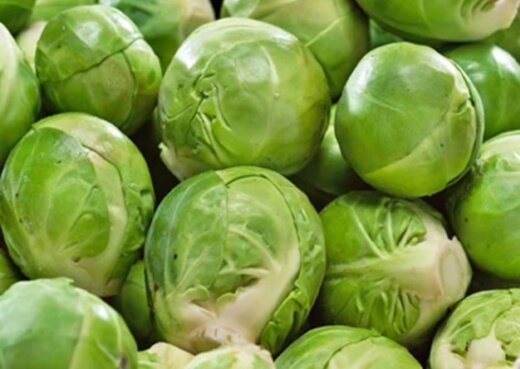 Source: etsy.com |
4. Diablo Brussels SproutsDiablo grows to around 1m tall, with firm sprouts filling up its stem in every direction. The leaves are particularly tender at the top of the plant too and cook down well as spring greens, mixed through pasta or rice. | 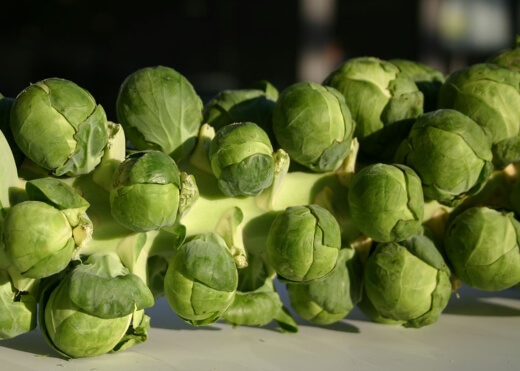 Source: upstartsorganicseedlings.com |
5. Gustus Brussels SproutsGustus are a cute sprout to grow for anyone who’s a little on the fence. The small sprouts are easy mouthfuls and are best steamed fresh. They don’t have the same pungent sulphur contact of many brussels sprouts either, so are a good way to get greens into kids. | 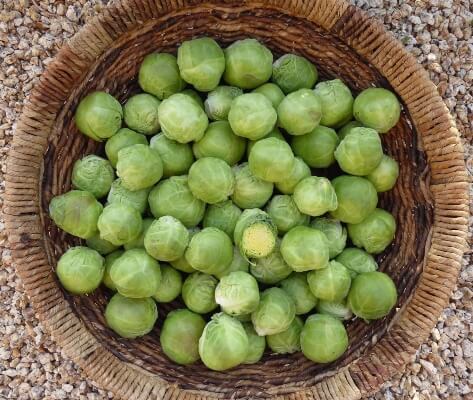 Source: seedway.com |
6. Hestia Brussels SproutsIf you’re lucky enough to get frost, try growing Hestia. Hestia has a high brix content (soluble sugars) so sweetens beautifully after freezing. The only downside of Hestia is that they ripen upwards, so should be harvested regularly throughout the season, meaning your first harvest will be nowhere near as flavourful as your last. | 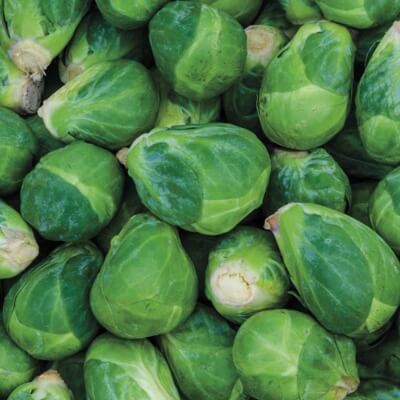 Source: gurneys.com |
7. Redarling Brussels SproutsIf you have problems with aphids or caterpillars, try growing Redarling. The deep purple leaves, stems and sprouts put most pests off. Like most red-leaved cabbages they have higher vitamin levels than their green counterparts, and a super stronger flavour as their dark exterior is thoroughly warmed by the sun. | 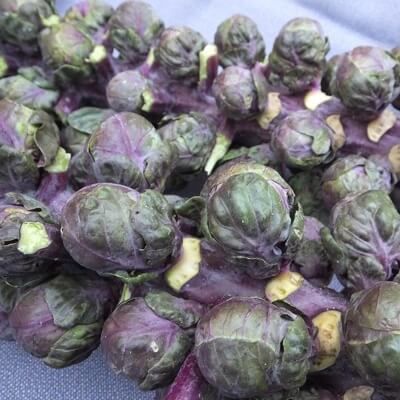 Source: osborneseed.com |
8. Green Gems Brussels SproutsI’m not a fan of the flavour of green gems. Even homegrown green gems taste just like store-bought brussels sprouts, but… if you’re growing for show, green gems are the perfect Brussel sprout. They are well proportioned, grow perfectly straight, and ripen regularly so give perfect sprout stalks every time. | 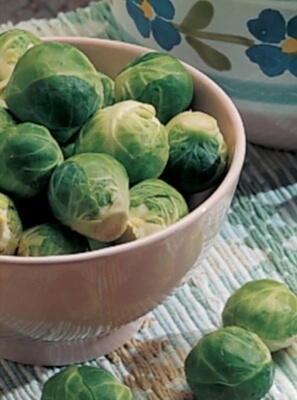 Source: seedsfromplants.com |
9. Rubine Brussels SproutsRubine are delicious red sprouts, with deep red veining across each leaf forming tight balls of brussels sprouts flavour. They are only small, even if left on the plant right to the end of the season, but well worth growing for how good they look when cooked. Toss them in a griddle pan for a few minutes and eat while they still have bite for the best flavour. | 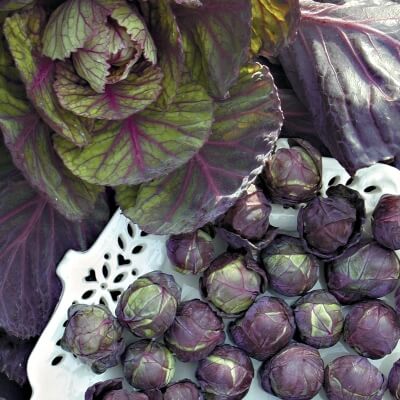 Source: territorialseed.com |
10. Falstaff Brussels SproutsIf you like the idea of dark-leaved brassica, you won’t find any darker than Falstaff. The deep purple, almost black sprouts produced on this gorgeous, tall Brussel sprout are perfect for showing off to guests and have a high sugar content which gives a nutty flavour in early crops, and an intense sweetness in winter crops. | 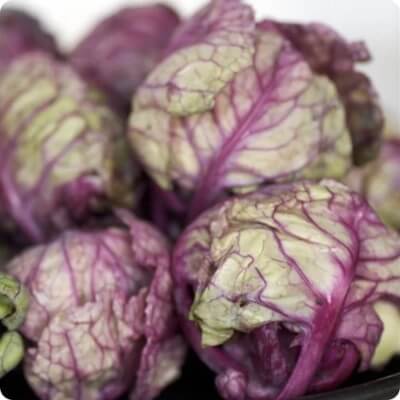 Source: incredibleseeds.ca |
1. Dagan Brussels Sprouts

Source: gaiaorganics.ca
Dagan are gorgeous Brussel sprouts, and have a fresh spring green flavour, unlike most sprouts you can grow at home. They ripen well and evenly together on the stalk, so there is no need to regularly harvest young sprouts as they form.
2. Kalettes

Kalettes are technically not brussels sprouts, but if you’re looking for something a little different, they have a zesty to them that just isn’t there in other brussels sprout varieties.
Their loose, fluffy leaf forms hold sauces beautifully, and sliced down the middle they taste glorious straight off the BBQ.
3. Catskill Brussels Sprouts

Source: etsy.com
Catskill are a great heritage variety, developed in 1941 for shorter stalks and larger sprouts. They typically grow to around 60cm tall and have sprouts between 5-7cm in diameter.


Get Your Free Guide:
Master Growing Australian Natives eBook
A Must Have Complete Guide for Every Australian Garden
Get Your Free Guide:
Master Growing Australian Natives eBook
A Must Have Complete Guide for Every Australian Garden
Freeze after harvesting to improve their flavour as they are the epitome of bad sprout flavour if cooked fresh.
4. Diablo Brussels Sprouts

Source: upstartsorganicseedlings.com
Diablo grows to around 1m tall, with firm sprouts filling up its stem in every direction. The leaves are particularly tender at the top of the plant too and cook down well as spring greens, mixed through pasta or rice.
5. Gustus Brussels Sprouts

Source: seedway.com
Gustus are a cute sprout to grow for anyone who’s a little on the fence. The small sprouts are easy mouthfuls and are best steamed fresh. They don’t have the same pungent sulphur contact of many brussels sprouts either, so are a good way to get greens into kids.
6. Hestia Brussels Sprouts

Source: gurneys.com
If you’re lucky enough to get frost, try growing Hestia. Hestia has a high brix content (soluble sugars) so sweetens beautifully after freezing.
The only downside of Hestia is that they ripen upwards, so should be harvested regularly throughout the season, meaning your first harvest will be nowhere near as flavourful as your last.
7. Redarling Brussels Sprouts

Source: osborneseed.com
If you have problems with aphids or caterpillars, try growing Redarling. The deep purple leaves, stems and sprouts put most pests off. Like most red-leaved cabbages they have higher vitamin levels than their green counterparts, and a super stronger flavour as their dark exterior is thoroughly warmed by the sun.
8. Green Gems Brussels Sprouts

Source: seedsfromplants.com
I’m not a fan of the flavour of green gems. Even homegrown green gems taste just like store-bought brussels sprouts, but… if you’re growing for show, green gems are the perfect Brussel sprout.
They are well proportioned, grow perfectly straight, and ripen regularly so give perfect sprout stalks every time.
9. Rubine Brussels Sprouts

Source: territorialseed.com
Rubine are delicious red sprouts, with deep red veining across each leaf forming tight balls of brussels sprouts flavour. They are only small, even if left on the plant right to the end of the season, but well worth growing for how good they look when cooked.
Toss them in a griddle pan for a few minutes and eat while they still have bite for the best flavour.
10. Falstaff Brussels Sprouts

Source: incredibleseeds.ca
If you like the idea of dark-leaved brassica, you won’t find any darker than Falstaff. The deep purple, almost black sprouts produced on this gorgeous, tall Brussel sprout are perfect for showing off to guests and have a high sugar content which gives a nutty flavour in early crops, and an intense sweetness in winter crops.
How to Grow Brussels Sprouts
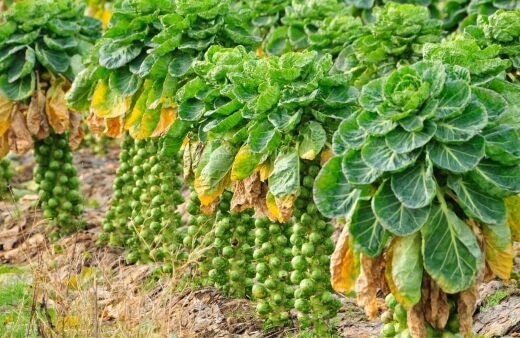
Brussels sprouts need plenty of space, and plenty of water to grow well, and benefit from as much organic matter as you can give them. Like all brassicas, they do not like competition so grow them in dedicated beds, or in pots where they have weeds or competing plants.
Growing Brussel Sprouts Outdoors
Plant Spacing
Space brussels sprout at least 1m apart in their final position when they are large enough to handle. While this might seem like a lot of space for each plant, they have wide root runs and require huge amounts of water.
Best Soil for Brussels Sprouts
Brussels sprouts, like any brassica, need plenty of water but will rot completely if left in standing water. Create a well-drained bed, with generous amounts of organic matter.
For sandy soils, improve them by digging comp-sot or rotted manure into the bed before planting. For loamy, humus-rich soil, add sand, perlite or grit into the soil to improve drainage.
Sunlight Needs
Brussels sprouts need plenty of light but can cope in partial shade. The worst thing for brussels sprouts is humid, shady conditions, where they develop mildew and play host to aphids on moist stems.
Water
Never allow the soil around the base of brussels sprouts to dry completely. Dry soil will lead to tough shoots, and loose sprouts, without enough water content to really bulk out or give a good bite to your crop.
Water generously once or twice a week, rather than a little every day, to ensure that the roots have access to plenty of moisture, and water doesn't simply evaporate away in warm weather.
How to Grow Brussels Sprouts in Pots
If you don’t have a dedicated vegetable plot in the garden, try growing sprouts in pots. Brussels sprouts hate competition, and like access to their own dedicated water supply.
Filling a large planter with compost (minimum: 40cm diameter) provides space for a single plant, but you can completely control the climate for that plant.
Avoid placing pots too close together, as it's still important to allow airflow between plants. Leave a gap of around 30cm between each pot.
Tip: place brussels sprout pots on soil. This prevents water from draining too quickly, and helps roots will often grow out into the soil below if they require extra moisture.
Propagating Brussels Sprouts from Seed
You can sow brussels sprouts directly into the garden, or indoors, depending on space and timing. Below, we’ll look at how, and when to do each.
Sowing Brussels Sprouts Indoors
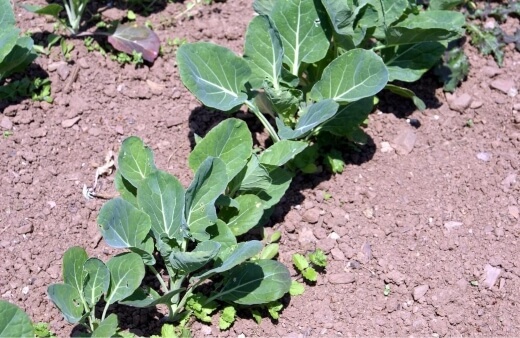
The most reliable way to sow Brussel sprouts is in seed trays indoors. Sow sprouts indoors, in a seed tray filled with fresh seed compost from late September-December (depending on the climate), then prick them out into individual pots when they are large enough to handle.
When sprouts reach 20cm tall, and have true leaves with roots poking out of the base of their containers, they are ready to plant in the garden.
Sowing Brussels Sprouts Outdoors
To direct sow brussels sprouts, the weather needs to be reliably warmer, so wait until late spring and sow directly into a prepared bed. Prepare your bed, or pot, by sieving the top two inches of compost and removing any large chunks. Rake it smooth, and lightly water the bed.
Create drills (shallow trenches) 1m apart, and sow brussels sprout seed thinly along the length. As seedlings germinate, thin out the weaker plants, leaving 80cm-1m between plants. Keep the soil moist as they develop.
How to Care for Brussels Sprouts
Once you’ve planted your sprouts, you need to keep caring for them for the next 3-4 months. That includes fertiliser, regular watering and occasionally pruning off damaged growth to prevent disease.
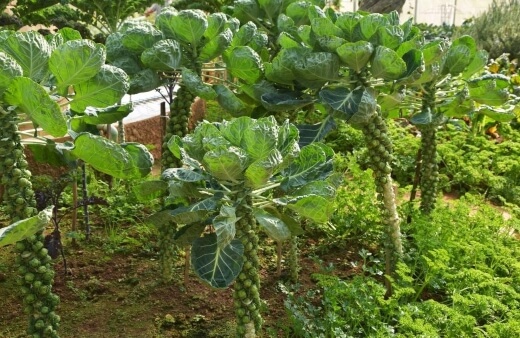
Brussels Sprout Fertiliser
Sprouts are actually quite particular about fertilisers. They need a reasonably well-balanced organic feed, with an NPK of around 8:12:11, as all three major nutrients (Nitrogen, Phosphorus and Potassium) are essential to healthy brussels sprouts.
After 60 weeks, add a calcium-rich fertiliser to the soil, either as a liquid feed, or by sprinkling bone meal, or egg shells, around the base of each plant.
As brussels sprouts develop, give them fertilisers with higher phosphorus and potassium, and reduce nitrogen levels. This develops stronger foliage, which is what sprouts are all about.
Watering Schedule
With significant differences in rainfall between each coast of Australia, it’s hard to give a general overview of watering for sprouts, but in warmer, drier climates, water at least twice a week, providing at least 4-5L per plant, per week.
In areas with higher rainfall or cooler temperatures, 3-4L per week should be enough per plant.
Pruning Brussels Sprouts
Sprouts grow as a single stem and do not require any pruning through the growing season. However, if you notice yellowing leaves, rust spots, or mildew, the safest option is to remove the affected growth, to prevent the spread of infection.
Harvesting Brussels Sprouts
There are two ways to harvest brussels sprouts, and like most veggies, harvesting smaller crops earlier produces higher yields and better flavour. Below, we’ll look at how, and when to harvest brussels sprouts for the best crop.
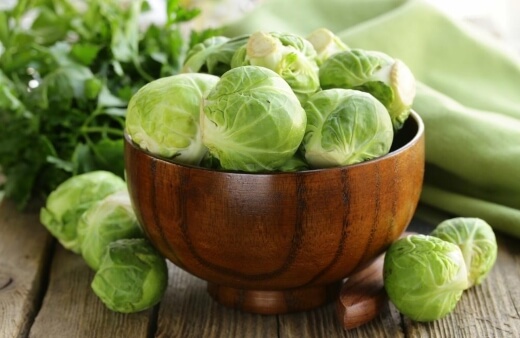
When to Harvest Brussels Sprouts
Brussels sprouts are ready to harvest as soon as they begin to form balls. This should be around 60-80 weeks after planting. By harvesting sprouts as they form, you can have a continuous crop of brussels sprouts through the season, and the small, cabbage-like crops will be firmer and have a fresher flavour than the tough, over-formed balls from later in the season.
The other option is to leave your plants to develop balls all the way up the stem and harvest around 90 days after planting. Harvesting this way with the entire stem intact, prologues storage by up to a week.
Leave brussels sprouts outdoors, on the plant, through frosts or cold weather. While fully formed sprouts are tough when left, if you live anywhere with a risk of frost, you should embrace it. Frost tenderises Brussels sprouts and improves their flavour.
How to Harvest Brussels Sprouts
Sprouts are easy to harvest. Simply bend each ball away from the stem and it should snap away with a base plate. If individual sprouts are difficult to remove from the main stem it can be the result of underwatering or drought, causing tougher stems. In this case, use a sharp knife to cut each sprout from the stem.
How to Store Brussels Sprouts
Sprouts keep best in the fridge, with a couple of sheets of kitchen paper in a plastic bag to soak up moisture. Sprouts will keep for up to two weeks in the fridge but are best eaten straight away.
Harvesting sprouts on the stem prologues their storage by around a week.
Brussels Sprout Pests and Diseases
To avoid and limit the risk of common brussels sprouts pests and disease, use a crop rotation system that leaves at least three years between planting brussels sprouts in the same bed.
Clubroot, ring spot and black rot are the most common diseases for sprouts, and they remain in the soil for several years, affecting any brussels sprouts grown in the same spot.
Companion planting won’t reduce the risk of disease, but it can help deter or confuse potential pests, including slugs, snails, aphids and diamondback moths.
Brussels sprout, and all brassicas, produce sulphur, which creates their distinct bold flavour, and distinct aroma. While we’re normally able to smell brassicas on warm days, most pests can smell them from miles around even in cool weather.
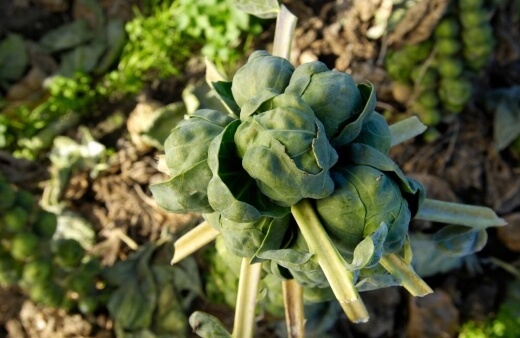
Planting other fragrant plants nearby can help to mask the smell, and onions and lavender are proven to distract several common pests.
Aphids
Aphids and blackfly are brassica terrorists. They suck the life from growing tips, and are incredibly hard to get rid of. If you notice small clusters of green, white, or black flies on the growing tips on your plants, treat them with neem oil to reduce the problem.
Diamondback moths
The only effective way to control the damage of diamond black moth caterpillars is to net your crops. Create a sturdy frame around your brussels sprouts bed, tall enough to accommodate their full height. Cover with a fine mesh fabric (net curtains work well).
Slugs & snails
Distract slugs and snails from brassicas and brussels sprouts by planting disposable companion plants. Healthy marigolds planted around the outside of any sprout bed will distract slugs for long enough that plants can establish.
Slugs are most active at night and in the evening. Do a weekly patrol in the evening and remove and dispose of slugs. Alternatively, encourage wildlife into your garden. Plenty of birds and small mammals love to snack on slugs.
African black beetle
African black beetles are hard to spot as they hide just beneath the soil surface for most of the day, and feed on the base of plant stems. If you notice damage to the base of brussels sprout stems slathers them with Vaseline.
This works in two ways; petroleum jelly makes it hard for pests to climb the plant, and it’s also extremely distasteful to the beetles.
Root knot nematode / Beet cyst nematode
Nematodes can be beneficial, and in general, a measure of healthy soil diversity, but root knot nematodes and beet cyst nematodes cause significant problems with brassica crops.
The tunnels into the roots of crops, and cause roots to callous and distort. This restricts the production of new roots and limits the uptake of nutrients.
It’s difficult to get rid of nematodes, and many gardeners suggest using diatomaceous earth. However, to change the soil pH drastically enough to kill nematodes would also damage your crop.
In most cases, it’s best to try and salvage what you can this year, and then avoid planting any brassicas or root crops in that location for the next three years.
Clubroot
Clubroot occurs in damp, acidic soils, where temperatures are routinely above 25°C. Club root exclusively affects brassicas and can be limited by crop rotations.
Clubroot is a soil-borne pathogen, which causes roots to swell and distort, and on plants which typically have fine roots, forces them to develop thick, swollen roots which look almost like rhizomes.
To prevent the development of clubroot, do not overwater sprouts or brassicas. And try to maintain the soil at a slightly acidic level by adding alkaline mulches in spring.
Black rot
Black rot starts with a V-shaped lesion on leaf margins which appears yellow, then brown, in its early stages. When cut, the interior veins of the leaves will be black.
Black rot is spread by insects and set into leaves through insect damage and dirty tools. The bacteria can spread from rain splashing between leaves, or leaves rubbing in the wind. Remove any signs of black rot as soon as you see it.
Downy mildew
Downy mildew affects brussels sprouts from seedlings right through to harvest. The fungal spores are spread by wind, but only take hold on wet leaves.
Avoid watering the leaves of any brassica crop at any point in the growing season, and you should be safe from mildew.
Black leg
Black leg is a particularly difficult problem to fix but can be managed with fungicides. Early signs of black leg on brussels sprouts are purple lesions on the stem, which spread to brown, dusty patches, and cause cankering and tearing in stems and leaves.
Bacterial soft rot
Bacterial soft rot is a general term but is usually caused by Erwinia and Pseudomonas bacteria that enter through bruised parts of the plant. Protect sprouts from hail with netting, and use sharp tools for any cuts.
If soft rot was present in this year’s crop, do not compost that material as it lives in compost for 12 months or more.
Brussels Sprout FAQs
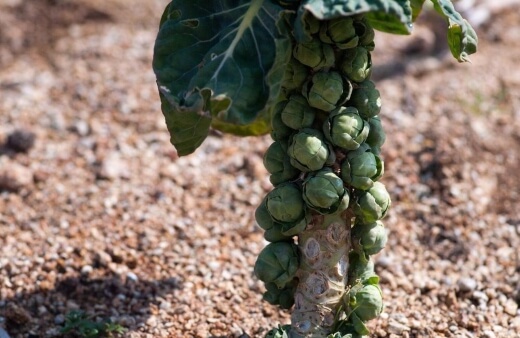
Which is healthier broccoli or Brussels sprouts?
While broccoli may be higher in calories, fat and carbohydrates, it is richer in nutrients like calcium, iron and pantothenic acid which contains a B vitamin that is great for healthy hair.
Broccoli also has a slightly higher potassium count whereas Brussels sprouts do have the advantage of being lower in sodium.
When are Brussels sprouts in season in Australia?
Brussels sprouts are considered cool weather crops that grow best through the winter months in favourable conditions. They are then commonly harvested towards the end of winter, being readily in season during spring in Australia.
Are Brussels sprouts good for you?
Brussels sprouts contain a lot of a natural, sulphur-based substance known as glycosinolate glucobrassicin. This compound may help reduce your chances of getting cancer and may also stop new blood vessels from growing inside tumours.
Eating brussels sprouts may also assist with high blood pressure, high cholesterol, heart disease and diabetes.
Do Brussels sprouts burn belly fat?
Brussels sprouts are widely considered excellent weight loss food as they are high in fibre and protein while being low in fat and calories. They can therefore help to keep you in a calorie deficit which in turn will lead to reduced body fat percentages.
When should you not eat Brussels sprouts?
You can tell if Brussels sprouts are raw or bad if there is mould present, if all the leaves are loose or turning yellow or brown, and if the sprout is soft and squishy. Sprouts featuring any of these issues should rather not be consumed.
What are the disadvantages of eating Brussels sprouts?
A common disadvantage of eating raw sprouts is that they can cause gas in some people. Furthermore, individuals with hyperthyroidism may want to avoid consuming them in large quantities due to their potential iodine-inhibiting compounds.
Is it okay to eat Brussels sprouts every day?
Yes, if eaten in moderation, they are safe to eat daily. However, try to avoid eating them just before bed as the high-fibre nature of these vegetables can cause gastrointestinal pressure and cramping at night, which could affect your sleep.
How long do sprouts take to grow?
Brussels sprouts take 7-14 days to germinate and are ready to plant out around a month after germination. Once planted in their final position they take between 60-90 days to be ready for harvest.
Do Brussels sprouts come back every year?
Brussels sprouts are biennial plants so will come back for several years, but will not produce crops after their first year. Like all biennials, they develop foliage and roots in their first year, then continue to flower after that.
What can you plant next to Brussels sprouts?
Onion radish, carrots, celery, beets and peas grow well next to Brussel sprouts. They have different root runs and require different nutrients so do not compete excessively for nutrients.
Should I cover my Brussels sprouts?
Brussels sprouts have always, and will always suffer from butterflies and their caterpillars. Netting Brussels sprouts is the only way to prevent caterpillars from hatching on your crops.
Check out our vegetables growing guide for beginners which includes a list of which vegetables to grow depending on the season.
Enjoy Homegrown Brussels Sprouts
Brussels sprouts might not be everyone's cup of tea, but when grown well, and harvested properly, they are a wonderful treat that tastes a thousand times better than anything you might buy.
On top of the difference in flavour from homegrown veggies, the variety, from red sprouts, to kalettes, means there’s a Brussels sprout for everyone.
Published on March 29, 2023 by Maisie Blevins
Last Updated on September 30, 2024

