It doesn’t matter if you’re looking after houseplants or bringing up veggies, everyone is equally guilty of forgetting one fundamental part of their plant care; soil health.
I don’t mean nutrient levels, and I don’t even mean managing irrigation. I am talking about the actual health of your soil. In this guide to worm castings, we will look at exactly how they make the difference they do.
This guide shares details on how to build three different types of worm farm, and how to use the products. And rather than leaving you in the dark about why you are doing it, we share the facts about worm castings so you can make the most of this magical, miniature, manure.
More...
What are Worm Castings?
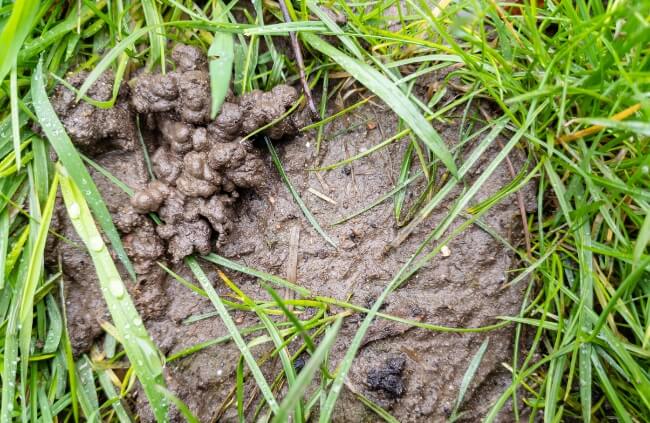
Worm castings are the excretions of worms; worm poo. You might be familiar with it from those small mounds on patches of open soil, the worm castings found on lawns, and even on the beach.
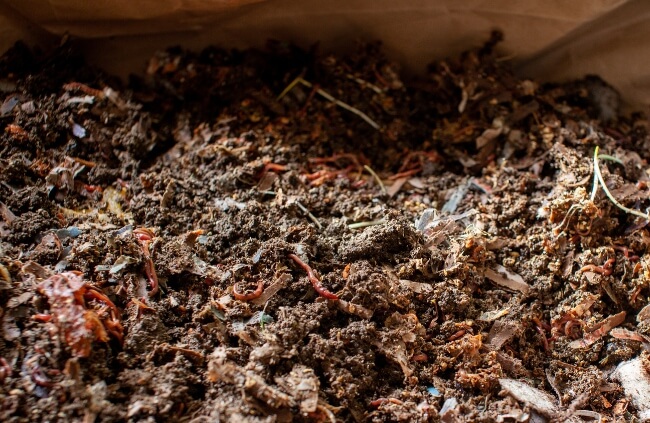
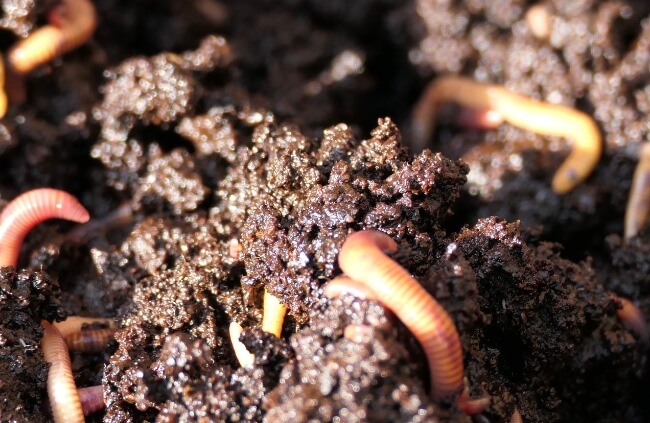
But, worm castings for use in the garden are produced by incredibly well-fed worms, working overtime to break down kitchen and dried garden waste into gorgeously loose and friable compost.
In terms of their uses, worm castings are a valuable seed-starting compost and, in large quantities, an excellent soil improver.
Pros and Cons of Worm Castings
Benefits of Worm Castings
Any compost comes with the same overhanging question – what does it actually do for my plants?
Well, worm castings actually are more beneficial for the soil than they are for plants, but there are obvious knock-on benefits of this, for how well your plants can grow in that soil once it’s had a treatment of worm castings.
1. Increased yield
Leafy greens grow noticeably better with a treatment of worm castings, either as a surface dressing for the soil or mixed into potting compost to increase moisture retention and improve nutrient availability.
Some annual veggies, like tomatoes and courgettes (anything in those families), seem to benefit from worm castings, but without the same significant differences in yields as leafy greens.
Spinach, cut-and-come-again lettuce and pretty much all kinds of brassica really, really, show increased yields from worm castings.
2. Bacteria in worm castings
Worm castings, as we will discuss later, are not really about nutrients, and sometimes offer none of the main nutrients required for plant growth. But they do contain essential soil bacteria which rapidly speeds up soil function, offering more base micronutrients to your plants.
3. Improved water retention
The primary purpose of worm castings is essentially the same as all organic matter – it improves water retention, both by improving drainage in heavy clay, and helping to hold moisture in sheer sand.
Where this is particularly useful is if you are dealing with under-watered houseplants, where the soil is starting to crack away from the sides of the pots. This sort of soil will recover with soaking, but can quickly shrink back.
Adding a mulch of worm castings will rapidly improve moisture retention in house plant compost that is dried up.
4. Improved nutrient uptake
Somewhere between the bacterial action and moisture retention, worm castings have the magical effect of making otherwise inaccessible nutrients accessible.
This means that garden soil, even with a light application of worm castings, can be reused year after year, and liquid feed becomes significantly more effective than it otherwise would.
5. Disease protection for plants
Positive bacteria from worm castings, especially at the seed-sowing stage, coat seeds and roots with beneficial microbes, preventing infection from fungal spores.
Drawbacks of Worm Castings
This might all sound too good to be true, but let’s clear up a few potential problems you might face when using worm castings too… the cons:
1. Quantity of worm castings
Worm castings, by their very nature, are small. Unlike other manures that are cheap to produce, and cost-effective to spread around the garden, worm castings are surprisingly costly.
Note: Nearly all manure has the same or similar microbial effects on soil as worm castings, but its urea content is higher, it can easily burn plants, and is definitely not good for seed starting.
2. Time to make worm castings
Worm castings can take months to produce in sufficient amounts to be useful. The process can be sped up, but it is far from instant. If you are buying worm castings, this isn’t an issue, but use them wisely (generously where you need them, and not at all where you don’t… never spread it too thinly).
3. Misunderstanding nutrients
I have deliberately put the heading as ‘misunderstanding nutrients’ here, rather than ‘lack of nutrients’ because worm castings shouldn’t be judged on their nutrient levels. They are not meant as a nutrient source or a fertiliser.
If used correctly, worm castings are excellent soil additives, but, if used to plant directly into, you will quickly end up with a half-empty pot, filled with inert, dry, compost, that does nothing for your plants.
Science of Worm Castings (Nutrient Levels & Soil Activity)
Now you know the pros and cons, you can probably get a reasonable idea of how you want to use them, and the sort of things you can do. But… How does that really work?
Why do worm castings improve nutrient uptake? How do they prevent diseases? How do worm castings improve germination rates, and what are they doing to the soil to improve its structure and moisture retention?
Nutrient Levels in Worm Castings
NPK, the three-letter code on most fertilisers and compost bags that is meaningless to most, means Nitrogen, phosphorus and potassium, and gives the accessible percentage of each nutrient in any compost or plant food.
Worm castings, on average, have an NPK value of 1-0.5-0.5. That means it has 1% nitrogen content and 0.5% of potassium and phosphorus. These nutrients are typically referred to as macronutrients, but all that means is that they are the most essential nutrients that nearly all plants need to grow.
Considering some worm casting brands sell worm castings labelled with an NK ad 0-0-0, it is safe to say that nutrients are not the best indication of worm casting quality.
How Worm Castings Improve Soil
Where worm castings come into their own is in their ability to actively improve soil structure. This action means they make existing nutrients more available to plants, increase water retention, and support drainage.
They also offer antifungal benefits and antibacterial support to young plants too (which we will look at in more detail in a moment). When we say that something improves soil, what it is actually doing is working as a mortar. In a sandy soil, each grain of sand can be seen as a brick.
Worm castings, the mortar, settle and sit between each ‘brick’, offering moisture retention, and allowing water to dissolve any potentially soluble nutrients in the earth that would otherwise be missed.
It works exactly the same in clay, sitting between each flat clay particle, and preventing them from locking together into a boggy or cracked-dry soil structure, therefore aiding drainage.
How Worm Castings Prevent Disease
The most impressive part of the worm casting puzzle is how the beneficial microbial content can latch onto and coat seeds and fine roots, preventing other bacteria and fungal spores from attaching onto the vulnerable plant material.
If you have ever bought a packet of seeds, and the seeds inside have a blue coating, that is an artificial replica of this protection offered by worm castings.
The disease prevention generally doesn’t last beyond the seedling stage, but if you add more worm castings when seedlings are potted up or planted out it can support root development and prevent transplant shock too.
How to Use Worm Castings
Now, the most important part… putting our new knowledge of worm castings into action. Using worm castings is pretty simple, and as long as you don’t use them as the sole planting medium for mature plants, you can’t really go wrong.
However, if you want to get the most for your money, there are some ways to use worm castings that stand out from the rest.
Using Worm Casting When Sowing Seeds
Make the most of your worm castings using them as part of your seed sowing mix. You can either mix it through your seed compost for even distribution or apply it as a top dressing for seeds that require covering.
A relatively small amount of worm castings (5-10% of the total compost mix) will give all the disease protection and moisture management you need.
When using worm compost as a surface dressing, be sure to check whether your seeds should be covered, or need light to germinate. If your seeds need light to germinate, avoid using it as a top dressing, and instead mix it through your compost before sowing over the surface.
Potting on Seedlings
Similarly, to using seedlings, you can add worm castings at the potting up stage too.
Either mix a handful of worm castings through your potting mix before filling in the containers round young roots, or fill your pot with a standard compost mix, and mulch lightly with worm castings (a 5mm mulch is more than sufficient).
Both methods produce stronger plants and boost moisture retention.
‘Fertilising’ House Plants
OK, so fertilising is not exactly the right word here, but you can improve the overall health of your house plants by adding worm castings. There is a lot of background you could get to know in terms of why, but to put it simply… plants need worms to maintain soil health, houseplants do not have any.
Adding worm castings to your house plant containers just gives them what they would get in nature, as all but epiphytic and lithophytic plants require soil activity to generate nutrients continually.
The slightly more in-depth version is that by adding a 5mm layer of worm castings to the surface of your houseplant compost after watering, it will lock that moisture in and, after every subsequent watering, will work down into the soil to open it up and hold soil structure apart to prevent it from drying out completely.
Improving Poor Soil
The reality of this might be too expensive for most of us, but in small areas, worm castings are one of the best general soil improvers you can use.
If you’ve got poor soil in one particular spot, and need to plant into it, adding a bag of worm castings is a good long-term solution that can be dug through a planting hole before placing a new tree or shrub.
Mix the worm castings through the soil the day before planting, and water it just to help the mix settle before planting. After planting, the worm castings should provide a good structure for young roots, and mulching with leaf litter each year after will maintain the soil condition thereafter.
How to Make Worm Castings
Knowing how to use worm castings is one thing, but making your own is another entirely, and it is actually pretty mesmerising. Making worm castings isn’t quick but it’s worth doing, educational for kids, and a wonderful way to reduce your household waste without having smelly compost caddies in the kitchen.
Next, I’ll share some of the basic rules of worm composting, and then we’ll look at how to build your own vermicomposter (another name for worm composter).
The Basics of Worm Composting
If you think about how worms work, it might seem simple, but there is a huge amount we can learn from them about how to adapt to different conditions, and how we can treat our garden soil better.
For every square metre of soil in your garden, there will be between 30 and 250 earthworms (mostly in the top 1 ft of earth). They live by digesting organic matter like compost, manure, leaves, rotting bark, wood and dead animals, sometimes accidentally eating insects smaller than themselves too.
They are happiest in moist, loose soil, and offer a good indication of soil health (dig out a square of lawn and check how many worms there are vs those in your garden borders… the increase in your borders will astound you).
Creating a habitat that keeps your worms healthy, and maximises their productivity means understanding why they like those conditions, and mimicking it. Here’s how.
Layering
Layering is the absolute key to worm composting. It can be done in a single container, but you can manage the process a whole lot better by stacking containers on top of each other to improve yields and rotate your worm castings.
We’ll go into more detail about layering when we look at their feeding routine.
Moisture Levels and Temperature
Worms can cope with freezing temperatures but aren’t as good at living through dry heat, where their nutrients become less available and the soil dries out so much that they dehydrate.
Aim to keep your worm composting set up out of afternoon sun, and add a little bit of extra water through the summer months to stop the containers from drying out too much.
Feeding Your Worms
Worms are omnivores. They’re not exactly vicious predators, but they are capable of eating anything that’s smaller than them or is already starting to decompose.
To feed your worms in a worm composter, start with a principle of layering dry materials, green materials, and then sugary and starchy materials.
What foods are in each group?
- Dry materials can be dried leaves, shredded newspaper, straw, hay or even dried grass clippings.
- Green materials can be fresh grass clippings, any garden cuttings and fresh leaves, including salad leaves and cabbage from the kitchen.
- Sugary materials and starchy foods should still be limited to veggies, and avoid fatty foods that will attract vermin. We use any raw fruit and vegetables, including peelings, offcuts and fruit that’s past its best.
Dry materials offer space for the above materials to break down, regulate heat, moisture levels and aeration, and offer bedding for your worms. The other layers are primarily food sources, and as they break down, the worms will also produce a liquid that drips through to the base of your worm composter.
Taps for Fertiliser
As mentioned above, worms produce a liquid as well as solid poop. That can either be drained by drilling holes, or captured by adding a drainage box at the bottom of your worm composting unit to catch the liquid, which makes an excellent instant plant food and holds much more active nutrients than the worm castings themselves.
The Best Types of Worms for Composting
Red wigglers are generally said to be the best worms for composting and vermiculture but, in reality, you can use literally any red earthworms from around the garden.
If you have an existing manure heap, use about 1kg of part-rotted manure to get your worm composter started. The thin red worms in a manure heap are free, reproduce rapidly, and break down food waste and garden materials really quickly.
Constructing a Worm Bin or Vermicomposter
Building your own vermicompost is incredibly easy and you can do it with scrap materials from the garden shed. In the instructions below, swap out boxes for buckets, or test it out on a small scale with old Tupperware.
Any container that will stack into another and take a lid will work, so don’t worry too much about the specifics in the instructions below.
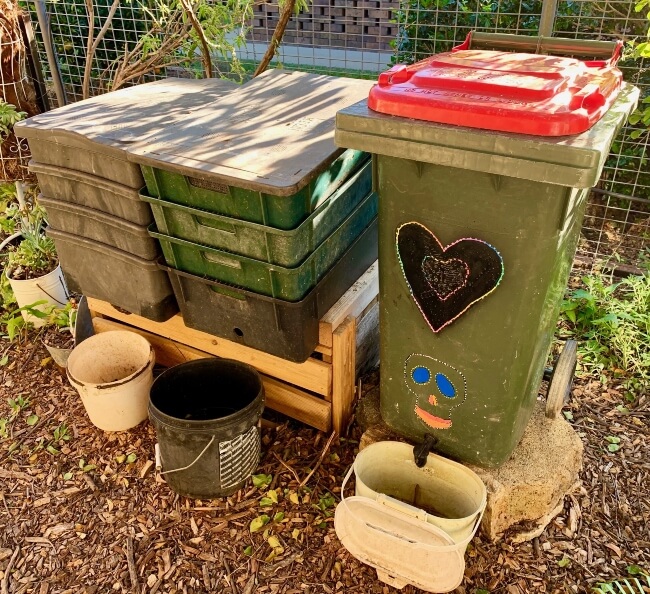
Source: Planet Schooling
Build a Worm Composter with a Fertiliser Tap, Step-By-Step
A simple worm composter is just a stack of boxes with a single sheet of newspaper lining the base of each, drainage holes, and a tub at the bottom to catch any liquid. Make more of your worm composting set-up by adding a tap to the lowest box.
To build your worm composter, you will need:
- At least three equally-sized boxes with lids
- A drill
- Newspaper
- Straw, garden waste and kitchen scraps
- Worms
- A water butt tap
Method:
- Start by drilling holes in the base of all but one container, making sure they line up with the holes in the lid above.
- On the bottom box, drill a hole for the tap and screw it in place, making sure to use rubber washers for a better seal.
- Add a single sheet of newspaper to the base of the top two boxes, and then a layer of straw or shredded paper.
- Add your worms (either in soil or not), then cover with garden clippings and a layer of vegetable peelings on top of that.
- Keep building up with a new layer about once a week.
- When the first box is full, put the next box on top and repeat the layering, adding more boxes until the bottom box is ready to use.
- Whenever you need liquid fertiliser for your plants, pour the contents of the bottom box into a watering can and dilute it with water (80% water).
Build a Basic In-Ground Compost Pile to Encourage Worms Naturally
If you would prefer to encourage nature and don’t mind waiting a little longer, you can create an in-ground version of this really easily.
You will need:
- An old bin or large bucket with a lid
- A drill
Method:
- Start by digging a hole that is just a little bigger than your bin or bucket and make sure the base of the hole is firm (so your bucket won’t sink).
- Drill 10 mm holes every 5-10 cm all over the walls of the container, and the base for drainage.
- Place it in the ground.
- Loosely fill soil around the bucket so worms can access it easily.
- Add layers of compostable materials in this order: dry > green > starchy order.
- Put the lid on and wait. The worms will find it and you should have usable compost in about three months.
Harvesting Worm Castings from the Garden
And finally, if you really don’t want to put the effort in, you can harvest your own worm castings from around the garden. Just pick up castings as you see them and pop them in a bucket.
The nutrient levels will be very low, and they will vary much more than homemade worm castings but they will work just as well for moisture retention, houseplant mulching, and germination support.
Common Problems When Making Your Own Worm Castings
Some recurring problems for any worm keeper are extreme moisture, poor aeration, and high temperatures. They are nearly all caused by poor attention to layering, or pacing your composter either in too bright a spot, or too dark a spot.
High moisture is usually a result of too much wet organic matter Vs dry organic matter. When this happens, there simply isn’t a drainage layer to let moisture escape. It can also be caused by placing your vermicomposter in the shade, where low temperatures cause water to stand and stagnate.
Poor aeration makes it virtually impossible for worms to live. They will not go near the centre of natural compost heaps and rarely venture deeper than 1.5 ft into the earth for that reason. Adding aeration holes to the top of each box in your worm composting tower usually solves this if you don’t already have them.
Pests and predators are also a big problem for vermiculture, both predating the worms and foraging for fatty foods. Birds, if they find out worms are inside, will continue coming back to your composter, and packing in through holes, with larger birds even taking the lid off the unit to get to the worms.
Rodents will be attracted to fatty foods in your vermicomposter, so avoid using meats, bones, eggs, or anything protein or fat-rich.
Where to Buy Worm Castings
If that sounds like too much effort, and you are just after a quick fix for your houseplants, you can buy ready-made worm castings. Below, we have shared a few links to brands we trust, and who offer well-constituted worm castings with clear and well-evidenced results.
They vary in price and quantity, but all are perfect substitutes for home-made worm castings.
Note: Imported worm castings do tend to be cheaper in Australia but the delivery time is obviously longer, and if you are aiming for an organic garden, lowering the air miles of the materials you use is worth considering.
Worm Casting Brands
1. Southern No Till 10L Worm Castings
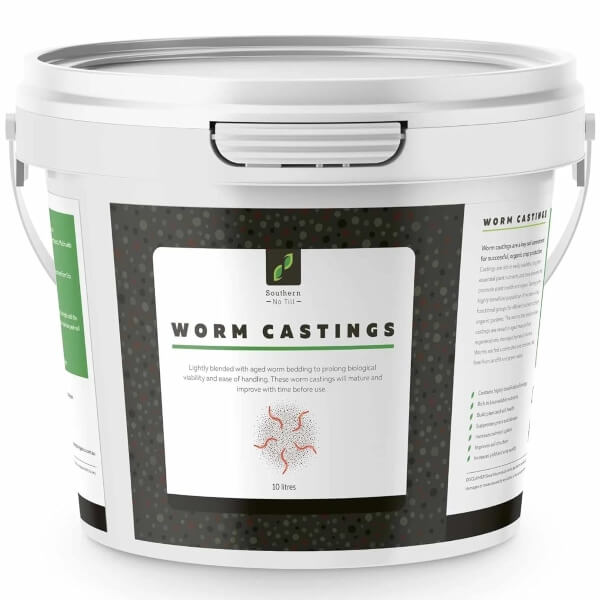
Southern No Till’s large buckets (10L) of worm castings are an ideal long-term storage option, allowing you to keep it somewhere cool and dry for several years and use it as and when needed.
It is the cheapest option for buying worm castings online because it’s blended with vermicompost bedding materials, making it stretch further, but offering slightly less benefit to your soil as a result.
2. Wiggle Worm 15 lb Worm Castings
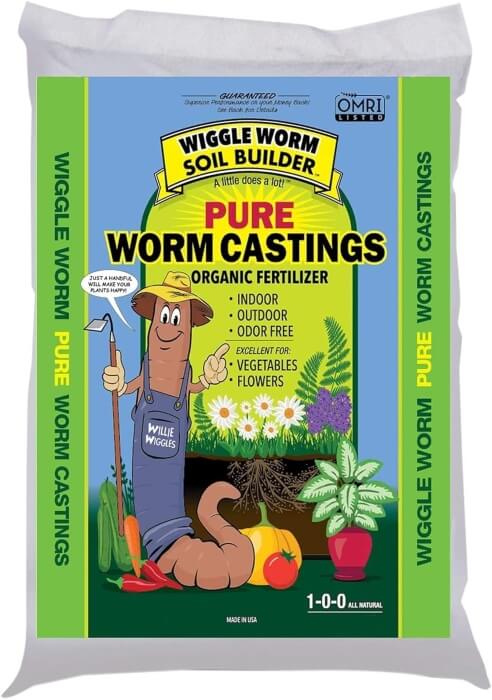
Wiggle Worm (by Unco) is the most popular worm casting brand for good reason. Their 15 lb bags are filled with 100% pure, organic, worm castings, with no filler, and no additives, so you are getting exactly what you asked for.
The purity is reflected in the price, but it goes a long way and will store well if you are not using it all at once. For houseplants and leafy veggies, this is a particularly good product.
Frequently Asked Questions About Worm Castings
How do you make worm tea?
Worm tea is a by-product of worm castings, and can be harvested easily by placing a bucket beneath the drainage holes on the bottom layer of your worm composting tower.
What nutrients are in worm tea?
Worm tea has the following nutrients: calcium, magnesium, potassium, nitrogen and phosphorus. Worm tea is much richer in nutrients than worm castings themselves, and worms well in combination with worm castings once they have begun to improve the soil.
How should I store my worm castings?
Worm castings keep forever if they are kept dry and aerated. Place them in a breathable bag, or a bucket with holes in the side and newspaper at the bottom and top to catch moisture.
Are there worms in worm castings?
There are no worms in worm castings. Worm castings are the trails of poop left behind after worms have digested organic matter.
Do worm castings attract rodents?
Worm castings do not attract rodents, but if you use fatty or protein-rich food in the production of worm castings (in your worm composting tower) you will attract them that way. The worm castings themselves do not attract rodents.
What is the difference between compost and worm castings?
Compost is the product of organic materials that have broken down to a loamy consistency, worm castings are the direct product of worms breaking down that organic matter. Compost is made through a mix of heat, bacterial action and digestion, so worm castings are just one-third of that process.
Do worm castings have worm eggs in them?
Worm castings can have eggs in them, but most worms, as soon as they hatch will head upwards in the worm compost bins, so the castings you use from the bottom layer will rarely contain worm eggs if you introduce it to houseplants.
Wrapping Up Our Worm Castings Guide
There isn’t much left to say, other than to sum up, just remember to use your worm castings wisely, and if in doubt, treat them as a conditioner, not a fertiliser.
Whether you make your own vermicompost or buy it in, the effects of worm castings are equally miraculous and offer so much more potential control over germination if you’re growing your own food, or starting annuals from seed.
Published on November 28, 2023 by Nathan Schwartz
Last Updated on November 28, 2023

