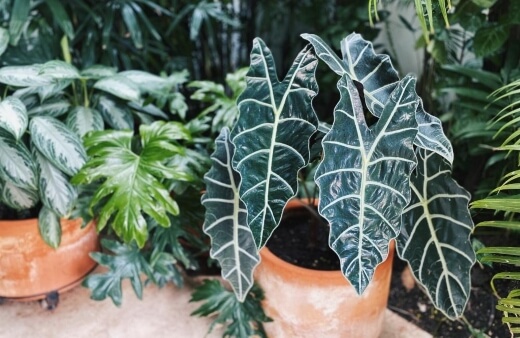
Alocasia, or the African Mask Plant, or Kris Plant, is a stunning perennial with its origins in the Philippines. It’s usually sold as mature plants in garden centres around Australia, and thanks to its worldwide popularity is often sold as a houseplant.
Truth be told, until recently I hadn’t had much luck growing alocasia. I adore them and have followed every rule in the book to try to get them to thrive, but until I start to experiment, my old, poorly ventilated home just didn’t seem hospitable.
So, in this guide, I’ll not only be sharing some simple tips to get your alocasia to grow indoors and out, but a few tried and tested methods that should help you troubleshoot common alocasia growing problems, and avoid any pest infestations on these (clearly) incredibly tasty African Mask plants.
More...
Family: | Araceae |
|---|---|
Genus: | Alocasia |
Species: | Various |
Common Names: | African Mask Plant, Elephant ears |
Origin: | Subtropical Asia and Eastern Australia |
Location: | Indoor and Outdoor |
Type: | Herbaceous perennial |
Growth: | Up to 6ft tall (some species are dramatically smaller or larger) |
Sun requirements: | Full sun or part shade |
Foliage Colour: | Green and white patterned |
Flower Colour: | Pale green or white |
Flowering: | Spring or summer |
Edible Parts: | Stems and roots are edible with preparation |
Maintenance level: | Medium |
Poisonous for pets: | Toxic to cats and dogs |
Alocasia Plant Details
Alocasia are native to subtropical Asia, but have naturalised in Eastern Australia. Their leaves go completely dormant in winter as a reaction to changing light levels, and while the rest of the world is limited to growing them indoors, so long as they have protection from frost, they are an exceptional choice for the garden throughout most of Australia.
African mask plant come in a huge variety of colour and leaf forms, but all subgenuses share one common visual trait which has made them unwaveringly popular plants under cultivation for decades.
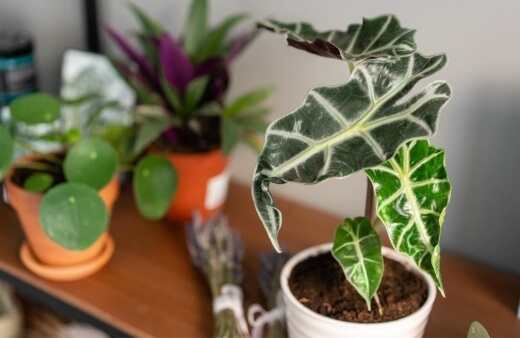
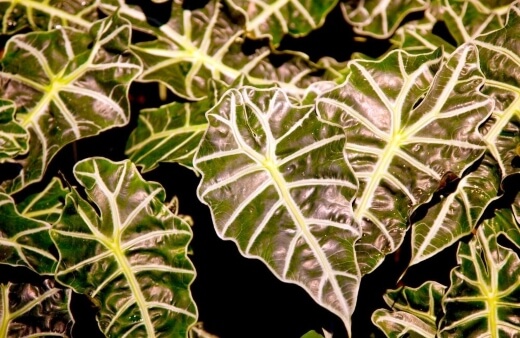
The most well-known variety is A. Amazonica, with dark green foliage punctuated by bright green, almost white, midribs and veins along the leaf surface, with the exact opposite colouring seen in the similarly formed leaf of Alocasia ‘Silver Dragon’.
For me, it’s the delicate A. zebrina that earned its space in my garden. While it takes a little more care, and it is more prone to root rot and damping off than any other subgenus of Alocasia, A. zebrina has a true lightness, both to touch, and to look at.
It’s striped stems give it its name, and while it might be less in your face than others with stronger midribs, and sturdier stems, it pairs with pretty much any other plant, whether you’ve got towering annuals spouting from under its low canopy, or delicate spring bulbs pre-empting it’s summer display.
Difference between Philodendron, Alocasia and Colocasia
While they are all aroids, alocasia, colocasia and philodendrons have distinct differences in their leaf shapes, and stem structures, but thanks to their relatively similar leaf shape, have all gained the common name ‘Elephant Ear’.
Alocasia and colocasia, for example, have different leaf structures. Where Colocasia’s leaves point down and are mostly matte, Alocasia leaves point up and tend to have a glossy, smooth finish, regardless of colour.
Philodendrons and alocasia have one incredibly obvious difference along their stems, and that’s that Philodendrons have stems at all. Alocasia has petioles, not stems. Philodendrons grow from a main stem, which usually sends up petioles independently, as well as developing aerial roots.
Alocasia’s Natural Habitat
Alocasia are native to tropical and subtropical Asia, and tropical parts of eastern Australia. Their vast leaf structures are designed to maximise their light catching capabilities on tropical forest floors, enabling them to outcompete younger plants and seedlings, while being mostly unaffected by the overhanging tree canopies.
As such, coping with humidity is in their DNA, and changeable sun too. They are often sold as shady room plants, but in our experience, they grow far better when offered the light they truly want, rather than making them fight for it like in the wild.
34 Alocasia Varieties to Grow in Australia
1. Alocasia ‘Albatuwan’
With a distinctly red underside, and a lime green surface, Alocasia ‘Albatuwan’ is a clean and predictable experiment in creative plant breeding, bred as recently as 2016, but recognised as a stable and unique cultivar between Aocasia alba and Alocasia ‘Batu’.
2. Alocasia amazonica ‘Polly’
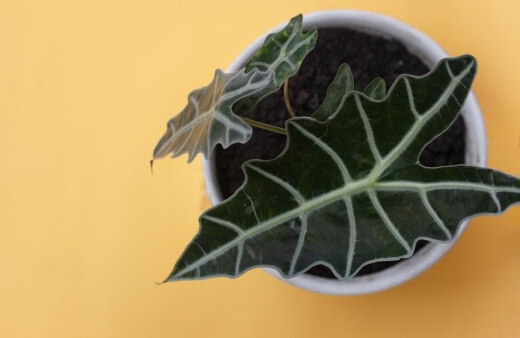
Sometimes sold simply as Alocasia ‘Polly’ this hybrid alocasia is one of the world’s most popular cultivars, with near-black leaves and deeply ridged, almost serrated, edges. Each leaf is supported by moisture-filled veins, ridging outwards from a sturdy midrib.
Alocasia amazonica ‘Polly’ can reach up to 60cm tall, making a wonderful statement in any bright room, or outdoor kitchen, provided it’s protected from frost.
3. Alocasia ‘Aurora’
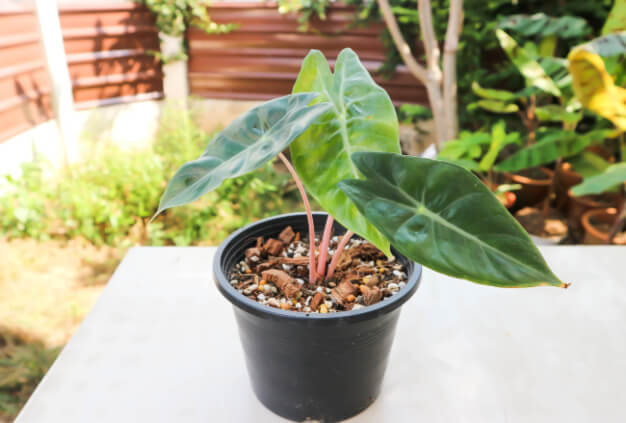
With stems like forced rhubarb, and leaves to go with them, Alocasia ‘Aurora’ has spent quite some time at the top of my garden wish list, but despite being intensely desirable, it’s not commonly grown, and even more rarely sold.
Even in cooler climates, Alocasia ‘Aurora’ can be grown outdoors through summer, either in a pot, or plunged into soil before lifting each winter.
4. Alocasia azlanii
Azlanii are a vivid burgundy, almost blood red foliage plant, far more reminiscent of European forest floor plants than most subtropical plants.
They are a product of exceptionally skilled cultivation, and while they are quite susceptible to over-watering, we’ve found them to be more resilient than most alocasia here.
They’re also sparingly happy in bright light despite their dark foliage, but it's safer to place them somewhere with a little bit of dappled shade.
5. Alocasia ‘Bambino Arrow’
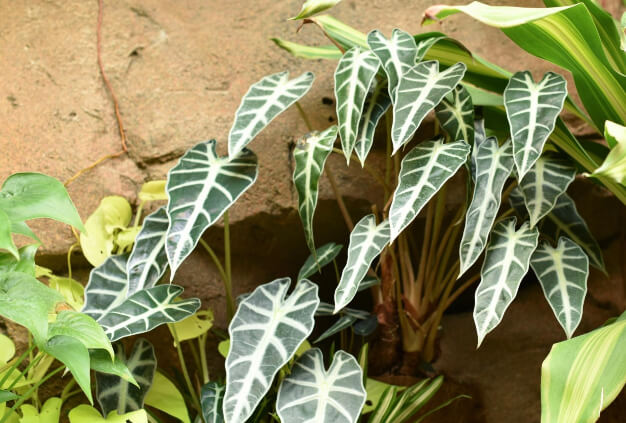
This dwarf cultivar reaches no more than 40cm, but has all the structure and vigour of the more common ‘Polly’. If you’re after a tidy plant that’s reasonably easy to grow in a bright office, Bambino Arrow is a great alocasia to start with.
6. Alocasia brisbanensis
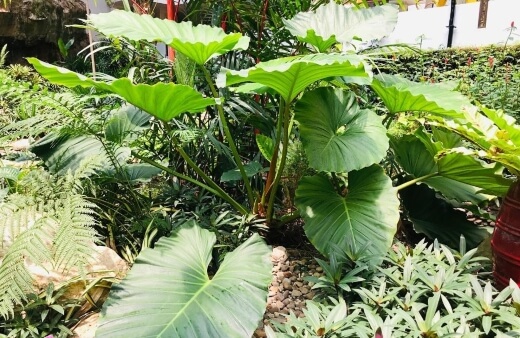
Alocasia brisbanensis are native to the rainforests of Eastern Australia, so grow well in most outdoor spaces across the country.
They are one of the larger varieties of alocasia, growing to 7.5 ft. tall at full maturity so add a unique structure to any shaded garden bed with their thick petioles giving a weight to the leaves that is unusual in most other forms of alocasia.
The leaves of Alocasia brisbanensis are a grassy-green, and their stems come in two types; dark stemmed, and light stemmed Brisbanensis.
Get to know more about Alocasia brisbanensis in our Australian native guide.
7. Alocasia ‘Golden Bone’
Described as having ‘petrol-blue’ leaves, this cultivar leans right into one of the most desirable traits of any alocasia – metallic colourings.
Part of the reason alocasias are so popular today is because they offer something unique that fits in with modern décor without being unnatural. ‘Golden Bone’ is a wonderful hybrid that’s relatively simple to grow, reaching about 1-1.5m tall at maturity.
8. Alocasia ‘Kalila’
Because alocasia breeding is so well documented, and still a relatively young passion for many growers, particularly in the Philippines, when it comes to new cultivars like the mottled, dark-green ‘Kalila’, it’s really simple to trace its origins.
This cultivar is bred for the dagger-like shape of ‘Bisma’ but the gorgeously rich colour of ‘Black Velvet’.
9. Alocasia ‘Katya’
If you like the shape of some of the more dramatic alocasias, but aren’t sure about the colouring, or armour-like patination, like maybe go for something more natural like Alocasia ‘Katya’, whose thinner foliage still retains the sharp, pointed dagger-shaped leaves, but without the textured ribbing, or extreme colouring.
10. Alocasia ‘Pseudo Sanderiana’
Psuedosanderiana, or Pseudo Sanderiana, is not yet an accepted cultivar, but it is so widely cultivated thanks to its rapid growth, and 70cm long leaves, that I can’t not mention it.
In a few years’ time, all things going well, it will be fully accepted cultivar, following proper testing, and should be widely available to most growers around the world.
11. Alocasia aequiloba ‘Gold Dust’
With leaves shaped like medieval arrow-heads and a painterly speckle of gilded yellow droplets across each leaf, there’s no structural plant quite like Alocasia ‘Gold Dust’ to add shadow and magic to a patio in the evening.
12. Alocasia alba ‘Silver’
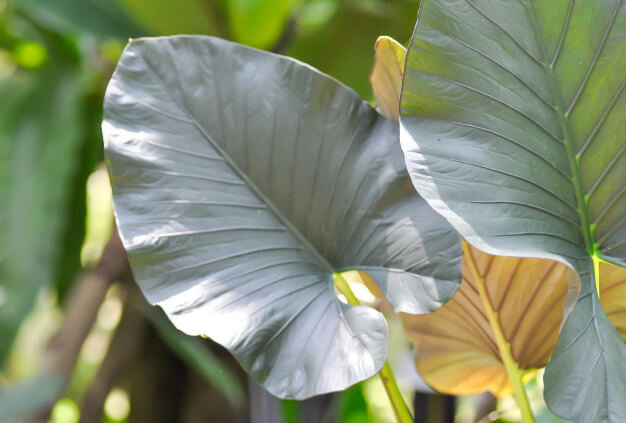
Alocasia alba is native to islands around Bali and Lombok. In plants, alba can mean either bright, or sunrise. Perhaps in this case, it's due to the translucent foliage that allows low light to pass through in a spectacular fashion.
Alocasia alba ‘Silver’ is a beautiful bred cultivar of this species, which continues to exhibit the fanned out ribbing, but with a truly unique white colouring across the enter leaf.
13. Alocasia baginda ‘Dragon Scale’
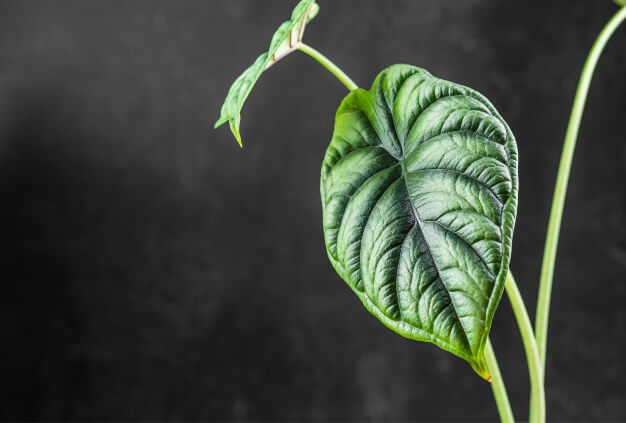
Another incredibly popular alocasia in every part of the world is Alocasia ‘Dragon Scale’, whose leaf has such an intense structure that it forms ridges and mounds within itself, including a neat seam that runs right around its edge.
Some even more specific cultivars include the glossy ‘Mythic’ Dragon Scale Alocasia, and the silver leaf form of the same plant.
14. Alocasia baginda ‘Green Dragon’
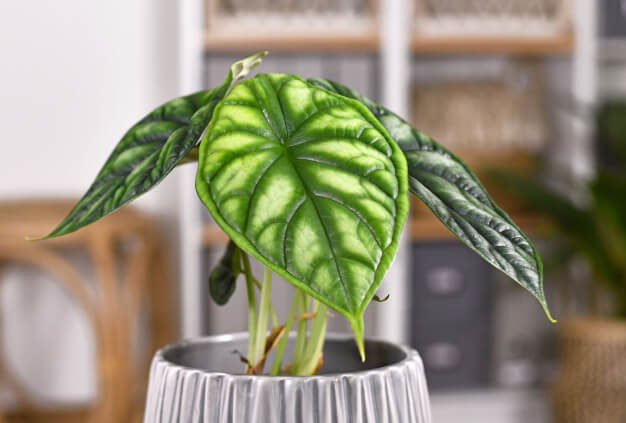
A subtle variation on Alocasia ‘Dragon Scale’ is Alocasia ‘Green Dragon’, which, while not specifically recognised as a unique cultivar, is sold regularly all over the world with distinctly brighter foliage than the other popular cultivar of the same species.
15. Alocasia baginda ‘Silver Dragon’
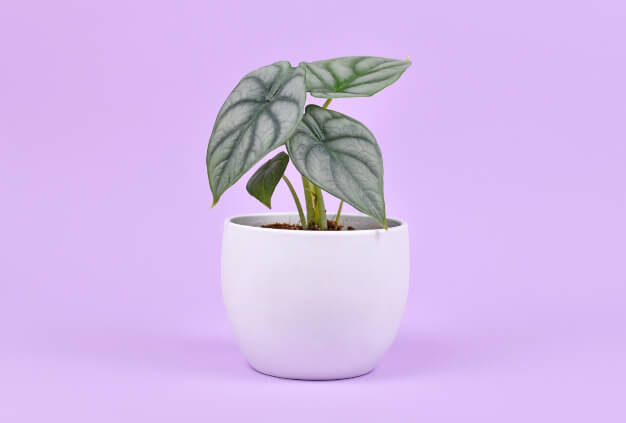
Alocasia ‘Silver dragon’ is another cultivar of baginda, but this time with intensely white, powdery colouration across its leaves, though unlike ‘Green Dragon’ it retains its deeper coloured ridges.
Silver Dragons are one of those plants that look like they belong in sci-fi. There are plenty of silver leafed plants out there, and they develop naturally to cope with bright light.
As a result, these make excellent plants for full sun, as they are far less likely to scorch than other alocasia. They are very susceptible to over watering though.
And thanks to their already pale leaves are less likely to give any early indications, so the first you’ll know about your Silver Dragon being unhappy is when it’s leaves turn brown and start dropping off.
16. Alocasia cucullata ‘Banana Split’
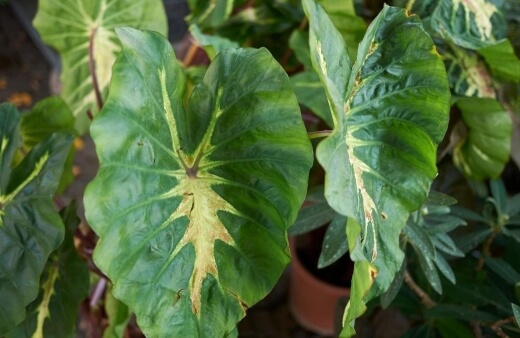
Alocasia cucullata ‘Banana Split’ is beautiful, but it’s also known to be somewhat disappointing for many growers. It will always be true to colour, with variegated leaves built mostly of a flat yellowish surface, with reliably dark green patches.
However, the name and most images online suggest it has crisp, symmetrical variegation, with each leaf split largely in half between green and yellow, which is rarely the case in reality.
17. Alocasia cucullata ‘Crinkles’
Also sold as Alocasia ‘Triangularis’, though strictly Alocasia cucullata ‘Crinkles’, this cultivar is beautifully unique, with crinkled, curled leaf edges, curling all the way in when the leaf dries out to help conserve moisture. As with most truly spectacular plants, its beauty exists for a reason, not simply for show
18. Alocasia cucullata ‘Moon Landing’
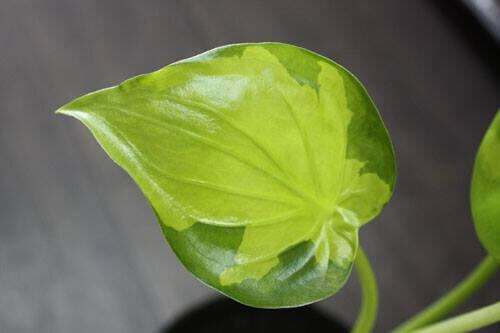
Source: Aroidpedia
More delicate variegation than ‘Banana split’, and a much glossier leaf, set Alocasia cucullata ‘Moon Landing’ apart from the rest of its species group, with beautifully odd variegations, which not only add colour and depth, but appear to also impact on each leaf’s form and structure, as they curve distinctly inwards after watering.
19. Alocasia cucullata ‘Yellow Tail’
Deeper ridges and a matt finish make ‘Yellow Tail’ one of the most wonderful houseplants you can grow. Not simply because it’s good looking, but because of the outside-in thinking when it comes to design.
Obviously closely resembling a Hosta, but evergreen in most scenarios, this plant brings a sense of calm to indoor spaces while reflects common garden plants.
20. Alocasia cuprea
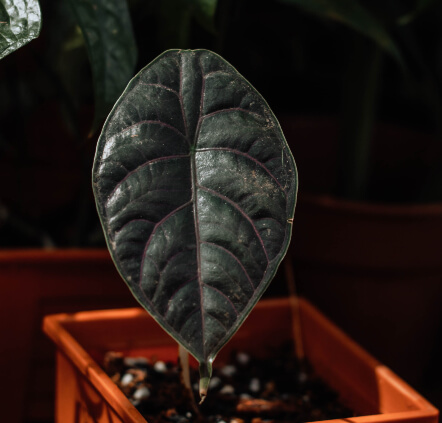
Alocasia cuprea is a naturally occurring species, but nearly all variations on it in garden centres or for sale online will be of the stunning ‘Red Secret’, which exhibits not just deep, red, ridged leaves, but a bull’s-blood underside that shimmers in the light.
21. Alocasia heterophylla ‘Green Veins’
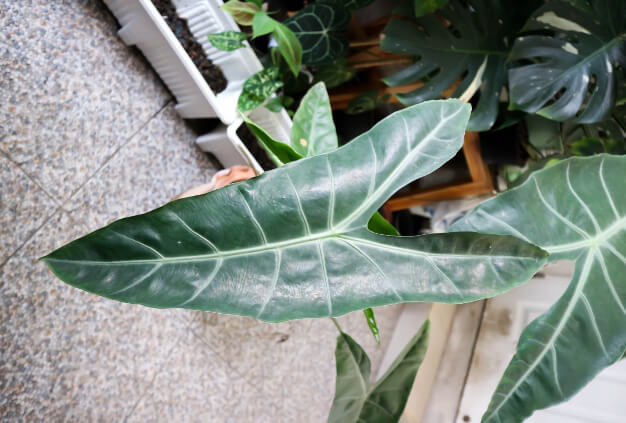
The elongated leaves associated with A. heterophylla make a great base for breeders to play with colour. The leaf form will always provide a wonderful structure, but playful colourations like ‘Green Veins’ make the most of that structure by enhancing natural pigmentations.
22. Alocasia heterophylla ‘Silver Kris’
Just as above, this A. heterophylla cultivar uses the striking base shape of the species’ foliage, but gives it a twist with miraculously silver pigmentation that seems to coat the entire leaf, other than the veins.
23. Alocasia heterophylla ‘Silver’
‘Silver’, rather than ‘Silver Kris’ , goes to show just how busy alocasia breeders are, but also how subtle the difference in colour and form can be.
While the general leaf shape is similar, the ridging of ‘Silver’ is subtler, and the colouring is gentler too, making the most of the natural silver sheen given by the leaf texture, rather than blocking it out.
24. Alocasia macrorrhiza ‘Stingray’
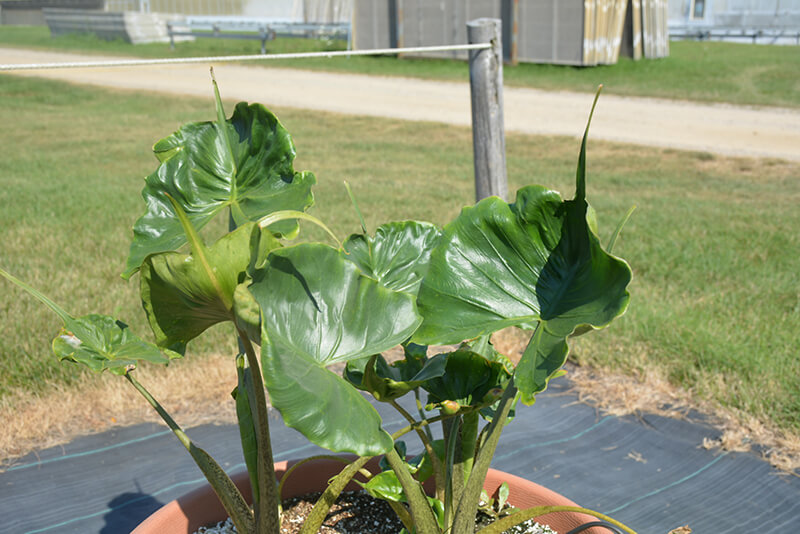
Source: Plants.rainbowgardens.biz
I wanted to include stingray as an example of how we learned what not to do with African mask plant. Stingray are the closest alocasia to most other plants from the subtropics, with thick, but not overly sturdy leaves, and a rich green all over their stems, petioles and leaves to maximise photosynthesis.
They are exceptionally happy in dry, humid conditions, but want to be under the canopy of subtropical trees and shrubs as much as possible.
Temperature is crucial here, not light, as light can easily scorch green leaves, and alocasia are exceptionally bad at recovering from illnesses.
25. Alocasia micholitziana ‘Frydek’ / ‘Maxkowskii’
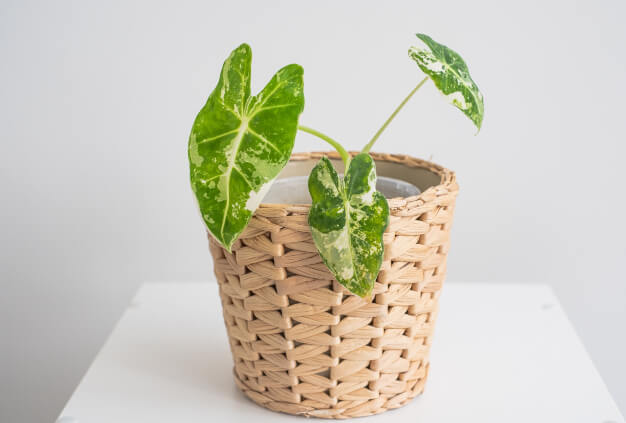
Crisp white veins set this emerald green Alocasia apart from the crowd. Though Frydek's structure is not dissimilar to many common cultivars, it is all about colour and form, rather than razor sharp scalloping as each leaf is generally smooth around the edge.
26. Alocasia minuscula
One of the smallest species of Alocasia, and that surely means that Alocasia minuscula is worth a mention – though the odds of you finding one for sale any time soon are pretty scarce, given that they are protected in the wild, and rare in cultivation.
27. Alocasia odora ‘Blue’
The leaf stems (petioles) have a distinctly blue colour, which sets off the jade-green foliage of this huge leafed plant, often reaching more than 1.5m tall, and stunning in containers.
A. odora is noted for the fanned ridging across its leaves, rather than patterning, or scalloping, so all cultivars are typically noted for pure colour, rather than shape or form.
28. Alocasia odora ‘Indian’
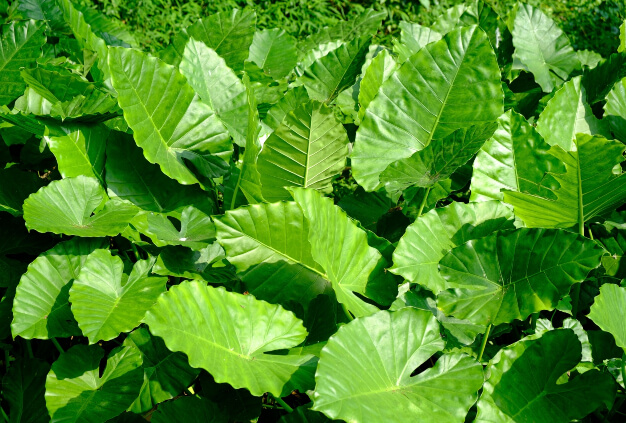
This natural subspecies of Alocasia odora occurs around the base of the Himalayas, but it has significantly larger individual leaves than others in this species group.
29. Alocasia odora ‘Okinawa Silver’
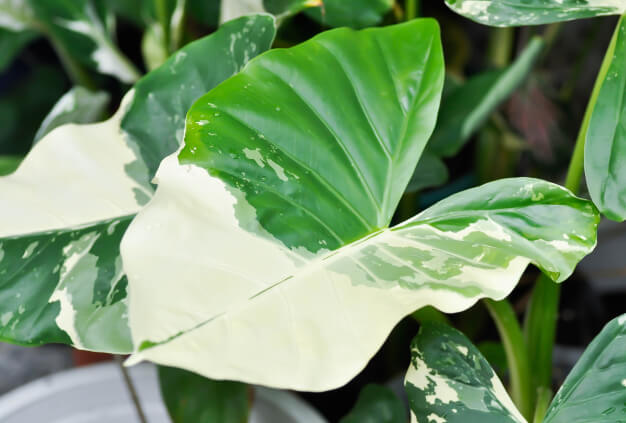
Variegated plants are collectable for all sorts of reasons, but they are rarely as reliable or beautiful as Alocasia odora ‘Okinawa Silver’, whose variegations are beyond just being described as striking. They are truly magical, blending and crossing pigments from white, to emerald, through jade, and silver specs.
As ‘Okinawa Silver’ ages it tends to develop some scalloping to the outside of each leaf, which does cast some doubt on whether it is bred from odora, or as a hybrid with some other species.
30. Alocasia peltata ‘Silver Grey’
I saw Alocasia peltata ‘Silver Grey’ recently at a plant fair. It has been brought along solely for exhibition, rather than for sale, but I’ve barely stopped thinking about it since. This unique cultivar looks otherworldly, and like no other alocasia I’ve seen before.
It’s rare, but out there!
31. Alocasia perakensis ‘Silver Giant’
Unlike most silver-name Alocasias, Alocasia ‘Silver Giant’ isn’t about colour, it’s about tone, and texture. The metallic leaves catch the light perfectly, creating a blueish, silvery glow.
The leaves themselves are fairly simple, but the effect they have on the light in a room is stunning.
32. Alocasia princeps ‘Candy Sticks’
Distinct arrow-shaped leaves mark this plant out as what it truly is, an aroid – a group of plants designated specifically for their unmistakable leaf shape, which includes several genera as mentioned above.
‘Candy Sticks’ has bright pink petioles, holding up mottled green and white leaves.
33. Alocasia princeps ‘Purple Cloak’
If you’ve ever wondered how varied a species can be, just look at Alocasia princeps, which includes cultivars of 10cm tall, and some of 2m tall. Alocasia ‘Purple Cloak’ is somewhere in the middle, but its glossy purple foliage makes it pretty clear where it got its name.
34. Alocasia zebrina
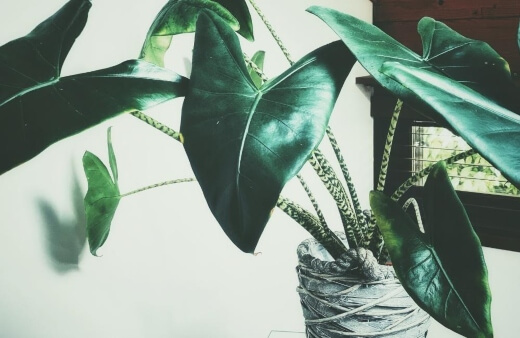
Zebrina have gloriously delicate striped stems, which can suffer easily from over-watering, and need dappled light to avoid leaf burn.
They scorch easily and really are very fussy plants, but they have a delicacy and a lightness to their leaves that can’t be compared to any other plant in the garden.
I always think they look like a Hosta and a Fritillary had a baby – there's a grace to them, but equally a punch.
Other Alocasia Varieties
Kris plant have dozens of subgenuses, far too numerous to describe each in detail, but those above are the most likely to be found in garden centres, whether as corms or as mature plants.
There are some truly beautiful varieties, and if you’re thinking of starting a serious collection it’s worth looking out for the rarer species like Alocasia ‘Dragon Sale’, Alocasia ‘Cuprea Red Secret’, or the elongated (in name as well as leaf) Alocasia ‘Purple Sword’.
How to Grow Alocasia in Australia
Alocasia are tropical, forest floor plants. They like reasonable heat, bright, dappled light, and above average but not extreme humidity (60-70%) – bedrooms, and ventilated bathrooms (not kitchens as the heat and grease can be too changeable).
Alocasia don’t like damp conditions, but require plenty or regular water for healthy foliage, so well drained compost, or well drained soil is essential for their health. But mixtures with good water retention are equally crucial for success.
In Australia, they do grow quite well outdoors in most parts of the country, but should be protected from drops in temperatures below 12°C, which can quickly cause them to hold water, leading to stem rot.
In this guide we’ll explore positioning as well as soil mixes in full, to make sure you give your plant the right start in life.
When to Plant African Mask Plant
African mask plant are dormant in winter as the shorter days don’t provide enough light for them to thrive, so don’t worry if you see them starting to drop leaves in autumn, this is normal.
You can plant alocasia all year round, but as with any deciduous perennial, it’s important to give it the most help you can, which means the best time to plant is in spring.
Ideally a few weeks after temperatures are reliably over 10°C to avoid any risk of cold shock to the plants, which should be covered up, or fleeced if you grow them outdoors in winter.
Alocasia Light Levels / Positioning
This plant needs bright but indirect light, but please don’t confuse indirect light with low light. If you are growing alocasia indoors, this is really simple to achieve, place them around 1m away from a bright window, or in the corner of a bright room out of direct sight of the window.
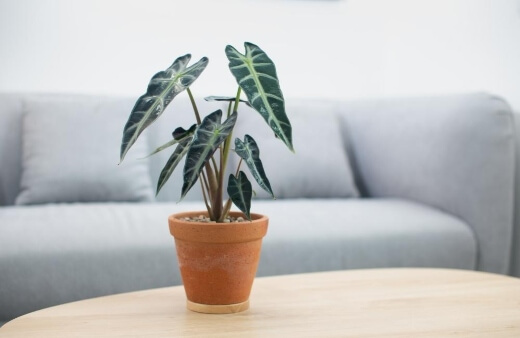
Because all species of Alocasia are very susceptible to leaf burn, they require steady light and protection from the hottest sun, which will quickly brown their leaf tips, and never really recovers in that growing season.
Don’t fret though, as alocasia are perennial, so even if they lose their vigour and verdancy in summer, they will grow fresh foliage next spring. If your plants suffer leaf burn this year, consider moving them somewhere slightly under the shade of a tree with a loose canopy.
Palms are excellent companions to alocasia outdoors, as they use most of the moisture in the soil, without completely drying it out, which can reduce the risk of over watering, and also give excellent dappled light.
Soil Preference and Drainage
Alocasia needs well drained soil that holds enough moisture to retain happy leaves. With one species holding leaves that can reach 40-50cm long, they really do need a good drink, but because they hate sitting in water it can be tricky to find the balance through trial and error.
With potting mix, perlite is a good option, as it doesn’t affect soil acidity, and helps water drain without impacting nutrient levels, but pair perlite with a good quality general purpose compost for water retention, and houseplant compost to give it the right nutrient level for an easy tart to life.
If you want to make your own compost, read our guide on our worm farm guide and product reviews for 2024.
If you’re planting in the ground, dig compost and horticultural grit through the soil to aid drainage, and boost nutrients.
Alocasia are rainforest plants from the subtropics, and need high nutrient levels, so mixing good quality compost rather than peat into the hole will help drainage and reduce the risk of waterlogging.
Peat might be high in nutrients but is much more likely to over fill with water in the wet seasons.
Caring for Alocasia
Alocasias might be relatively simple to grow, but they can turn bad quickly. Thankfully, when they do, you can fix most problems. Fast acting pruning, feeding and repotting doesn’t just stall problems, but reinvigorate growth.
Watering Alocasia
Alocasia needs regular watering, particularly when grown indoors. While they are fairly drought tolerant, you need to treat them with a sensitivity to their natural habitat.
Sub-tropical rainforests are humid, but not overly wet despite their name. The rain is mostly drunk by trees and larger top layer plants, leaving the ground dwellers like Alocasia to search for their water, never quite drying out, but never getting waterlogged.
Because most of us don’t have rainforests in our backyards, regulating their water retention through soil choice is the best choice for outdoor plants.
For indoor plants, like most houseplants, they should only be watered when the top inch of soil in their container is completely dry using rain water where possible.
What Fertiliser to Use
Any tropical plant liquid fertiliser, once a month is about right for Alocasia. If grown indoors, that’s all they need.
For those of you following NPK level religiously, 20:10:20 is what you need to be looking for on fertiliser labels. Meaning that for every 100ml or fertiliser, it contains 20% active Nitrogen (N), 10% Phosphorus (P), and 20% active Potassium (K).
Nitrogen and Potassium support root and foliage growth, while Phosphorus promotes flowering and fruit, which is irrelevant with this foliage focused beauty.
However, if you prefer playing it by ear, mixing a healthy amount of garden compost into the planting hole will add more than enough nitrogen and potassium to get your Alocasia going.
Mulching Alocasia
For ongoing care, coffee grounds and eggshells are good ways to keep Alocasia happy, and mulching with multipurpose compost in early winter to protect the rhizomes from frost is a useful way to add nutrients too.
Outdoors, garden soil often provides enough nutrients, but can be topped up with a simple mulch of part-rotted leaf litter, mimicking natural forest conditions.
More on fertilisers: Complete Australian Garden Fertiliser Users Guide
Pruning Needs
Alocasia doesn't need any regular pruning. They are deciduous perennial foliage plants so will die back to the ground in winter, and re-sprout. The only reason to prune them is to remove any dead, damaged or diseased growth.
Otherwise, leave them well alone and they will happily get on with their lives without intervention.
Repotting Alocasia
Alocasia should be repotted when they are brought home, and roughly every three years if they are starting to swell the sides of their container. They are easy to repot, and roots should bind the soil together.
Simply tease the roots out, and plant them into a slightly bigger container with fresh compost to promote new growth. This is often useful if your alocasia has stagnated growth, as the fresh compost and root teasing can be enough to trigger a new flush of life.
Growing Alocasia Indoors
Alocasia grown indoors should be potted up as soon as you buy it. Check the roots, because they typically grow on to the point of sale in new pots for a full year, meaning they are usually nearing becoming root bound.
Thankfully, they don’t mind being slightly restricted, but if you pot them on now, they can usually stay in their new, slightly large containers, for several years.
How to Grow Alocasia Outdoors
Alocasia brisbanensis in particular, is a practical plant for any garden in Australia. Provided it has moist, but draining soil, and isn’t at any risk of frost, it can cope with quite bright and exposed conditions, but will prefer some shade.
If you grow alocasia outdoors but there is a risk of frost in your area, simply plant it into a large plastic container, and plunge it into the soil, pot and all. Lift it in winter and move them indoors or to a greenhouse.
For outdoor alocasia is warmer climates, that stay outdoors all year round, give them a light mulch of part-rotted deciduous leaf litter each winter, to provide gentle fertilisation each year.
How to Propagate Alocasia
African mask plant rarely flowers, so propagating from seeds, and particularly finding the right conditions to ripen the seeds is almost impossible.
If you ever have the good fortune to have a flowering alocasia, and subsequent seeds, propagation is easy. Simply place the seeds on a bed of tropical seed compost, and water from the base.
Leave undisturbed and cross your fingers as germination can be erratic. Once sprouted, wait until leaves form, then gently pot the roots into a small pot and treat like any other alocasia.
However, propagating alocasia from seed is both unlikely and impractical, especially when you know how easy it is to grow them from split clumps.
African mask plant are tuberous, meaning they grow from a set of roots that sprout from a central rhizome (a rhizome is thick root that stores energy like a bulb, but rather than storing energy for spring, it remains dormant through winter, then sends new roots, which later form their own rhizome.)
Propagating Alocasia from Division
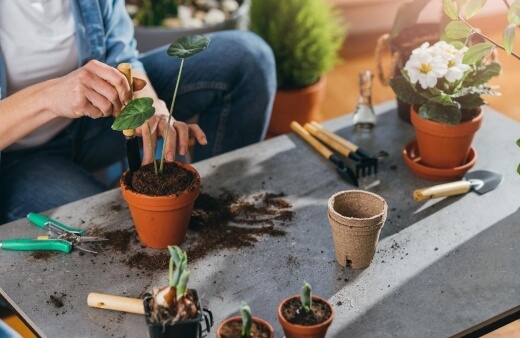
African mask plant is really easy to divide. When you see new stems shooting up from around the base of the original plant, these are in fact young plants in themselves.
By simply tipping the pot out gently, you can pull the young plants away from the main root, and make a clean cut against the rhizome. This will quickly heal underground and won’t harm the original plant.
The new plant will quickly form its own root system and respond to the separation by growing its own rhizome much faster than if it were left to rely on its parent.
With most tropical plants (Check out our list of tropical plants you can grow in Australia), we’re used to propagating by planting cuttings in water as our cuttings are therefore less likely to develop root rot in their early days (this is due to the unique water roots that plants send out when they are propagated hydroponically).
However, for any plants propagated from root cuttings, or division it is much safer, and produces much stronger plants in the long run to immediately place the young plants in the soil you intend to keep them in.
When young plants are given just water for propagation they don’t send roots in search of water, and they don’t develop resilience to diseases.
A plant grown in soil is always stronger, and plants from root cuttings are much more likely to become too reliant on readily available water.
Common African Mask Plant Pests and Diseases
Alocasia don’t have any notable essential oils, which means they are much less attractive to pests than most sub-tropical plants, and certainly unlikely to be affected if grown alongside flowering tropicals.
This will almost definitely have more or a drawn to mites and scale, but every so often, these irritating pests find their way onto the steams and leaves of our favourite Alocasia, and there’s only a handful of ways to deal with it.
Spider Mites
Spider mites spin webs, just like any other arachnid, but rather than growing them to catch prey they spin them to protect their eggs. If you ever see small clusters of silk patches on the underside of leaves, it is likely the work of spider mites.
When the problem gets worse you’ll notice strands of silk between the points of each leaf – or for serrated alocasia, strings between the serrations on the leaf.
Early signs of spider mites, particularly in summer, are dry leaves despite wet soil. Spider mites don't feed on living prey, instead they suck out the chlorophyll from the cells in the leaves, usually of dryer plants, leading them to appear dry, and starved of water.
So even if soil is well watered, the plant isn’t getting enough water to keep up with the unquenchable thirst of the spider mites.
Neem oil is an effective treatment of spider mites. They thrive in dry conditions, so can be exacerbated by under watering, or over-drained soil, and are likely on indoor alocasia due to our predisposition towards keeping them dry and in part shade.
Neem oil, either diluted and sprayed, or applied directly to spider mites will kill them instantly, and also help resolve any unnoticed fungal issues that they might have caused.
Mealy bug
Spotting mealy bugs on your alocasia is fairly simple, they’re really distinctive white pests that gather in clumps, looking almost like an occlusion to the stem just below a leaf.
They can gather on leaves and are often mistaken for spider mite egg clusters, but their groupings are usually fluffy rather than silky.
While regular treatments of mealy bug include insecticide or alcohol treatment, I’ve found that most houseplants will always have recurring problems when they have had one infestation.
The easiest way to eradicate the problem is to use a hand held hoover and literally suck the mealy bugs off your plants.
I know it sounds extreme, but a basic car hoover will do the trick and as long as you’re careful and have a steady hand will not only take them off stems and leaves, but remove most of the problem from the soil too.
Obviously, you’ll need to re-mulch afterwards.
Root Rot
Root Rot is usually a sign of overwatering or, sadly, that alocasia has been poorly cared for by the garden centre you purchased it from, and sold with existing infections that have yet to appear.
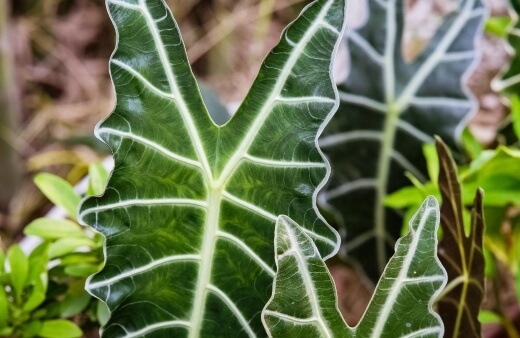
Early signs of root rot in alocasia are browning leaf edges that taper into yellow into the centre of the leaf. The brown can be mistaken for scorch, but when paired with yellowing leaves (on any alocasia variety) it’s a sign of a plant that has been sitting in saturated soil.
The yellow is a sign of saturation, while the brown is a sign of the root’s inability to take up nutrients.
With any case of root rot, it’s important to remove the affected roots before fungus spreads. Thankfully, alocasia has tough roots so don’t mind root pruning when it's needed.
Their roots are surprisingly slow growing for rhizomes, so don’t get carried away and only take off what is showing signs already. By taking too much root away, you’ll likely slow down the top growth.
Also, unless it’s a really serious case that requires immediate attention, don’t prune alocasia roots in winter. They should be pruned in spring or summer, so they have a chance to regenerate during the growing season.
If you notice early signs of root rot in autumn or winter, stop watering, and move the plant to a sunnier position for a few weeks. The heat can kill the fungus, but won’t remove the problem.
This won’t resolve it, but it will buy you time until spring when you can tackle the infection more effectively.
Sun Scorch and Leaf Burn
If your alocasia is turning brown, there are two most common causes – sun scorch and over feeding. Both lead to a burnt appearance, either like the plant has been literally frazzled by the heat of the sun, or like the roots are taking up too many nutrients.
And just as we would get heart burn, leading to irritated and over stimulated leaves that brown in much the same way as sun scorch. In both cases, re-thinking your care is required, and both are easy to treat.
Leaf burn on alocasia is unlikely to recover in the growing season, so it's best to just leave it in place and move the plant to a new location where it is in less direct sunlight.
The affected leaves will fall in late autumn and be replaced by new growth in spring. If the brown tips are particularly offensive, and only appear on one or two leaves, there’s no harm in trimming them off.
However, it’s not necessary as the damage isn’t infectious, and won’t spread to other parts of the plant.
Alocasia Frequently Asked Questions
How do you make alocasia grow big?
Each species has its own limitations, but high Nitrogen and Potassium fertilisers added via a slow release granular fertiliser, mixed with some used coffee grounds will help increase foliage health, and size.
Also, using Red/Blue grow lights promotes leaf production, so might be worth investing in.
How do you water African mask plant?
Alocasia needs regular water, but should never be watered if the soil is at all damp top touch on its surface. If you grow alocasia outdoors in Australia, then ensuring it has enough drainage in the planting hole when planting out is essential.
Does alocasia need sun?
Yes, alocasia are sub-tropical plants, and despite being forest floor plants, require bright but indirect light to thrive. They are delicate plants though, so never put them in direct afternoon sun, as they will almost certainly suffer from sunburn.
Can you grow alocasia from cutting?
Leaf cuttings and stem cuttings won’t work with alocasia. They can be divided from its root ball by separating young plants from the base of their parent, either by cutting a small section of rhizome and root, or by gently pulling a section with its own root system.
Why is alocasia so hard to keep alive?
Full sun can damage leaves, causing burns and leaf spots, while excess moisture, or cool temperatures can cause root rot and stem rot to take hold quite rapidly. Their ideal growing conditions are light moisture too. All of those factors can make alocasias quite hard to keep alive, but not impossible.
What is the lifespan of an alocasia plant?
Alocasia has a natural lifespan of about 5 years, but can last for decades if properly cared for. Their short life span is likely down to the challenges many growers have with maintaining adequate soil moisture.
Should I cut off dying Alocasia leaves?
You should cut off dying alocasia leaves as soon as you spot them because they rarely recover. Not only will this quickly neaten up the appearance of the plant but it will stop the spread of potential disease, reduce stress on the plant, and can encourage new growth.
Do alocasias do well in bathrooms?
Alocasias do well in bathrooms, provide there is some ventilation. Humidity should be around 60-70%, so above average but not a sauna.
Do alocasias do well in kitchens?
Alocasias, like nearly every plant on the planet, should not be grown in a kitchen. Greasy humidity is present, regardless of extractors or ventilation, which makes the spread of fungal problems, particularly mildews, much more likely.
How do you keep an Alocasia alive in winter indoors?
Keeping an alocasia alive in winter indoors can be tricky as sunlight levels drop, temperature stays reasonably constant, but moisture levels rise. They are unnatural conditions for these tropical plants, so reduce watering, allow them to dry out a little, and if you can, increase light levels slightly.
Wrapping Up Our Alocasia Growing Guide
Growing Alocasia is a challenge, but it’s not a high maintenance one. They require the right care, but not a lot of it. When their soil is starting to dry out, they need watering, and they are quite picky about humidity levels, and how the form that moisture takes.
Alocasia might be fussy plants, but once you know how to care for alocasia, they become like part of the family, as any house plant does, and grown indoors, or outdoors, are undeniably as beautiful as they are varied
Published on October 29, 2023 by Maisie Blevins
Last Updated on February 25, 2024

