Australians love a good lawn, but overtime they can become worn out and tired. One of the easiest and quickest ways to fix this is by hitting the reset button and re-turfing a lawn. This might sound drastic and expensive, but it can actually be one of the cheapest solutions to a turf nightmare.
By following this step by step guide on how to lay turf, you can save yourself even more money by doing the job yourself. But don’t get caught cutting corners, or you’ll just be back where you started in no time.
More...
Steps on How to Lay Turf in Your Backyard

Step 1 - Soil Preparation for Laying the Turf
The two most common causes for deteriorating turf that I see are soil compaction and weeds. Compaction of the soils means that the tiny spaces between the soil particles are reduced or removed, which limits the space for air, water, plant roots and microorganisms to move around, and invasive weed species can out-compete your grass for nutrients, light and water.
That means, that before we lay any new turf, we need to sort these two issues out. If weeds are your problem, go through and spray the entire area with a general glyphosate herbicide. (I now don't recommend a glyphosate herbicide - Check out our review of the best weed killers for more info.)
This will kill most common weed species like dandelion, clover and bindii, and has the double effect of stopping the existing grass growing up through your new turf, which is especially good if you’re laying a different species. If chemicals aren't your thing, you can just go manually dig out the patches.
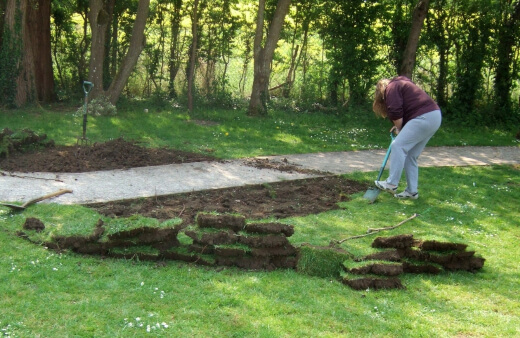
For compaction, you’ll need to cultivate your soil. Depending on the area you’re turfing, this can be done by hand with a maddock or shovel, or by using a hand pushed rotary hoe. You can hire one of these machines for pretty cheap, and can usually knock over a normal sized backyard in half a day.
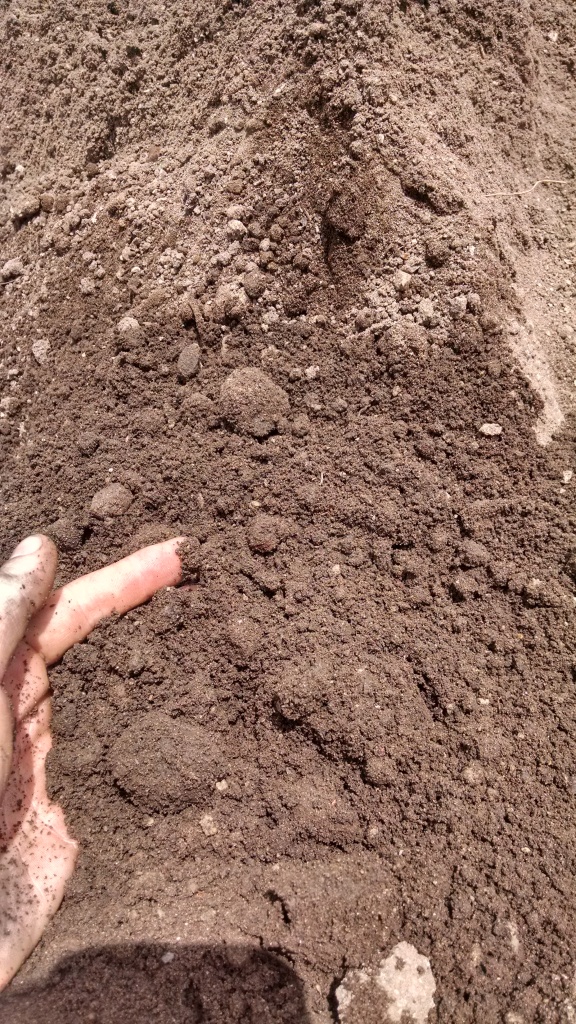
You want to aim for around 500mm (50cm) deep turning and breaking large clumps as you go so you're left with something that looks like the soil in the picture.
You’ll need to go through after with a rake and find any large chunks of grass left over on the upper layer, but if you’ve sprayed it, don’t worry too much about getting all of them.
If you can’t get deep enough, it might be worth picking up some good organic turf underlay with a 80/20 ratio of sand to soil and some good quality turf starter fertiliser to mix through and get it to a good depth.

Once your depth is right and you've broken the larger chunks up, it's time to level. Using a lawn leveler, or if you don’t have one, the back of a lawn rake, drag any lumps and bumps out as flat as your can. This will mean when you lay your turf, there’s no nasty bumps or holes to trip over.
When you think you've got it as level as you can, flip your garden rake the right way up, and lightly drag some nice straight lines in the soil. This will give a rough surface for the turf roots to grab onto.
Step 2 - Laying your turf
There’s a huge array of turf species that you could pick for your garden, some are very cheap, some are more expensive. It will pay to do your research on what grass types in Australia suits you best. Think about foot traffic, sunlight, and climate conditions before you select your species.
When you've got your turf species picked, measure up your area, and order it in. It will be delivered in rolls on a pallet, and you need to get it off there and laid as quickly as possible to stop it drying out, so make sure you’re ready to go when it comes.
Some suppliers may offer ‘supply and lay’ services, but be careful of this, as sometimes they cut the rolls thinner so it’s easier and quicker for them to lay. Thinner rolls means less soil and root, and less chance of the turf taking.


Get Your Free Guide:
Master Growing Australian Natives eBook
A Must Have Complete Guide for Every Australian Garden
Get Your Free Guide:
Master Growing Australian Natives eBook
A Must Have Complete Guide for Every Australian Garden
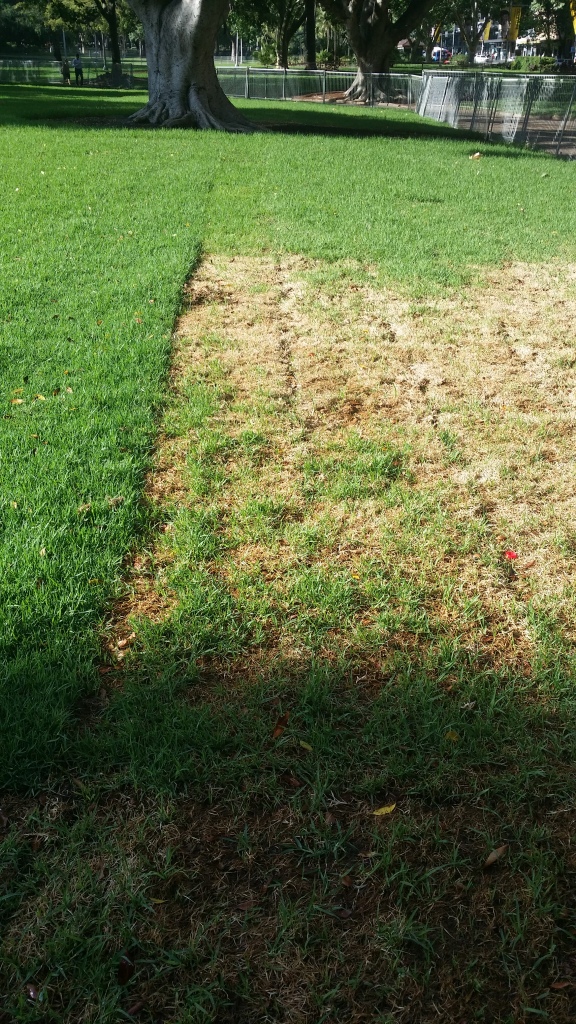
If you do get some of these thinner rolls, you’ll notice the difference straight away and will need to up the watering on them to stop uneven drying out like in this picture.
When laying the turf, grab the roll and lay it at the point you want to start and roll it out in the direction you want to work. The edges of a lawn are the first to dry out, so it’s a good idea to lay the outsides first with a row of rolls, as larger continuous bits are less likely to dry out.
After the edges, simply fill in the gaps with the rest.

I like to stagger my roles when I lay them, so that the end of each role is half a rolls distance from the other, much like bricks in a wall. It means that if the ends do happen to dry out, its less uniform and doesn’t look as bad.
Folding the end and sides of each roll together and pressing firmly down knits the roots together, and will encourage quicker establishment.
When you’re done, there’s always a few gaps left, but don’t worry too much.
You can fill these with any offcuts or spare bits left over, or simply back fill it with some soil or sand.

After laying, you should have a nice, even, flat and continuous lawn. Now get some water on it and water your new lawn in.
Step 3 - Turf Maintenance
Watering your turf immediately after laying is a must. This will help settle any lumps and air pockets, as well as keep the turf alive. In the warmer months, you should be trying to get water on your turf every day in the first week or so.
Remember, this has no real root system yet, so whilst the soil underneath may feel wet, the turf on top can still dry out. As the roots begin to set, you can reduce the watering to every second day, but make them a deeper, longer soak, to encourage the roots to grow deeper.
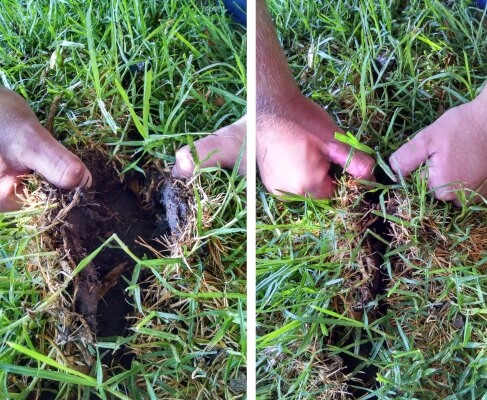
Pick up a roll and try to lift it, if it comes easily, it has not set roots. Whilst not absolutely necessary, you can also roll your new turf with a turf roller. This will press down the turf and force better contact with the soil, and help knit the roles together.
Fill the roller with water to add the weight, and do some nice long slow laps along your turfing grass, the same way you would with a push mower.
Step 4 - When to Mow New Turf
After about 3-4 weeks your turf should be set and ready for its first mow. Be careful with this, and take it easy. Using the highest setting, go slowly over your new lawn and take the tips off most of the leaves. Be very careful not to cut it too low and scalp it.
Mowing will help promote some more lateral runner and root growth. After its first cut, you’ll be able to cut it as you need to as normal and begin to ease into using it, but hold off on the backyard cricket for a tad longer. After around 5-6 weeks, you’re all done.
Check out our guide on planning to lay turf in Winter and learn why Australian gardeners choose Sir Walter Buffalo Turf here.
Now You Know How to Lay Turf
All the work in preparing your soil, turf laying and looking after it correctly means your DIY turf should be all ready for you to enjoy. That is everything you need to know on how to lay turf in your backyard.
Published on June 18, 2021 by Clinton Anderson
Last Updated on October 5, 2023


I'm writing from South Texas: we recently returfed our back yard which slopes down towards a creek. Shortly after that we had over a week of solid heavy rain. One area has become a quagmire – we have 3 border collies, but the ground looks like a herd of cattle has trampled over it. We have rigged up a temporary fence to divert the dogs away from that part. Is it likely that it will recover if we keep the dogs off it?
Hi,
Thank you so much for your question, it’s lovely to see that we reached you all the way in South Texas!
The answer to your question really depends on how badly the ground has been torn up and how well-established the grass was before it got soaked. In most cases, grass should recover – although it may take a while to do so and be a bit patchy.
Most species of grass love water but don’t like sitting in water for too long, so if it’s not well-drained it can lead to root rot and cause the grass to die off.
You can also supplement this by overseeding the area. All you need to do is get some grass seed and dig it into the soil lightly where it looks like the grass may be struggling, and this will help boost growth and help the turf thicken up nicely. Try to keep the area protected as best you can and see if it naturally bounces back after a few weeks.
When new grass growth appears, give it a boost with a little organic fertiliser, being careful not to allow fertiliser to drain into the creek, as this can upset the creek ecosystem. This will strengthen the root systems and help the grass grow into areas where it died off.
We hope that helps!
Kind regards,
The Aussie Green Thumb Team