I have a favourite nursery that we visited just recently and the reason that I like them so much is because they carry many of the plants that big nurseries don’t. Walking through Bunnings and Waldecks you get a sense of Blah! as you see rows and rows of the same thing. Then as you travel past home gardens you notice that this is all they have as well.
More...
Guide to Root Bound Plants
Why are there Root Bound Plants in Nurseries?
Unfortunately, the type of nurseries that usually carry a vast array of plants are predominantly husband and wife teams who are trying to compete with these big companies and suffer from a lack of manpower (or womanpower). Many of the plants you find at these nurseries are often neglected, unappealing and more seriously – root bound.
While this turns away many consumers and eventually puts these nurseries out of business, I make it my personal campaign to shop at them. I know that whatever I buy can usually be revived and will eventually do well.
Alas, many gardeners want instant and will pay for plants that will grow and flower as soon as they put them in the ground. So, if you join my personal campaign for keeping these nurseries open you will need to know how to plant root bound plants, because I can assure you that most plants you buy from them will be.

Transplanting Root Bound Plants
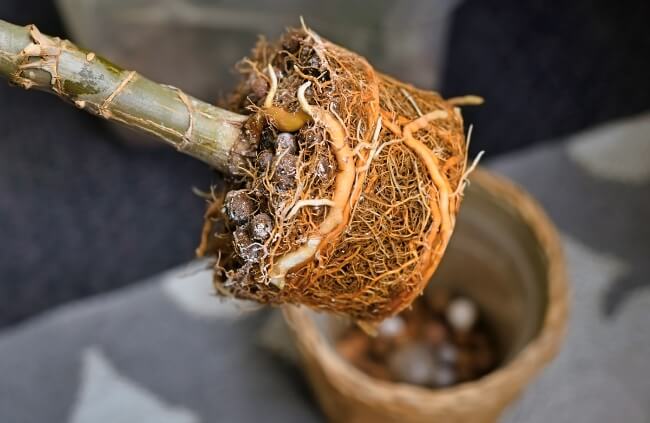
Take the plant out of the pot or bag. An early indication that the plant is root bound is roots that are growing out of the bottom of the pot and even securing themselves to the ground they stand on. The potting mix will usually be fairly dry as they immediately take up any water they’re given.
Tease the bottom roots so they become loose from the potting mix. This won’t damage the plant so long as you have prepared the soil well.
Pull some of the roots away from the side. If the potting mix is dry you want to be fairly gentle doing this as it could easily disrupt the soil and it may then all fall away leaving the roots exposed.
Prepare the soil. Ensure that a good 20-30 cm (1 ft) of soil below the root ball is broken up and fertilised well. Don’t use chicken manure or let the roots come into immediate direct contact with the fertiliser or they will burn and it will kill your plant.
Water in well and continue that you do this over the next week or two checking for any signs of distress and responding accordingly.
Published on June 7, 2023 by Nathan Schwartz
Last Updated on September 20, 2023


