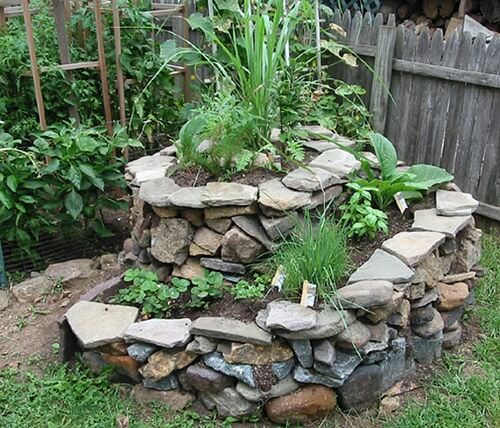
For gardeners living with limited space, a herb spiral may be a good method to incorporate some of your favourite herbs into the garden. It winds its way from the base into the centre perched more than a metre above ground level giving enough room to nearly all your herbs.
More...
What is a Herb Spiral and its Benefits?
The herb spiral, similar to a keyhole garden, is a gardening method that uses your outdoor space to its full potential. Gravity allows the water to seep through the levels meaning that the plants at the top get full drainage while the ones at the bottom may reside in a simple bog.
It also gives your herbs shady spots with varying degrees. The herbs that need full-sun can be grown in those positions while more shade loving plants can be located on the opposite side.
Another benefit of a herb spiral is the ease in which one can access the plants whether it be to pick or to plant and maintain them. The spiral doesn’t take too much space and its varying heights means that you’re not always bending over – much better for the knees and back.

How to Build a Herb Spiral
Obviously, the first requirement is to choose the materials you plan to build with. I have seen these made from staggered PVC piping (100 mm diameter), clay tubing and rocks and stones.
Next, drive a stake into the centre of where you plan to construct your herb spiral. Tie a piece of string (1 m wide) to the centre and using a loose stake tied at the other end, mark out a circle. This will give you your base measurements and a place to start.
If you’re using the pipe or tubing you won’t need to measure a circle this wide. Using your chosen materials start forming a base by adding a perimeter of material and filling it with good draining soil. Continue until this base is about 30-40 cm high.
Then, take the spiral from one of the sides and begin to work your way in, and up, to the centre adding materials to create a barrier and filling it with soil. Once finished it should stand about 1 m high and have come to a small central planting area.
Water well and leave for a few days to settle in before planting. When the spiral seems like it won’t move any further and the soil has compacted a little, it is time to begin planting.
Published on June 5, 2023 by AGT
Last Updated on December 20, 2023


