Transplanting Plants – How to do it Correctly.
A while ago I wrote an article about how I transplanted a Grevillea Caloundra Gem and despite doing nearly everything wrong, still got a successful outcome. Today though I thought it might be much better to write about transplanting plants the correct way.
Now before I start I need to say that plants such as Australian native plants and Proteas are in some circles considered to be difficult to transplant. All I have to say is this, if anyone tries to tell you this they are wrong.
I’ve always been of the opinion that anything is possible. You just have to find the right way to go about it.
More...
How To Transplant Plants Correctly
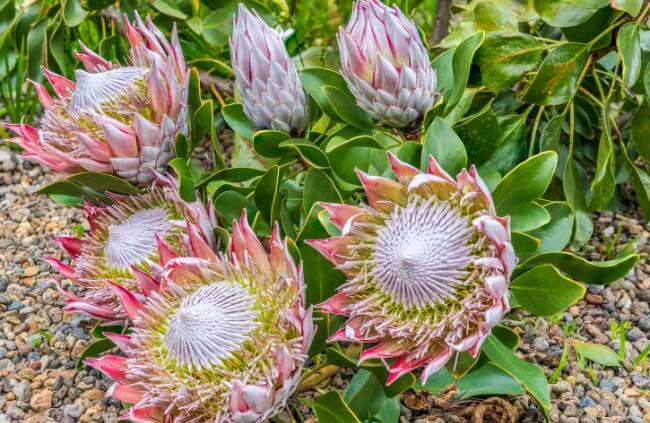
Transplanting a King Protea
Anyway today's subject is Protea cynaroides, aka the King Protea. Now this particular plant here has an interesting history. It was one of two plants propagated by my mother from two cuttings taken from a King Protea in another garden in 2001. It was my first introduction to my mothers method of propagating plants.
I’d tried all sorts of elaborate methods to propagate Proteas beforehand with hardly any success at all. From two cuttings, using this method, two plants were produced. Both are still alive today, eight years later and one in the subject of this article today.
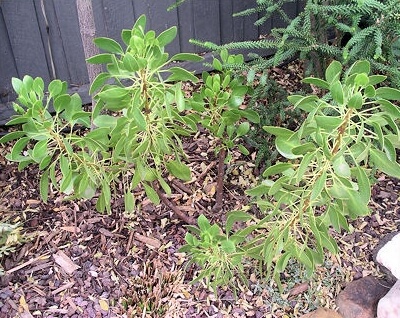
My mother has about 6 King Proteas growing in her garden. This one wasn't in an ideal position as its growth rate over about 7 years suggests.
So to get back on track, here’s what you need to do. Water the plant late in the day before you transplant it, with Seasol and water so it is well hydrated. Now I must confess I didn’t in this instance as it was a bit of a spur of the moment decision but the weather was cool as it was the middle of winter. So, it is best to select a day that is cool and if possible a time of the year when the plant is dormant.
Next is to select your pot/container beforehand and place some potting mix in the bottom so it’s ready for the plant before you even start to dig. Also have a bucket or watering can ready with a Seasol and water solution.
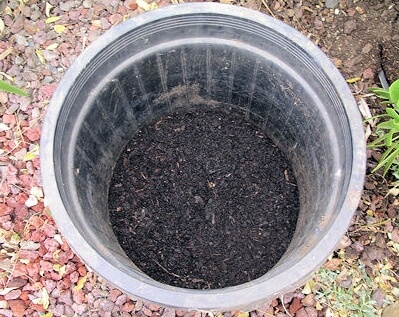
This pot is selected to suit the size of the anticipated root ball. I'm hoping for a root ball around 30 cm so I've selected a 38 cm pot. It's best to select a pot size just larger than the root ball.
Another important point is to make sure that you have a sharp spade to do the digging as you are going to have to cut through some roots. If it’s not sharp then get a file and sharpen it otherwise you may have some trouble cutting through those roots.
The other thing to consider here is the size of the root ball. The more the better, but at the end of the day you are going to have to lift it into the pot so if it is too large some of the roots may break away.
In this case I’ve tried to keep it to about 30 cm/12 inches in diameter. Before you start to dig just scrape the mulch away from the base of the plant and then just dig a circle around the plant with your spade, cutting through the roots as you go.
Once you’ve done this you then have to level the spade into a position so as to then cut the roots underneath the plant. The King Protea didn’t have a tap root but if your plant has got one a sharp spade will really come in handy.
Once you’ve cut through all the roots it’s then into the pot. I used the spade to lift it. It’s then just a matter of filling around it with a potting mix. Make sure you fill in all the gaps with the potting mix. I used a narrow stick to just push it all in.
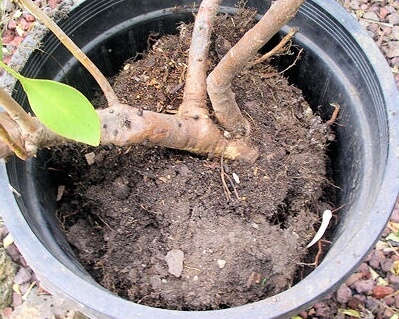
You can see the size of the root ball. You can also see how dry the soil was. It is best to water your plant the day before.
After you’ve done this it’s just a matter of watering it in with the Seasol and water solution and this is the important bit. I really saturate the root ball in the new potting mix so that you make sure that the potting mix fills all the gaps and also to ensure all the severed roots come in contact with the Seasol.
I normally use about 30 litres/7 gallons/3 watering cans of the solution and place the pot in the garden so the excess drains into the garden for the other plants. In this case I placed it in the old hole as there were other plants in close vicinity just in case I cut through some of their roots as well.
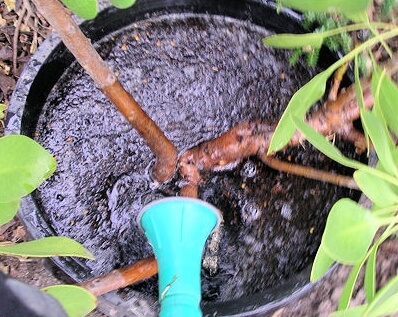
Water generously with a Seasol and water solution.
Over the next few days it’s important to keep the plant in a cool, shady area. Also make sure you keep it moist. I normally keep giving it the Seasol solution for another week and then just back off the watering, as it needs it.
I’ve decided I’m going to grow this King Protea in a larger pot permanently because of the phosphorus toxicity in my soil. I’ll probably re-pot it into a more attractive pot once the roots recover. Probably next Autumn, in about 8 or 9 months. It’s also probably due to some low phosphorus Native plant fertiliser and I think that I will also start to introduce some Multicrop Plant Starter to help encourage some root growth.
Also at this stage I’m really hoping that it will flower this time next year, but we’ll wait and see about that.
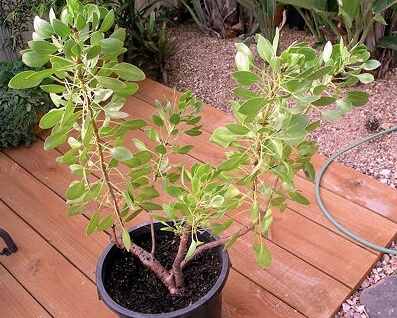
My King Protea has now been recovering quite happily over the last 5 weeks in its new container.
Other things to consider when transplanting plants is that the more preparation you do beforehand the better your chances of success.
If I was transplanting a larger more established plant such as the Grevillea Caloundra Gem here is what I would do.
1. Cut a circle around the root ball with your spade, the size that you’ve decided on for your pot. Only do it so that you miss every second cut. Then water it well with a Seasol and water solution.
2. Then leave it for a month or so to recover and then cut the other areas around the roots that you missed the first time. Water it again with the Seasol and water solution.
3. Then a week before you are going to transplant it, prune the plant back as hard as you can and then paint the cuts with a liquid adhesive to seal the wounds. The pruning will make it easier to lift the plant when lifting it out of the ground. This may or may not be necessary, just use your judgement here.
Another reason you might want to prune your plant is if you are going to Bonsai. In this case how much you prune it will depend on the type of plant. It may be best though to give it an intermediate prune at this time and then again after you have completed your Bonsai.
4. Instead of just placing it in its new hole in the ground. Plant it into a pot so that you keep it in the shade so that it doesn’t dehydrate and can lessen the chance and symptoms of transplant shock.
5. Another important point I would like to make is to consider your soil. By this means heavy soils will bind together better than sandy soils. This is important when you lift the root ball out of the hole so it will stay in one piece and not have bits break away.
If you have sandy or crumbly soil though you may have a problem. You really need to avoid breaking the root ball away when lifting and here’s how to do it. Just before the plant comes into its growing season, sever the roots all around the plant as mentioned above and then water frequently with a Seasol and MultiCrop Plant Starter solution diluted in water.
This will encourage a denser root growth within the circle you’ve severed with your spade. These roots will hopefully bind the soil together for when you lift it out of the hole. The other thing to test is if your soil binds together better when wet or dry. Test it. Remember a wet root ball will be heavier with a chance the extra weight may cause it to crumble even more. It’s just up to you to use your judgement here.
6. Finally the last point I would like to make probably goes without saying. The larger the plant you are trying to transplant the more difficult it will be. It will require more preparation and maybe even lifting equipment. So don’t bite off more than you can chew.
Some of these steps may seem like a bit of an overkill but it depends on how conservative you are or how desperate you are for the transplant to be a success. This is especially true if your plant is a favourite. If you want to experiment, find a plant that is expandable and use it to hone your skills. After all, if you've got a plant in your garden you don’t like, don’t put up with it. Dig it up, put it in a pot and give it away.
Wrapping Up How To Transplant Plants Correctly
So there you have it. This is how I transplanted my King Protea. I’ll be writing another article about King Protea soon. How to grow it and how to prune it into a nice shape. The King Proteas in my mothers garden are just coming into flower now. She’s got pink ones, a red one and a white one.
I’ve transplanted lots of plants over the years for a variety of reasons. There are lots of ways of doing it. The one thing that I would always recommend would be to use a high quality seaweed solution and make sure you don’t under use it. I use Seasol when transplanting plants but whichever one you use is up to you.
Here’s to your success!
Published on June 14, 2023 by Nathan Schwartz
Last Updated on January 23, 2024


