So you want A better garden? This article will be focusing on helping you step forward to meet your gardening goals. I realise though that for many people the task of improving your garden seems monumental.
Don't fret! One of the keys things I'll be helping you do this month is break the task down into manageable, bite sized pieces with my series '30 Days to Grow a Better Garden'.
More...
How to Grow a Better Garden
I'll be releasing 5 days worth of tasks at a time simply because a few of them will require you to be prepared for the days task. However as much as possible I have kept these tasks to 10 minutes per day.
Connect with Aussie Green Thumb? on Facebook or follow AusGreenThumb on Twitter to make sure you don't miss any tips! So, without further ado, here is how to grow a good garden
The reason I set this 30 day garden challenge
Over the years I have been surprised by how many people just don’t know how many garden beds they have and what they have growing in them (or if anything is growing in them).
Now of course, many of you may not actually know what your plants are and that is fine. Simply knowing where you have plants is helpful!
The main reason for this stocktake is it will help you work out what you need to do first. For me I was surprised to note just how much the weeds in my front garden stood out.
Though they are relatively small in number, they actually really stand out. This is not necessarily a good look for a gardener?
When you have it clear in your mind what is actually going on it can help you feel less daunted. Ok, so if your garden is weed infested you may in fact feel more daunted, but you also better know your garden now.
This will help you as the next few steps unfold. This will help you towards growing a better garden.
Days 1 to 5 – Understanding Garden Design
Day 1 to grow a better garden:
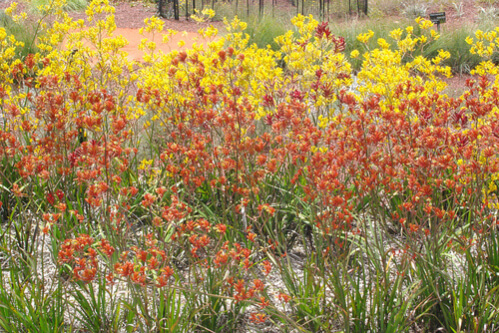
How many different garden beds do you actually have? Do they all have plants in them or are some empty? Do you have any garden beds which have too many plants in with some plants overgrowing the garden bed?
Take 10 minutes to take stock of your actual garden layout. This will help you prioritise which garden beds will need attention first.
Day 1 Report
This morning before I came into the office I took a piece of paper and a pen and went outside to document how many garden beds I have and roughly what I have growing in each.
Though I had 10 minutes allotted for today’s challenge, it took me at most 5 because I live in a rental with a relatively small garden. If you have a bigger house, you’ll likely have needed the full 10.
Here is the current state of my garden;
Front of house
Garden Bed 1 – Callistemon(Bottlebrush) and 2 Leptospermum. Mild weeds.
Garden Bed 2 – 2 Lemongrass plants, Rhubarb. Mild weeds.
Garden Bed 3 – Empty. Medium weeds.
Back of house
Vegetable Bed 1 – Celery. No weeds.
Vegetable Bed 2 – Snow peas, carrot seedlings. No weeds.
Vegetable Bed 3 – Climbing beans, broccoli. No weeds.
Vegetable Bed 4 – Dwarf beans, cauliflower. No weeds.
Herb Garden – Mostly empty. Some old parsley. One lemon grass plant. Rosemary. Heavy weeds.
Day 2 to grow a better garden:

Take 5 minutes in the morning and 5 minutes in the afternoon and note what garden beds receive sun and when. What gets morning shade? What gets afternoon shade?
This will influence what plants you should choose to plant in each garden bed. Some plants need a lot of sun, but prefer the less harsh morning sun. Others thrive with the strong afternoon sun.
Day 2 Report
For this challenge I cheated a little so that I could report to you today. I actually also did this challenge yesterday! I went out early morning and then late afternoon.
For the morning I had to actually do a little work to understand where the sun would be because I was out a little early, however I was able to see where the sun was and work out where it would rise to, giving me an indication of what would get sun and when.
Front of House
Garden Bed 1 – Shaded for most of the morning due to my house blocking out the sun until it is high up in the sky. Receives afternoon sun but is still shaded almost as early as my other garden beds, again due to its position near my house.
Garden Bed 2 & 3 (side by side) – Early morning shade, mostly due to it being against an north/south fence on the east side of my house. This means the fence blocks the east rising sun. Receives full afternoon sun.
Vegetable Gardens 1-4 – Early morning and late afternoon shade due to their position between my house and back fence. Receive between 6 hours(winter) and 8 hours (winter) sunlight. Perfect for vegetable gardens! Vegetable garden 4 receives a little more afternoon shade due to the palm tree next to it.
Herb Garden – My herb garden is situated on the other side of the aforementioned palm tree and receives a lot more shade because of this. Many herbs actually like a bit more shade so this works.
My herb garden probably gets 4 hours sun in Winter and 6 hours in Summer, mostly dapled sun. Not all herbs will thrive in this and my rosemary probably needs to be moved but I had a bumper crop of chives, parsley, lemongrass and mint last summer.
I also have an indoor herb garden, this is how I grew that.
Day 3 to grow a better garden:

While you are out and about today, keep an eye on any gardens you see.
- What do you like about them?
- What don’t you like about them?
- Is there 1 idea you could try and implement in your garden?
Growing a great garden yourself means learning from and being inspired by the gardens you see out and about.
Day 3 Report
I was driving around this morning, heading into the office. The sun was shining, the birds were singing. Spring was well and truly in the air! Though I do partially notice gardens while I am driving around I do try and keep my focus on the road.
Today however, spotting an idea that I could implement in my garden and keeping my eyes on the road, focusing on my driving were actually the same thing.
You see, some of the most inspiring idea’s I have seen for gardening (and, to be honest, some of the least inspiring) are found in the way councils choose to decorate round about’s.
Most councils choose to actually make use of the space in the middle and beatify them, rather than leave them as boring concrete. I like this. I was driving towards a particular round about today and I saw it had a big tree in the middle.
Around the big tree were a heap of ‘Bird of Paradise’ plants(pictured) which had grown quite large and filled the space in the middle. Then around the outside was a hedge. I didn’t have time to stop and take a photo sadly but you get the idea.
It gave me an idea for my front garden. In my front garden I have a Bottlebrush and 2 medium sized Australian native plants. However there is still lots of room for more plants and as this garden bed is right near the front door, it might be good to make it a little special.
Though this particular bottle brush will never be a large tree, it will likely grow to around 1.5 to 2m. I could plant a couple more medium sized natives around it, perhaps with a couple of Kangaroo paws on the front aspect, and then make a border around the front of really low growing shrubs.
Day 4 to grow a better garden:
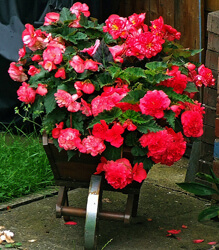
Have a look around your house for materials you might use to spice up your garden design. Old pavers, bricks, pieces of equipment (like wheelbarrows), baskets etc.
Perhaps you have some excess natural rock that would look good somewhere in your garden? Garden design is all about inspiration and finding different things that you can either feature or that will help your plants stand out.
Day 4 Report
I was actually worried about this challenge, I wondered if I would actually find anything and, if I did, how I could make it work! I live in a rental property which actually has a very small amount of garden.
I had to add garden beds so I could actually have a sufficient vegetable garden. As such, I wasn’t sure whether I myself had bit of more than I could chew with this challenge.
What this challenge has proved to me is than anyone can have better gardens. As I was looking around I stumbled across an old wheelbarrow that I forgot I had. When I moved in it had been left by the previous owners. At that stage it was in a pretty bad state but I still managed to get another 6 months of use out of it.
Then, one hot summers day this year as I was moving mulch, the tyre blew up. Though it would be possible to replace the tyre it would be very difficult and I have a sneaking suspicion that size tyre is no longer in production. However…there is still hope for this wheelbarrow! It can give me better gardens!
With few garden beds I am always on the lookout for creative ways to add more. What better way to add a garden bed than to add a semi-portable one? As you can see in the picture supplied, you can actually turn an old wheelbarrow into a garden bed!
Perfect for either a mix of annuals during spring or for growing a small amount of vegetables, an old wheelbarrow can add character to an otherwise normal garden. I’ve even seen people place a wheelbarrow in the centre of a garden, with beautiful flowering plants both in the wheelbarrow but also littered around the base of it. I actually think this is quite effective and gives a bit of a historic or old cottage garden feel.
Day 5 to grow a better garden:
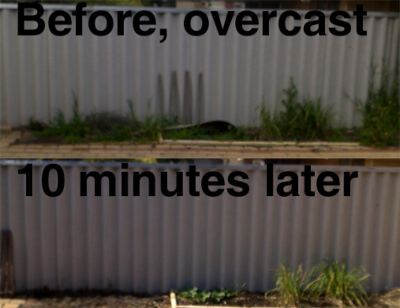
Spend 10 minutes reclaiming whichever garden bed is most weed affected. Try and focus on the area that will make the most aesthetic difference because this will encourage you to keep going in the future.
We humans are fickle creatures and often need constant motivation. If you weed for 10 minutes and nothing looks different you are less likely to do it again. If however there is a world of difference it increases the motivation factor roughly tenfold.
Day 5 Report
It was really simple for me to know which garden bed to weed today. I actually weeded what I called garden beds 2 and 3 on day 1. I consider these as two beds in my own design, even though they are connected.
They are also very close to my house and so very visible to visitors. They are also the most overgrown bed weed wise, though not even close to what I sometimes see! I knew weeding these beds would make the biggest different and would encourage me to do more weeding in the future. There is only one bed left out the front which I will likely do next time.
As you can see, I achieved quite a bit in just 10 minutes. I have been weeding for a while and so don’t mess around but even someone brand new to gardening will be surprised, I believe, with how much you can get done.
Sure, this is a relatively small garden bed in the scheme of things but what I find works well with big garden beds is to break them down into bite sized pieces. Don’t necessarily set yourself the goal of doing the whole lots, perhaps choose a small, very weedy part and do that. Seeing a gaping hole in a garden bed that is weed free brings strange motivation to do the rest!
Days 6 to 10 – Understanding Your Climate
Day 6 to grow a better garden:
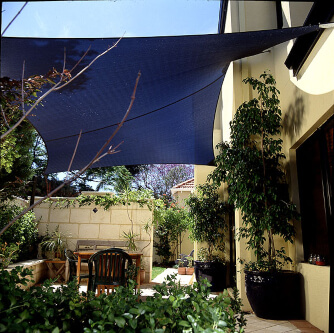
Do you live in a cold, temperate or tropical climate? Spend 10 minutes online researching about climate zones, where you live (if you don’t know the climate) and what impact that has on gardening in your zone.
Climate has a huge impact on gardening. You might choose a plant that looks great but will really struggle in your area. Knowing what you will experience climate wise will help you make a wise choice.
Day 6 Report
If you have followed this challenge you may have found yourself confused. I spent 10 minutes researching climates of Australia and came away with very different perspectives. The issue with climate is that there are so many different categorizations of it, even within Australia.
There could be anything from 4 to 7 different climate categories and what is ‘temperate’ in one way of carving up Australia is called ‘hot, dry’ in another.
The key thing when researching your climate is to find pages which have a map showing exactly what area’s they consider to be what. If you can see a map, you can see where you live and can work out what category you live in going by that system.
I live in Perth, WA. Depending on what system you use it is either a temperate climate or a hot, dry climate. The system I have always gone by is the most simple one, consisting of 3-4 categories and this would place Perth in a temperate climate.
About Temperate Climates
Hot, dry summers with very little rain.
Mild winters with varying rainfall.
Generally Autumn and Spring are fantastic growing seasons.
With experience I have learned that in summer my garden will required extra care and many area’s may require some temporary shade. If you have plants that are fine in full sun all year around except for summer, perhaps invest in building or installing some sort of temporary shade for summer, such as shade sails.
Day 7 to grow a better garden:
What season is your climate zone in? Summer, Autumn, Winter or Spring? Research what that means for your zone. Different climates have different seasons and experience different things.
For example, a temperate climate experiences a dry Dec-Feb in Australia where as a tropical climate generally experiences their wet season then in Australia! This will impact on your garden.
Day 7 Report
As I live in Perth, Western Australia September marks the beginning of Spring. Spring is a wondrous time in a temperate climate because it so often corresponds with so much new growth. Whether plants have gone completely dormant in winter or simply slowed down, as is usually the case in a temperate climate, Spring is where they kick into gear again. Around Perth right now there are many wildflower shows going on which are absolutely spectacular.
My Bottlebrush is also bursting with buds and within a week or so will be alive with the colour red. I am very excited to see how it looks this year after I gave it the first trim it has received in years after last flowering season.
Another thing spring is great for is vegetables. Vegetables such as asian greens, asparagus, avocados, beans, broccoli, cabbage, carrot, cauliflower, lettuce, mushrooms and many, many more very much enjoy spring.
The growing conditions this year(2011) have been particularly good. A few days of beautiful sunshine, then some light showers for a day or so, followed by a few more days of beautiful sunshine.
Day 8 to grow a better garden:
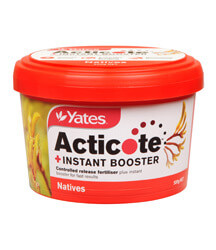
If you are towards the beginning of one of the seasons why not fertilise your garden? This task will take longer than 10 minutes if you do not have fertiliser at home so perhaps get it the day before on the way home from work.
I reviewed the best garden fertilisers available to help you get through this faster.
Buy a good slow release fertiliser and then take 10 minutes applying it, following the dose described on the container. For most garden beds an all purpose fertiliser will be fine. If you have native plants, use a native plant specific fertiliser.
Day 8 Report
Today’s challenge was rather easy and took me less than 10 minutes, mostly because I do have fewer garden beds than the average home owner. Still, it should not really take too much more than 10 minutes to complete this challenge if you are using slow release fertiliser.
The best direction is to follow the application instructions on the back. What I tend to do though is take a handful of slow release fertiliser and loosely scatter it over the garden bed, making sure it spreads evenly.
One handful would cover roughly 1 square metre, if not a little more. I used native slow release fertiliser on garden bed 1 since it has mostly native plants and an all purpose fertiliser on the rest, which mostly contain vegetables.
Day 9 to grow a better garden:
Spend 10 minutes removing any dead flowers on your plants. This is particularly important with plants that flower in the hot months of your climate. Removing spent flowers encourages them to continue to grow and perhaps even flower again sooner because plants want to produce seeds.
Removing spent flowers means they need to flower again to achieve this. It also takes a lot of energy from a plant to produce seeds, removing the spent flowers means this energy is spent on growing and flowering.
Day 9 Report
This morning I mostly focused on removing some dead flowers from my Bottle Brush. There were not too many because it is actually just about to flower but some have already blossomed and I was able to remove them, hopefully enabling me to get another showing.
Last Spring this particular Bottle Brush looked incredible in early spring and I am excited to see it in blossom again. Around early October I trimmed all the old, dead flowers off it and as I hoped, it managed to have another, slightly less abundant showing in late November.
Not quite as spectacular but still very nice and it was great to get a second showing during the flowering season.
Day 10 to grow a better garden:
Spend 10 minutes weeding your garden. Depending on the season, your garden may have lots of weeds or very few. As the seasons change take note of when weeds tend to pop up more and less.
If you know a high weed season is coming you may want to make sure you have plenty of mulch to minimise them. If you know a low season if weeds is coming, you might feel more encouraged to pull them out when you see them because you know that will really make it difficult for weeds to grow.
Be sure to check out my review on the best weed killers available in Australia.
Day 10 Report
Another 10 minutes of weeding, another garden bed weed free! This time I focused on my front garden, the one visitors see when they enter the house. It was a smaller garden bed with a small to medium amount of weeds. That meant this challenge actually only took me about 7 minutes to finish this garden bed.
Days 11 to 15 – Understanding Your Soil
Day 11 to grow a better garden:
Spend 10 minutes working out if your soil is too sandy, has too much clay or is just right. Dampen a small amount of soil and then pick up a handful. Squeeze. As you open your hand, take note of whether the soil keeps shape or not. If it falls apart you likely have a sandy soil.
If you prod it and it then falls apart you probably have good soil. If you prod it and it still sticks together you probably have more clay in your soil.
Getting to know your soil will help you understand what you need to do to improve it so that your plants will grow to their best. Also read about loam soils for more information.
Day 11 Report
Australia, in particular Western Australia, generally has sandy soil. This is not true of every place but it is the norm. This is true of my garden. In fact it is very true.
My vegetable garden beds are a little better because I bought in a heap of soil and added a fair amount of manures and fertilisers. The garden beds out the front of my house need a little work.
Garden bed 1 is improving because I have been working on it for a few months. When I added some plants a few months back I added a heap of native soil mix and also some cow manure, which is low in phosphorous, a requirement for native plants.
Garden beds 2 and 3 still require the most work. Garden bed 2 was actually under pavers until quite recently and so is pretty much just sand. Garden bed 3 has been growing stuff for a while and so has received some work. Still has room to be improved.
Day 12 to grow a better garden:

Choose a garden bed to focus on, either your most sandy or most clay filled. Buy some manure (like chicken, cow, or sheep manure). If you have your own compost this will also work. Add approximately one bag of 30L per square metre and mix it into the soil.
Manures and compost help improve both sandy and clay based soils. The organic matter within manure improves the soil structure, either helping to lock in nutrients in sandy soil or by breaking up the clay and allowing nutrients to be accessed in clay soils.
Make it easier to make compost with our compost bin product reviews and buying guide.
Day 12 Report
Manure and fertiliser (whether it be organic or inorganic) is one of the most important things to add to your soil whether you are looking to improve it or not. Plants require nutrient top ups to really thrive and manure provides this is spades.
Of course, different manures provide different levels of nutrients and so it is worth doing a little research to learn what is best for your situation.
Today I added a bag of cow manure to Garden Bed 2 in my front yard. This is the garden bed that was reclaimed from underneath some pavers recently. The reason I used cow manure is because I am actually still not sure what I want to grow there.
For now it is too close to a parking spot to decide but this will change in the coming months, making it a valid garden bed to use. As such, I’m starting to prepare for it now.
It will likely be used to grow some Australian native plants. As native plants don’t like too much phosphorous I needed to add a manure low in this.
Cow and sheep manure is lowest in nutrients in general, where as chicken and pig manure is higher. This is mostly due to the diet of these animals, sheep and cows eating mostly grass and chicken and pigs often having a more nutritious diet.
Day 13 to grow a better garden:
Make sure you spend 10 minutes watering your garden manually today. Watch the water as you go. Does it sink straight into the soil? Does it slowly sink into the soil? Does it form puddles and only very slowly sink into the soil?
If it sinks fast your soil has good water drainage. If it sinks but only slowly, you probably need to improve the drainage. If it forms puddles on the surface you have water drainage issues. Either buy a soil wetting agent and apply or use a garden fork and thoroughly poke your garden beds which need drainage improvement.
Day 13 Report
I think it is safe to say my soil needs a good dose of a wetting agent. Nearly every one of my garden beds had water linger for longer than I am comfortable with during my watering today.
You see, this is a task that even regular gardeners will often have to do. Some choose to use wetting agents, like me. Others prefer to use manual, organic methods like turning the soil over or prodding it with a fork.
If you are working in the garden often enough you may not even need to do this because you’ll be turning the soil over naturally. However, most people don’t spend ages in the garden and so this is an important step, understanding how to get the most out of watering.
I’ll be honest, I don’t mind using soil wetting agent, even though it is not necessarily organic. However if you would prefer a completely organic garden, you will need to aerate your soil using a garden fork to allow the water to seep down past the upper crust when you are watering.
Day 14 to grow a better garden:
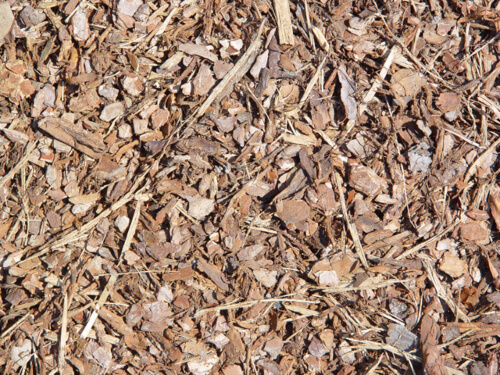
Do you have mulch on your garden beds? Take 10 minutes to see which garden beds still have a thick (10cm) layer of mulch and which need a top up. Mulch will limit weeds ability to grow and make your job easier. Top up your garden bed as required.
It is a good idea to check your garden beds at the beginning of each season, so every 3 months. Keeping a healthy layer of mulch on your soil all year around will also help to improve your soil because as the mulch breaks down, it will become part of the soil and, again, improve soil structure much like manure does.
Mulch not only helps your plants but can also be used as added aesthetics to your garden. Read our Ultimate Mulch Guide to which mulch would best fit your garden.
Day 14 Report
I have a confession to make…my garden beds are horribly low on mulch. Yes, that is right, even I have trouble making sure I keep my garden beds with a healthy layer of mulch!
One of the main topics I cover on this blog is mulching your garden and today’s challenge has made me woefully aware of just how bad a state my garden beds are in at the moment, mulch wise.
- Garden bed 1 has a moderate layer of mulch but this could do with a top up.
- Garden bed 2 has no mulch but that is because I am still working on turning it into a garden bed after reclaiming it, untill recently it was paved.
- Garden bed 3 has no mulch left.
All my vegetable garden beds have a limited layer of mulch from when I last planted. This really needs a top up. My herb garden is bare, mulch is required.
This task will become a weekend job for me most likely as there is actually some significant work to do. However, the payoff will be a far healthier and better looking garden
Day 15 to grow a better garden:
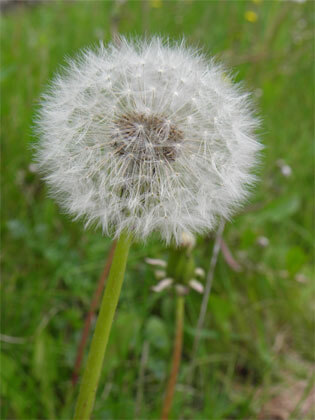
Spend 10 minutes weeding your garden. Weeds steal nutrients from your soil that your other plants could use. If you limit your weeds you will enable your wanted plants to have access to more nutrients.
I also want you to get in the habit of weeding in small doses as a more likely way for you to keep your garden weed free. 10 minutes weeding every few days will increase the likelihood of you actually continually working on the weeds.
Day 15 Report
Another weeding challenge is complete. This time I started working out the back. During this particular season my herb garden is actually empty. This is mostly because I haven’t gotten around to planting anything new.
Yes, even I have trouble fitting everything I want to do in the garden into my life! I decided to leave my herb garden fallow for this season and, of course, it has become overflowing with weeds!
Today I spent 10 minutes and removed them all, leaving the garden bed weed free and ready for some new plants at any time.
Days 16 to 20 – Buying Gardening Tools
Day 16 to grow a better garden:
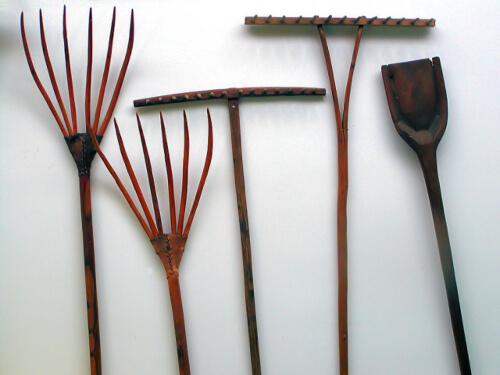
Take an inventory of your garden shed or space. What garden tools do you have? What garden tools would you like? What tasks have you found hard without garden tools? Having the right garden tools will go a long way towards helping you to grow a better garden.
Day 16 Report
It may surprise you to know that, apart from the basic garden tools I actually have very few garden tools. This is mostly because I myself am slowly building my own gardening tool kit. I want to have good quality garden tools so it is taking time to actually acquire what I want.
I will be honest with you for a minute. About 2 years ago now I had to start again from scratch for various reasons. At that time I needed all the basic garden tools to get my garden business going so I started with mostly borrowed or cheap tools.
My intention always was, and still is, to slowly replace my cheaper garden tools with better quality ones. I’ve had a bit of luck along the journey and stumbled onto some very good garden tools for free but mostly I am slowly stockpiling the quality that I want which, on the whole, will last me quite a long time.
So to actually answer the challenge, here is what I have in my garden tool repertoire:
Garden Rake
Garden Shovel (no spade, I just use the shovel)
Hedge Shears
Garden Loppers
Bypass Secateurs
Pruning Saw
Trowel, & Weeder
Electric Hedge Trimmer
Garden broom (needs a new handle)
Extendable pruning lopper (needs repair)
Garden Fork
Lawn mower
Whipper snipper
Basically, I have all what I would call ‘essential’ tools. My plan is to slowly replace the cheaper garden tools of these that I have with good quality, long lasting ones.
Then I might start to invest in a few specialty garden tools, like a chainsaw (and a chainsaw sharpener) or electric mulcher etc. For now though, what I have well and truly does the job for what I need.
Day 17 to grow a better garden:
If you have tools like secateurs, hedge trimmers or loppers check and see how sharp they are. Try and find an old or dead tree or bush limb and cut it off. You should get a smooth cut. If your tool struggles to cut cleanly you have a blunt tool. Sharp tools help limit plant diseases.
There are a few methods to sharpen tools. Some business’ offer tool sharpening as an option. Another option is to buy a tool sharpener. A third method, which is actually what I use, is to buy a good, small metal file.
You have to be a little careful with this because you can actually make the tool worse, but even then you can usually fix it. Just try and file to the angle of the blade. If you are not confident doing this, try either method 1 or 2.
Day 17 Report
As someone who uses my tools regularly on other peoples gardens you will often find me sharpening tools because I need to make sure I use the best on their garden.
I used my 10 minutes today to give my loppers, shears and secateurs a quick sharpen using the small metal file that I use. Soon however I will be moving to testing a store bought tool sharpener, I just don’t have time today to really look at how it works. I am pleased to say my three most used tools are now back up to scratch and ready to be used again!
Day 18 to grow a better garden:

Remove any more dead flowers from your plants. Make sure you use a sharp tool. Removing dead flowers will help to encourage your plants to flower again if possible.
Using a sharp tool is important though because you don’t want to open your plant up to disease. Plants heal best from good, clean cuts which come from sharp tools.
Day 18 Report
Today’s challenge was quite easy for me because there were very few dead flowers to remove. However, this is mostly because I keep on top of this. The upside is that the ones I did need to remove were removed with ease because of the sharpened tools I was able to use, due to meeting yesterdays challenge.
Day 19 to grow a better garden:
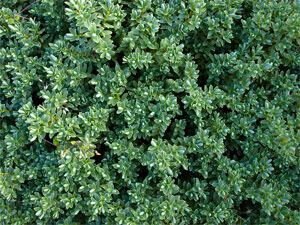
If you have a hedge or plants you are trying to turn into a hedge, use your hedge sheers to give them a light trim/shaping. If they are flowering, consider waiting until they finish.
Most hedge plants can handle regular light trims to keep them in shape. If you don’t have hedge shears, either go and buy some or start to budget towards buying them, they are a very important gardening tool. Scissors don’t cut it on the big scale!
Day 19 Report
Today’s challenge was incredibly easy for me simply because I don’t actually have any hedges. I live in a smallish unit at the very rear of a block, with another unit directly in front.
This itself creates a barrier between my unit and the road and so there is no need to use gardening space to provide privacy. However, most houses have some form of hedge or at least plants which need to be shaped. Today is your day to shine.
Day 20 to grow a better garden:
Consider buying a weeder to remove dandelions from your grass. If you have a weeder, spend 10 minutes removing as many dandelions and other weeds as you can from your grass.
This is a way of removing weeds and minimising the amount of chemicals that you have to use on your garden. Some grasses, like buffalo types, don’t handle the weed and feed poisons and that means the manual method really is your best bet.
Day 20 Report
Once again I myself have actually had an easy days challenge simply because I don’t have grass. I chose to use today’s 10 minutes to poison the weeds growing between pavers and other various places where nothing is supposed to be growing.
A lot of people pave area’s or make other changes to their property along these lines to reduce the garden space but weeds still manage to find a way to grow. I won’t lie, I am all for using poison to keep these under control.
I’m sure there are organic alternatives and I’d love to hear them if you have an idea, but for now I stick to using roundup to keep weeds growing in my paved area’s under control.
Days 21 to 25 – Common Garden Tasks
Day 21 to grow a better garden:
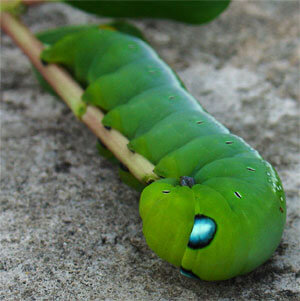
Check your plants for pests and diseases. Is there any sign of plants being eaten? Can you see anything that just does not look like it should be on a plant? If you have roses, are they covered in little black bugs?
If you are unsure what the cause of your plant problem is, take a photo and show your local nursery horticulturalist. They are usually willing to help you identify the problem and can give suggestions for solutions and they can usually sell you what you need to fix it.
Day 21 Report
The main plants that I have to keep an eye on regarding pests are my vegetables. My native plants very rarely, if ever experience any trouble with pests but I have to keep a constant vigil with my vegetables because insects like snails, slugs and caterpillars are always cropping up.
A little while back we had a real problem with caterpillars. They were getting to all my new vegetable seedlings and stripping them bare. Thankfully I know that most caterpillar varieties from my area strongly dislike the smell of marigold plants so I have been able to plant a few marigolds around the most targeted plants.
This both repels the caterpillars and makes my vegetable garden even more beautiful.
I’ve also had a few aphids around this season but I treat that with various vegetable garden powders and sprays. This is not an organic approach but is the approach I choose to use. The organic approach is to either use companion planting, like the above marigold example, or make natural sprays. A quick google search should help you find a recipe for an organic pest spray.
Day 22 to grow a better garden:
Apply some slow release fertiliser to any garden bed you have not gotten to yet. Adding slow release fertiliser is the most time effective method because it will continue to fertilise your garden beds over a period of time.
Check the back of the package of fertiliser you get for how often you need to re-apply but you can often get away with applying it once every season.
Day 22 Report
Today I added some fertiliser to each of my vegetable gardens. I didn’t add too much because I already add water soluble fertiliser every fortnight during growth, just added a small amount of slow release fertiliser to the mix. I just used a general purpose fertiliser because I had that on hand.
There are specific vegetable garden slow release fertilisers available but if you have some general purpose fertiliser lying around that will do just fine.
Day 23 to grow a better garden:
Continue to remove dead flowers from your plants. Getting in the habit of just cutting off flowers as needed will make this task a far quicker and simpler job than waiting for the whole plant to finish flowering.
Sure, at the end of flowering it is recommended that you give your plants a trim, so it could wait till then but your plant isn’t encouraged to flower again.
Day 23 Report
Even though I have been keeping on top of this task, I had a lot of dead flowers to remove today. At the moment my bottlebrush is flowering profusely and just over the past few days a lot of the flowers have started to die of. This is usual and natural during flowering season. I used the full 10 minutes and it left quite a pile of spent flowers to put in the bin.
Day 24 to grow a better garden:
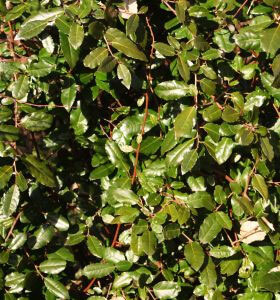
Lightly prune any plants that have finished flowering. Prune any plants that you are trying to keep to a certain shape or size. Small regular prunes cause less stress to plants than big prunes.
Some plants, like roses, like a solid prune once a year but over all, most bush or hedge like plants are better of with small, regular prunes to keep them in shape.
Day 24 Report
As I only have a small garden and use it mostly to grow vegetables I don’t have many plants which need to be trimmed. I do keep an eye on my Bottlebrush and trim off the flowers when they die, as I did yesterday, and this usually keeps my plant in shape. As such, for today’s challenge I actually did a little weeding.
Day 25 to grow a better garden:
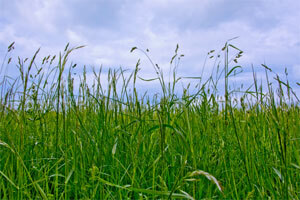
Spend 10 minutes weeding a garden bed you have not gotten to yet or one which needs it most. Perhaps spend the first couple of minutes quickly picking out any new weeds growing in the beds you already have weeded.
Hopefully, depending on the size of your garden, you are started to get the weeding under control. If you still have a long way to go to get to that point, don’t fret. Just keep doing 10-20 minutes of weeding every few days until you get it under control, then work out how often it needs to be.
Day 25 Report
By now, regardless of how big your garden is you should really have started to make a significant dent in the weeding of your garden. As I have a small place, I have pretty much been able to get completely on top of the weeds around my unit and keep the garden beds I have already weeded, weed free.
If I spend 10 mins ever few days now, I’ll be able to pick out any new weeds before they really take root and, most importantly, stop them from reaching flowering stage which should diminish (but it won’t alleviate) future weed outbreaks.
Days 26 to 30 – Choosing the Right Plants
Day 26 to grow a better garden:
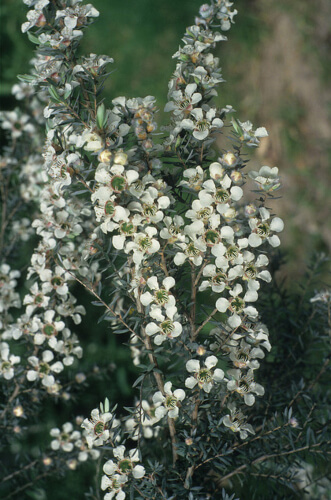
Do you know what plants you have in your garden? Take note of how many you know the name of and how many you don’t. Set yourself the goal of learning the name of every plant you have. This may not happen quickly but it is a good practise to get into, knowing what you are growing.
Day 26 Report
- Garden Bed 1 – In garden bed 1 I have a Bottlebrush and a Leptospermum. I had 2 of these but one didn’t survive the planting. I have plans to add more native plants to this garden.
- Garden Bed 2 – Empty
- Garden Bed 3 – Lemon Grass and Rhubarb
- Vegetable Garden – Broccoli, Cauliflower, Celery, Spring Onion, Carrots, Beans, Snow peas, Tomato, Strawberries
- Herbs – Parsley, Rosemary, Basil
It is pretty easy for me to know all the names of the plants in my garden because, besides the Bottlebrush, I have planted them all. This can be far harder if you inherit an established garden.
Day 27 to grow a better garden:

Are your plants annual or perennial? Take note of your garden. Annual plants last one season, perennial plants last more than 2 seasons. Annuals are great and you will want to plant some however a majority of perennial plants will be better in the long term. Use annual plants to compliment your long-term perennial plants.
Day 27 Report
Perennial Plants
- Bottlebrush
- Leptospermum lanigerum
- Rosemary
- Strawberries (they would last for 3-4 seasons however they don’t usually fruit well after 2)
Annual Plants
The rest of my vegetables. Many, if not most vegetable plants are annuals, they last one flowering/fruiting season. Most fruit trees are perennial.
Day 28 to grow a better garden:
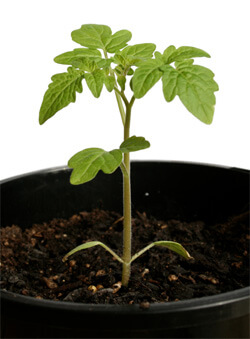
Do you want to plant from seeds or seedlings? Do some research to discover the pro’s and con’s of each. Most perennials need to be seedlings or mature plants for best results but many annuals and vegetables will grow well from seed.
Day 28 Report
I’ve personally never been a very big fan of seeds. No real reason for this other than laziness to be honest. Planting vegetables from seed is clearly the cheapest option and can provide you with plenty of plants, however I’ve always preferred to buy just the amount of seedlings I am interested in and work from there.
As far as annuals go, I also always use seedlings, again because I can just buy the amount I want. I once did plant a set of rockery style annual seeds which took over that garden bed well. Just don’t usually do it. Perennials I always plant as a small shrub or a cutting. Growing perennials from seed is often either very difficult or, with some hybrid varieties, impossible. Much easier to buy a small, mature plant and add that to my garden.
Day 29 to grow a better garden:
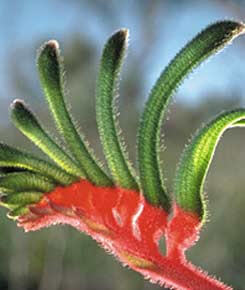
Is there a particular perennial plant you would like to add to your garden? Do some research and find out. Perhaps consider an Australian native from our Growing Australian Native Plants Ultimate Guide
Day 29 Report
I haven’t added it yet but I definitely want to extend the range of native plants in my front garden, with a particular interest in adding a couple of Kangaroo Paws. I also need to replace the Leptospermum which died, and this I need to do soon before the other one grows too far ahead!
I did add a rather mature Rosemary plant to my unused front garden bed. I like to use plants that are both attractive and provide cooking benefit. The Rosemary I planted has delightful white flowers and is also useful as a herb. A win, win!
Day 30 to grow a better garden:
Take a quick trip to your nursery and have a look at what annual plants they have in stock. Perhaps look to add one or two to your garden. Annual plants add vibrancy to your garden. There are annuals for every season, however Spring to Autumn are the best seasons for growing annual plants.
Day 30 Report
Now that I have planted a rosemary plant in my unused garden bed, I could easily complement it with a few annuals. I’m very seriously contemplating adding petunias or some snap dragons around the base of it. This would transform this unused garden bed into one of the more beautiful garden beds at my house, all for less than $20! Not a bad effort really.
Published on August 29, 2021 by AGT
Last Updated on December 27, 2023


